Author

Martha Rose Shulman

Browsing

Panna cotta is a classic Italian dessert known for its silky texture and elegant simplicity. Made with just a handful of ingredients, this creamy treat is perfect for dinner parties, holidays, or anytime you want an impressive dessert that doesn’t require baking.

This authentic Italian panna cotta recipe combines cream, milk, sugar, vanilla, and gelatin to create a smooth, delicate dessert that melts in your mouth. It’s easy enough for beginners yet sophisticated enough for special occasions.

1. Authentic Italian Panna Cotta Recipe (Yield: 6 Servings)

Ingredients

  • 2½ cups (600ml) heavy cream
  • ½ cup (120ml) whole full-fat milk
  • ½ cup (100 grams) granulated white sugar
  • 1 vanilla bean
  • 2 teaspoons unflavored powdered gelatin
  • 2 tablespoons water
  • Pinch salt

Instructions

Begin by preparing the gelatin. Pour the 2 tablespoons of water into a small bowl and sprinkle the gelatin evenly over the surface. Let it sit undisturbed for 5 to 10 minutes. This process, called blooming, allows the gelatin to absorb the water and ensures it dissolves smoothly later.

Using a sharp knife, split the vanilla bean lengthwise. Scrape out the tiny seeds inside using the back of the knife.

In a medium saucepan, combine the heavy cream, whole milk, sugar, vanilla seeds, the scraped vanilla pod, and a pinch of salt. Place the saucepan over medium-low heat.

Heat the mixture slowly, stirring occasionally until the sugar has completely dissolved. Continue heating until steam begins to rise from the surface and small bubbles form around the edges of the pan. Do not allow the mixture to boil, as boiling can affect the texture of the finished panna cotta.

Remove the saucepan from the heat. Take out the vanilla pod and discard it.

Add the bloomed gelatin to the warm cream mixture. Whisk continuously for 1 to 2 minutes until the gelatin is fully dissolved and no lumps remain.

For the smoothest texture, pour the mixture through a fine-mesh strainer into a large measuring cup or bowl.

Divide the mixture evenly among six ramekins, dessert glasses, or serving molds.

Allow the panna cotta to cool at room temperature for about 20 minutes. Once slightly cooled, cover each serving dish with plastic wrap.

Transfer the panna cotta to the refrigerator and chill for at least 4 to 6 hours. For the best texture and flavor, refrigerate overnight.

If serving from molds, briefly dip the bottom of each mold into warm water for 5 to 10 seconds. Run a thin knife around the edge if needed, then carefully invert onto serving plates.

Serve chilled on its own or garnish with fresh berries, fruit sauce, caramel sauce, or a light dusting of grated chocolate.

2. Tips for Perfect Homemade Panna Cotta

Bloom the gelatin properly before adding it to the cream mixture. Dry gelatin that isn’t fully hydrated can create small lumps and prevent the panna cotta from setting evenly.

Avoid boiling the cream mixture. High heat can weaken gelatin’s setting power and may cause the texture to become less smooth and delicate.

Whisk thoroughly after adding the gelatin. Any undissolved gelatin can create uneven spots that affect the final consistency.

Strain the mixture before pouring it into serving dishes. This simple step removes any bits of vanilla pod, gelatin particles, or milk solids, resulting in a silkier dessert.

Allow the panna cotta to chill for at least 6 hours if possible. Extra chilling time helps the dessert fully set and develop its signature creamy texture.

When unmolding, use warm water only on the outside of the mold. Excessive heat can begin melting the panna cotta and affect its appearance.

The ideal panna cotta should gently wobble when shaken. If it feels firm like gelatin dessert, too much gelatin may have been used.

3. Frequently Asked Questions

What does panna cotta mean in Italian?

Panna cotta translates to “cooked cream.” Despite the name, the cream is only gently heated rather than fully cooked.

Can I make panna cotta ahead of time?

Yes. Panna cotta is an excellent make-ahead dessert and can be prepared up to two days before serving.

Can I use vanilla extract instead of a vanilla bean?

Yes. Substitute 1 teaspoon of pure vanilla extract if a vanilla bean is unavailable. Add it after removing the cream mixture from the heat.

Why didn’t my panna cotta set properly?

Common causes include insufficient gelatin, improperly bloomed gelatin, or overheating the mixture after the gelatin was added.

Can panna cotta be frozen?

Freezing is not recommended. The texture can become grainy and watery after thawing, which affects the smooth consistency that makes panna cotta special.

4. Nutrition Information

Nutrient Amount Per Serving
Calories 340
Protein 4g
Carbohydrates 18g
Fat 29g
Saturated Fat 18g
Cholesterol 95mg
Sodium 45mg
Sugar 17g
Calcium 90mg
Potassium 110mg

Nutrition values are estimates and may vary depending on ingredient brands and portion sizes.

Homemade panna cotta is a beautiful example of how a few simple ingredients can create an elegant and memorable dessert. Its smooth texture and delicate vanilla flavor make it a favorite for both casual meals and special celebrations.

Once you learn the basic technique, panna cotta becomes one of the easiest desserts to prepare ahead of time. Serve it with fresh fruit, berry sauce, or simply on its own for a classic Italian dessert that never goes out of style.
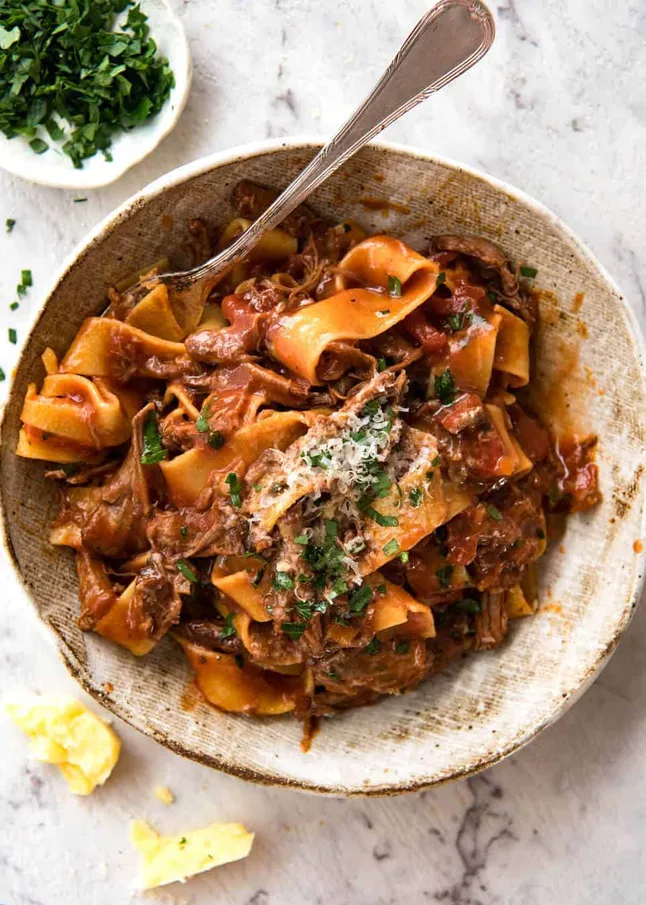
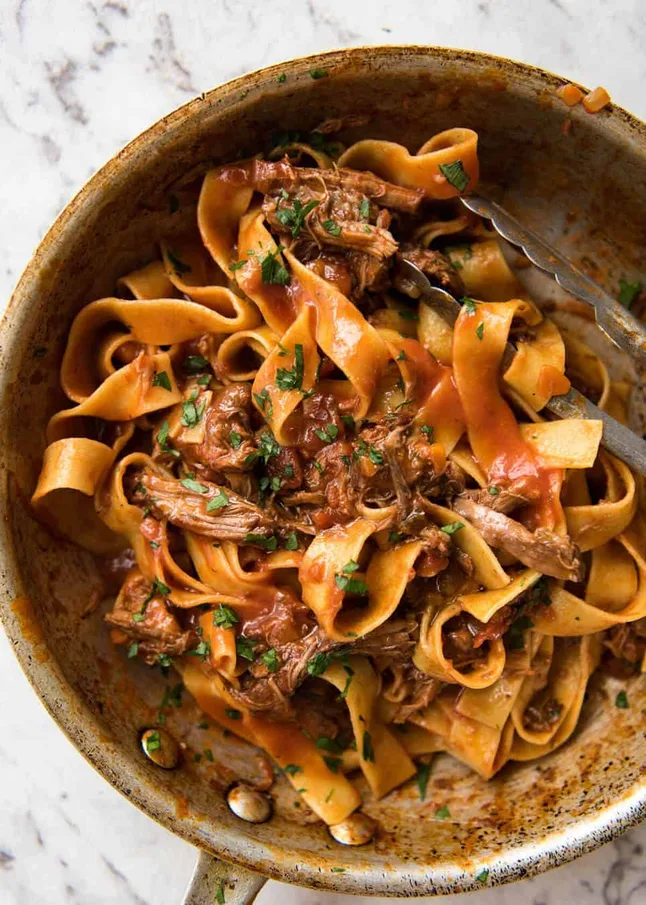
Slow Cooker Beef Ragu is a rich and comforting pasta dish made with tender beef, tomatoes, vegetables, and herbs that slowly cook together to create incredible flavor. The long cooking time allows the beef to become fall-apart tender while developing a hearty, savory sauce.

This easy recipe is perfect for busy days because the slow cooker does most of the work. Serve the flavorful beef ragu over pappardelle or your favorite pasta for a satisfying meal that is great for family dinners, special occasions, or meal prep.

1. Slow Cooker Beef Ragu Recipe (Yield: 8 Servings)

Ingredients

For the Ragu

  • 1.2kg / 2.5 lb chuck beef, cut into equal 4 pieces
  • 1 tbsp salt
  • 1 tsp freshly ground black pepper
  • 3 tbsp olive oil, separated
  • 3 cloves garlic, minced
  • 1 onion, diced
  • 1 cup carrots, diced
  • 1 cup celery, diced
  • 800g / 28 oz crushed canned tomatoes
  • 3 tbsp tomato paste
  • 2 beef bouillon cubes, crumbled
  • 1 cup / 250ml red wine, full-bodied (such as Merlot or Cabernet Sauvignon), or beef broth
  • 1 1/2 cups / 375ml water
  • 3/4 tsp dried thyme or 3 sprigs fresh thyme
  • 3 dried bay leaves

To Serve

  • 1 lb / 500g dried pappardelle, or other pasta of choice
  • Freshly grated Parmesan cheese or Parmigiano Reggiano
  • Fresh parsley, finely chopped (optional)

Instructions

Pat the beef pieces dry with paper towels. Season all sides evenly with the salt and black pepper. Drying the beef helps it brown better and develop a richer flavor.

Heat 2 tablespoons of olive oil in a large skillet over medium-high heat. Once hot, add the beef pieces and sear them for about 2 to 3 minutes per side until a deep brown crust forms. Work in batches if necessary to avoid overcrowding the pan. Transfer the browned beef to the slow cooker.

Reduce the heat to medium and add the remaining tablespoon of olive oil to the skillet. Add the diced onion, carrots, and celery. Cook for about 5 minutes, stirring occasionally, until the vegetables begin to soften. Add the minced garlic and cook for another minute until fragrant.

Stir in the tomato paste and cook for 1 to 2 minutes. This step helps deepen the tomato flavor and adds richness to the sauce. Pour in the red wine and scrape the bottom of the skillet with a wooden spoon to release any browned bits. Let the wine simmer for about 2 minutes.

Transfer the vegetable mixture to the slow cooker. Add the crushed tomatoes, crumbled bouillon cubes, water, thyme, and bay leaves. Stir gently to combine all the ingredients around the beef.

Cover the slow cooker with the lid and cook on low for 8 to 10 hours or on high for 5 to 6 hours. The beef is ready when it can be easily shredded with a fork.

Carefully remove the beef from the slow cooker and place it on a large plate or cutting board. Use two forks to shred the meat into bite-sized pieces. Discard any large pieces of fat.

Return the shredded beef to the slow cooker and stir it into the sauce. Remove and discard the bay leaves and thyme stems if using fresh thyme. Allow the ragu to cook for another 15 to 20 minutes so the shredded beef can absorb more flavor from the sauce.

Meanwhile, bring a large pot of salted water to a boil. Cook the pappardelle according to the package directions until al dente. Reserve about 1 cup of the pasta cooking water before draining.

Transfer the drained pasta to a large serving bowl or skillet. Add several ladles of the beef ragu and toss gently to coat. If the sauce seems too thick, add a little reserved pasta water until it reaches your preferred consistency.

Serve immediately with additional ragu spooned over the top. Garnish with freshly grated Parmesan cheese and chopped parsley if desired.

2. Tips for Perfect Slow Cooker Beef Ragu with Pasta

Searing the beef before slow cooking creates deeper flavor and adds richness to the finished sauce.

Choose chuck roast for the best balance of flavor, tenderness, and marbling. It becomes exceptionally tender during the long cooking process.

Use a full-bodied red wine for added complexity. The wine contributes depth and enhances the savory flavors of the beef and tomatoes.

Avoid lifting the slow cooker lid frequently during cooking. Each time the lid is removed, heat escapes and can extend the cooking time.

Shred the beef while it is still warm. Warm beef separates much more easily than cooled beef.

Cook the pasta just until al dente. Slightly firm pasta holds up better when combined with the rich sauce.

Reserve some pasta water before draining. The starchy liquid helps create a silky sauce that clings beautifully to the pasta.

Allow the finished ragu to rest for a few minutes before serving so the flavors can settle and blend together.

3. Frequently Asked Questions

Can I make beef ragu a day ahead?

Yes. Many people find that the flavor improves after resting overnight in the refrigerator. The ingredients have more time to meld together, creating an even richer sauce.

What other pasta shapes work well with beef ragu?

Pappardelle is a classic choice, but tagliatelle, fettuccine, rigatoni, penne, and even gnocchi pair wonderfully with this hearty sauce.

Can I use a different cut of beef?

Yes. Beef brisket, boneless short ribs, and beef shoulder are all excellent alternatives. Choose cuts that benefit from low and slow cooking.

How can I make the sauce thicker?

If the sauce is thinner than desired, remove the slow cooker lid during the last 30 to 45 minutes of cooking. This allows excess liquid to evaporate naturally.

Can I freeze leftover beef ragu?

Yes. Allow the ragu to cool completely, then store it in freezer-safe containers for up to three months. Thaw overnight in the refrigerator before reheating.

4. Nutrition Information

The following values are approximate and based on one serving of beef ragu with pasta.

Nutrient Amount Per Serving
Calories 610
Protein 42g
Carbohydrates 49g
Fat 25g
Saturated Fat 8g
Cholesterol 110mg
Sodium 980mg
Fiber 5g
Sugar 8g
Calcium 120mg
Iron 6mg

Slow Cooker Beef Ragu is a comforting pasta dish packed with rich flavors, tender shredded beef, and a savory tomato-based sauce. The slow cooker makes preparation easy while delivering results that taste like they came from a traditional Italian kitchen.

Serve this hearty ragu over pappardelle or your favorite pasta for a meal that feels both rustic and elegant. With its make-ahead convenience and freezer-friendly nature, this recipe is one you’ll want to keep in your regular dinner rotation.

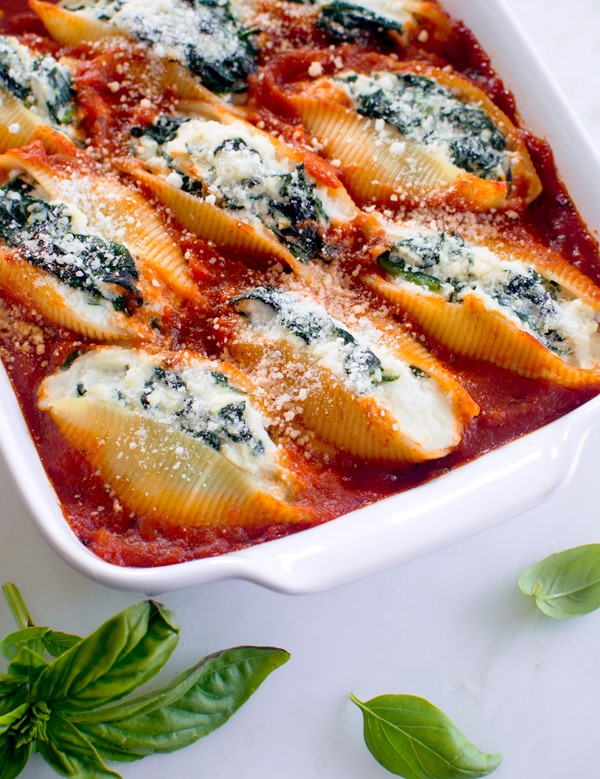
Spinach and Ricotta Stuffed Shells are a comforting Italian-inspired pasta dish that combines tender jumbo pasta shells with a creamy cheese and spinach filling, all baked in a flavorful marinara sauce.

This recipe is perfect for family dinners, meal prep, or serving guests when you want something hearty and satisfying without requiring complicated techniques. Serve these stuffed shells with a simple green salad and warm garlic bread for a complete meal everyone will enjoy.

1. Spinach and Ricotta Stuffed Shells (Yield: 4 Servings)

Ingredients

  • 16 jumbo pasta shells
  • 1 large egg
  • 1 tsp kosher salt
  • 1–1/2 tbsp olive oil
  • 2 tsp fresh garlic, minced
  • 1–1/4 cups marinara sauce
  • 12 oz skim-milk ricotta cheese
  • 1 tbsp fresh basil, finely chopped
  • 1/2 tsp freshly-ground black pepper
  • 1 cup shredded skim-milk mozzarella cheese
  • 1/2 cup grated Parmesan cheese, plus more for serving
  • 4 cups (packed) fresh spinach leaves, roughly chopped

Instructions

Preheat the oven to 375°F (190°C). Lightly coat a 9×13-inch baking dish with a small amount of olive oil or cooking spray to prevent sticking.

Bring a large pot of water to a rolling boil. Add the kosher salt and cook the jumbo pasta shells according to the package instructions until they are al dente. The shells should be tender but still firm enough to hold their shape when filled. Drain the shells and rinse them briefly under cool water to stop the cooking process. Arrange them on a baking sheet or large plate to prevent them from sticking together.

While the shells are cooking, heat the olive oil in a large skillet over medium heat. Add the minced garlic and cook for about 30 seconds, stirring frequently until fragrant. Add the chopped spinach and cook for 2 to 3 minutes, stirring often, until the spinach is wilted and any excess moisture has evaporated. Remove the skillet from the heat and allow the spinach mixture to cool slightly.

In a large mixing bowl, combine the ricotta cheese, egg, fresh basil, black pepper, half of the mozzarella cheese, and half of the Parmesan cheese. Stir until the ingredients are evenly blended. Add the cooled spinach and garlic mixture and mix thoroughly to create a smooth and creamy filling.

Spread approximately three-quarters of a cup of marinara sauce evenly across the bottom of the prepared baking dish. This layer of sauce helps keep the shells moist during baking and prevents them from sticking to the pan.

Using a spoon or small cookie scoop, carefully fill each cooked pasta shell with the spinach and ricotta mixture. Be generous with the filling, but avoid overstuffing to prevent the shells from splitting. Arrange the filled shells in a single layer in the baking dish with the open side facing upward.

Once all the shells are filled and arranged, spoon the remaining marinara sauce over the tops of the shells. Make sure the sauce is distributed evenly to keep everything moist and flavorful.

Sprinkle the remaining mozzarella cheese and Parmesan cheese evenly over the top. The cheese will melt during baking and create a delicious golden crust.

Cover the baking dish loosely with aluminum foil and place it in the preheated oven. Bake for 25 minutes. Remove the foil and continue baking for an additional 10 to 15 minutes, or until the cheese is melted, bubbly, and lightly golden around the edges.

Remove the baking dish from the oven and allow it to rest for about 5 minutes before serving. This short resting period helps the filling set and makes the shells easier to serve.

Garnish with additional grated Parmesan cheese and fresh basil if desired. Serve warm and enjoy.

2. Tips for Perfect Spinach and Ricotta Stuffed Shells

Cook the pasta shells just until al dente. Overcooked shells can tear easily during filling and baking.

Allow the spinach mixture to cool before combining it with the cheeses and egg. This helps maintain the proper texture of the filling.

Drain excess moisture from the cooked spinach if necessary. Too much liquid can make the filling watery and affect the final texture.

Use freshly grated Parmesan cheese for the best flavor and smoother melting.

Spread a layer of marinara sauce on the bottom of the baking dish before adding the shells. This prevents sticking and keeps the pasta tender.

Fill the shells evenly so they bake consistently and provide the same amount of filling in each serving.

Cover the dish during the first part of baking to retain moisture, then uncover it near the end for a beautifully melted and lightly browned cheese topping.

Let the stuffed shells rest for several minutes after baking. This allows the filling to firm up and makes serving easier.

3. Frequently Asked Questions

Can I prepare stuffed shells ahead of time?

Yes. You can assemble the entire dish up to one day in advance, cover it tightly, and refrigerate it. When ready to bake, add a few extra minutes to the baking time if the dish is cold from the refrigerator.

Can I freeze spinach and ricotta stuffed shells?

Absolutely. Assemble the shells in a freezer-safe dish, cover tightly, and freeze for up to three months. Thaw overnight in the refrigerator before baking for the best results.

Can I use frozen spinach instead of fresh spinach?

Yes. Frozen spinach works well as a substitute. Be sure to thaw it completely and squeeze out as much excess moisture as possible before adding it to the filling.

Can I make this recipe without egg?

Yes. The egg helps bind the filling, but you can omit it if needed. The filling may be slightly softer, but the shells will still be delicious and hold together well after baking.

How do I store leftovers?

Store leftovers in an airtight container in the refrigerator for up to four days. Reheat individual portions in the microwave or warm larger portions in the oven until heated through.

4. Nutrition Information

The following nutrition information is an estimate per serving.

Nutrient Amount Per Serving
Calories 430
Protein 29g
Carbohydrates 35g
Fat 18g
Saturated Fat 8g
Cholesterol 95mg
Sodium 940mg
Fiber 4g
Sugar 7g
Calcium 520mg
Iron 3mg

Spinach and Ricotta Stuffed Shells are a delicious baked pasta dish that brings together creamy cheese, nutritious spinach, and savory marinara sauce in every bite. The recipe is simple enough for a weeknight dinner yet impressive enough for special occasions and family gatherings.

With make-ahead and freezer-friendly options, these stuffed shells offer convenience along with great flavor. Once you try this comforting recipe, it is likely to become a regular addition to your meal rotation whenever you’re craving a satisfying homemade pasta dinner.

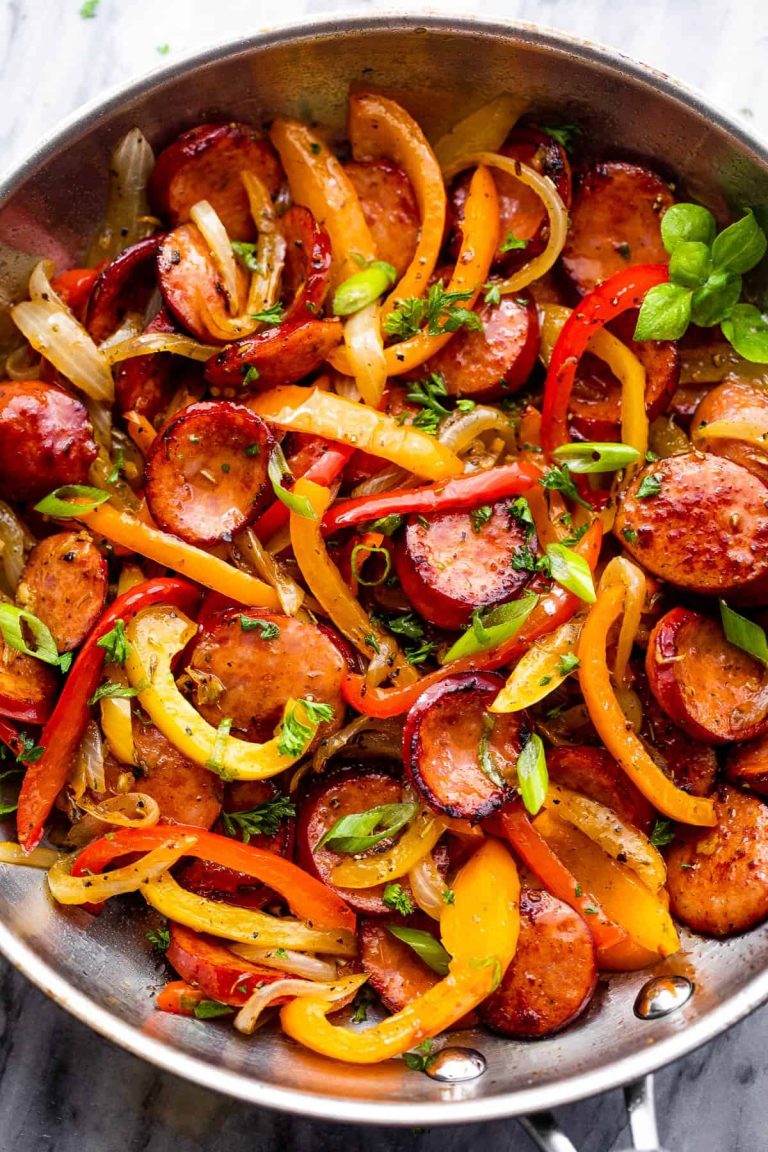
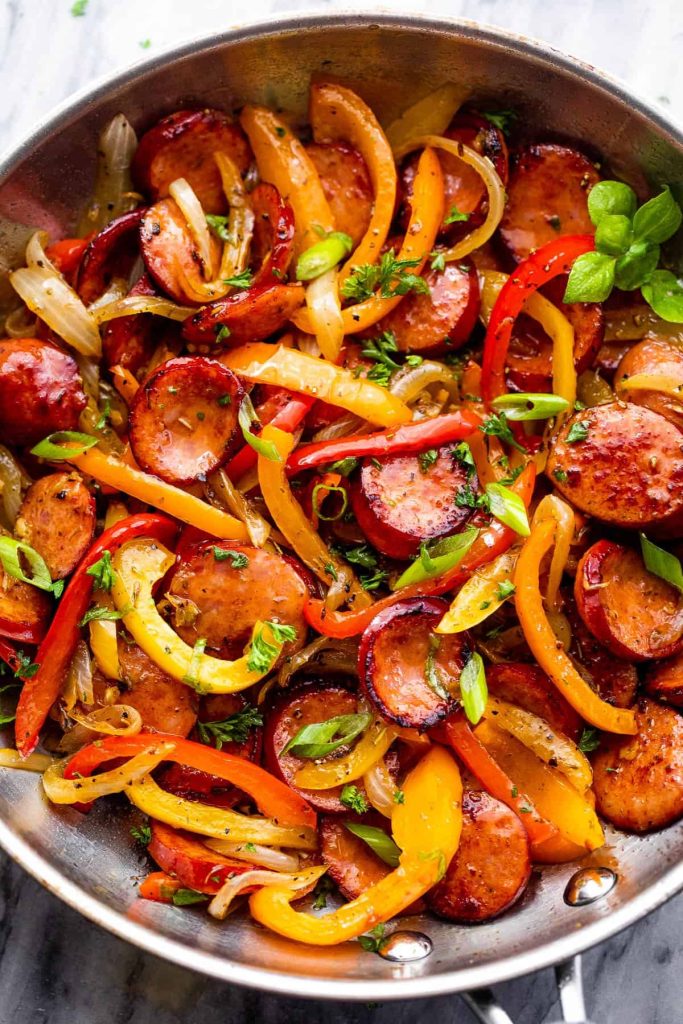
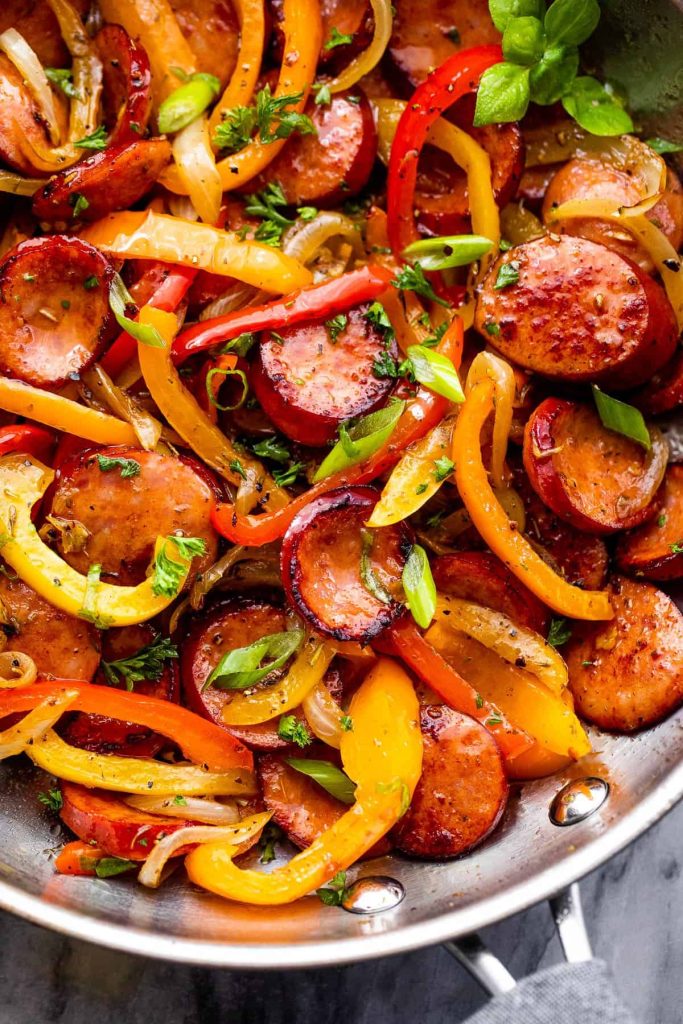
Italian Sausage and Peppers is a classic dish that brings together savory sausage, sweet peppers, and aromatic onions in one satisfying skillet meal. The combination of colorful vegetables and perfectly browned sausage creates a hearty recipe that is packed with flavor while remaining simple enough for busy weeknights.

This dish has been a favorite in Italian-American kitchens for generations because it is easy to prepare, requires minimal cleanup, and delivers restaurant-quality results at home. Served on its own, over rice, pasta, or tucked into a crusty roll, Italian Sausage and Peppers is a versatile meal that everyone at the table can enjoy.

1. Italian Sausage and Peppers (Yield: 4 Servings)

Ingredients

  • 2 tablespoons olive oil, divided
  • 12 to 14 ounces Italian sausage, cut into thin rounds, between ⅛-inch and ¼-inch thickness
  • 1 red bell pepper, cut into thin strips
  • 1 yellow bell pepper, cut into thin strips
  • 1 small yellow onion, cut into thin strips
  • 1 teaspoon Italian seasoning
  • 4 cloves garlic, minced or pressed
  • Salt and freshly ground black pepper, to taste
  • ½ teaspoon red pepper flakes, optional
  • 1 green onion, sliced, for garnish
  • Fresh chopped parsley or basil, for garnish

Instructions

Heat 1 tablespoon of olive oil in a large skillet over medium-high heat. Once the oil is hot, add the sliced Italian sausage in a single layer. Cook for about 4 to 5 minutes, stirring occasionally, until the sausage develops a rich golden-brown color on both sides. Browning the sausage first helps build flavor and creates delicious caramelized bits in the pan.

Transfer the cooked sausage to a plate and set aside. Leave any flavorful drippings in the skillet, as they will enhance the vegetables during cooking.

Add the remaining tablespoon of olive oil to the same skillet. Add the sliced red bell pepper, yellow bell pepper, and yellow onion. Stir everything together and cook for 6 to 8 minutes. The vegetables should become tender while still maintaining a slight crispness and vibrant color.

Sprinkle the Italian seasoning over the vegetables and stir well to distribute the herbs evenly. Add the minced garlic and cook for about 30 seconds to 1 minute, stirring constantly to prevent burning. The garlic should become fragrant without turning brown.

Return the browned sausage to the skillet. Stir the sausage together with the peppers and onions until everything is well combined. Season with salt and freshly ground black pepper according to your taste preferences.

If you enjoy a little heat, add the optional red pepper flakes and stir them into the mixture. Continue cooking for another 2 to 3 minutes so the flavors can blend together.

Taste the mixture and adjust the seasoning if necessary. Once everything is heated through and well seasoned, remove the skillet from the heat.

Transfer the Italian Sausage and Peppers to a serving platter or individual plates. Garnish with sliced green onion and freshly chopped parsley or basil before serving.

Serve immediately while warm. This dish pairs wonderfully with crusty bread, pasta, rice, roasted potatoes, or toasted sandwich rolls.

2. Tips for Perfect Italian Sausage and Peppers

Choose high-quality Italian sausage for the best flavor. Both sweet and hot Italian sausage work well, depending on your preference.

Slice the peppers and onions into similar-sized strips so they cook evenly and create a consistent texture throughout the dish.

Avoid overcrowding the skillet when browning the sausage. Giving the sausage enough space allows it to develop a beautiful golden crust instead of steaming.

Cook the vegetables until tender but not overly soft. Slightly crisp peppers provide the best texture and visual appeal.

Add garlic near the end of the vegetable cooking process. Garlic cooks quickly and can become bitter if overcooked.

For deeper flavor, allow the sausage and vegetables to cook together for a few extra minutes after combining them in the skillet.

If serving in sandwich rolls, lightly toast the bread before filling it. Toasted rolls help hold the juicy filling and add a pleasant crunch.

Fresh herbs added just before serving brighten the flavors and provide a fresh finishing touch.

3. Frequently Asked Questions

Can I use different colored bell peppers?

Absolutely. Orange and green bell peppers can be substituted or combined with red and yellow peppers. Using multiple colors creates a more vibrant presentation and adds subtle differences in flavor.

What side dishes pair well with Italian Sausage and Peppers?

This dish pairs nicely with garlic bread, roasted potatoes, mashed potatoes, pasta, rice, polenta, or a simple green salad. The versatility makes it easy to create a complete meal.

Can I make this recipe ahead of time?

Yes. Italian Sausage and Peppers can be prepared several hours in advance and gently reheated before serving. Many people find that the flavors become even more developed after resting.

Can I freeze leftovers?

Yes. Allow the dish to cool completely before transferring it to an airtight freezer-safe container. It can be frozen for up to 3 months. Thaw overnight in the refrigerator before reheating.

Is this recipe gluten-free?

The sausage and vegetables themselves are generally gluten-free, but ingredients vary by brand. Always check the packaging of the sausage and seasonings if you need to avoid gluten.

4. Nutrition Information

The following nutrition values are approximate and may vary depending on the specific sausage used.

Nutrient Amount Per Serving
Calories 340
Protein 18g
Total Fat 25g
Saturated Fat 8g
Carbohydrates 11g
Fiber 3g
Sugars 5g
Cholesterol 55mg
Sodium 760mg
Potassium 480mg

Italian Sausage and Peppers is proof that a handful of simple ingredients can create an incredibly flavorful meal. The combination of savory sausage, sweet peppers, tender onions, and aromatic herbs comes together in one skillet for a dish that feels comforting and satisfying.

Perfect for busy weeknights, casual gatherings, or meal prep, this recipe offers flexibility and great flavor with very little effort. Once you try this easy Italian Sausage and Peppers recipe, it is likely to become a regular addition to your dinner rotation.

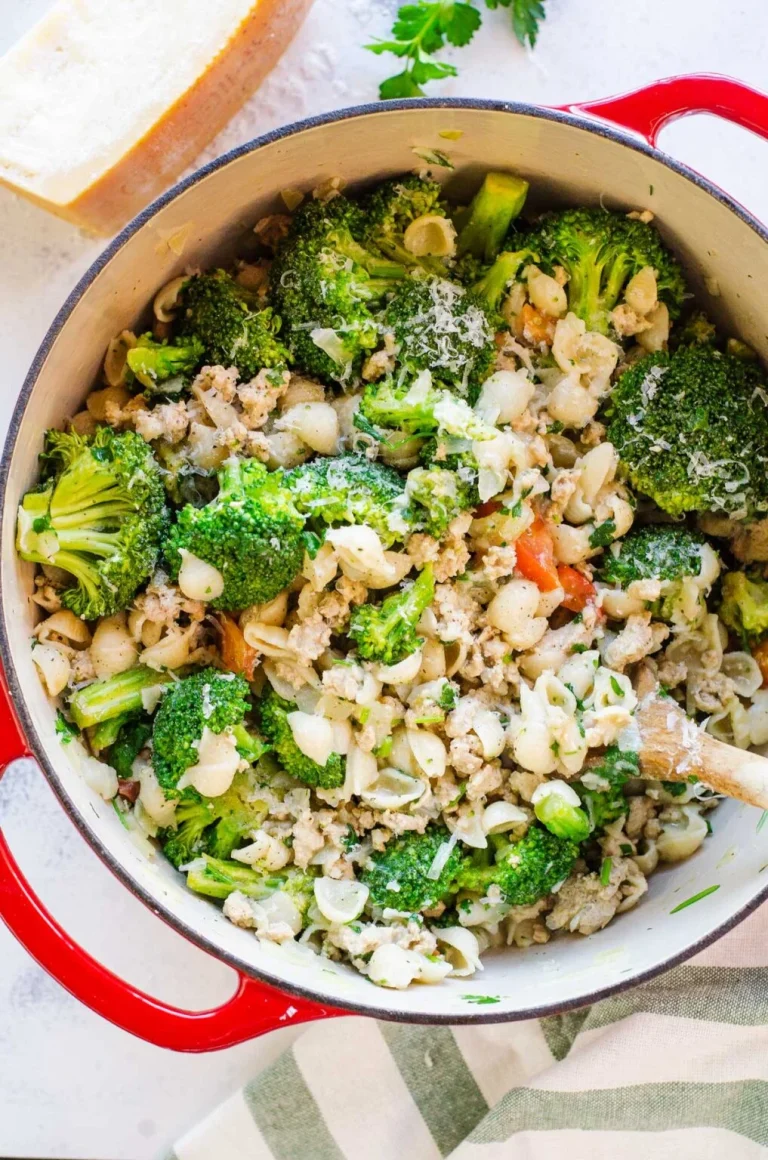
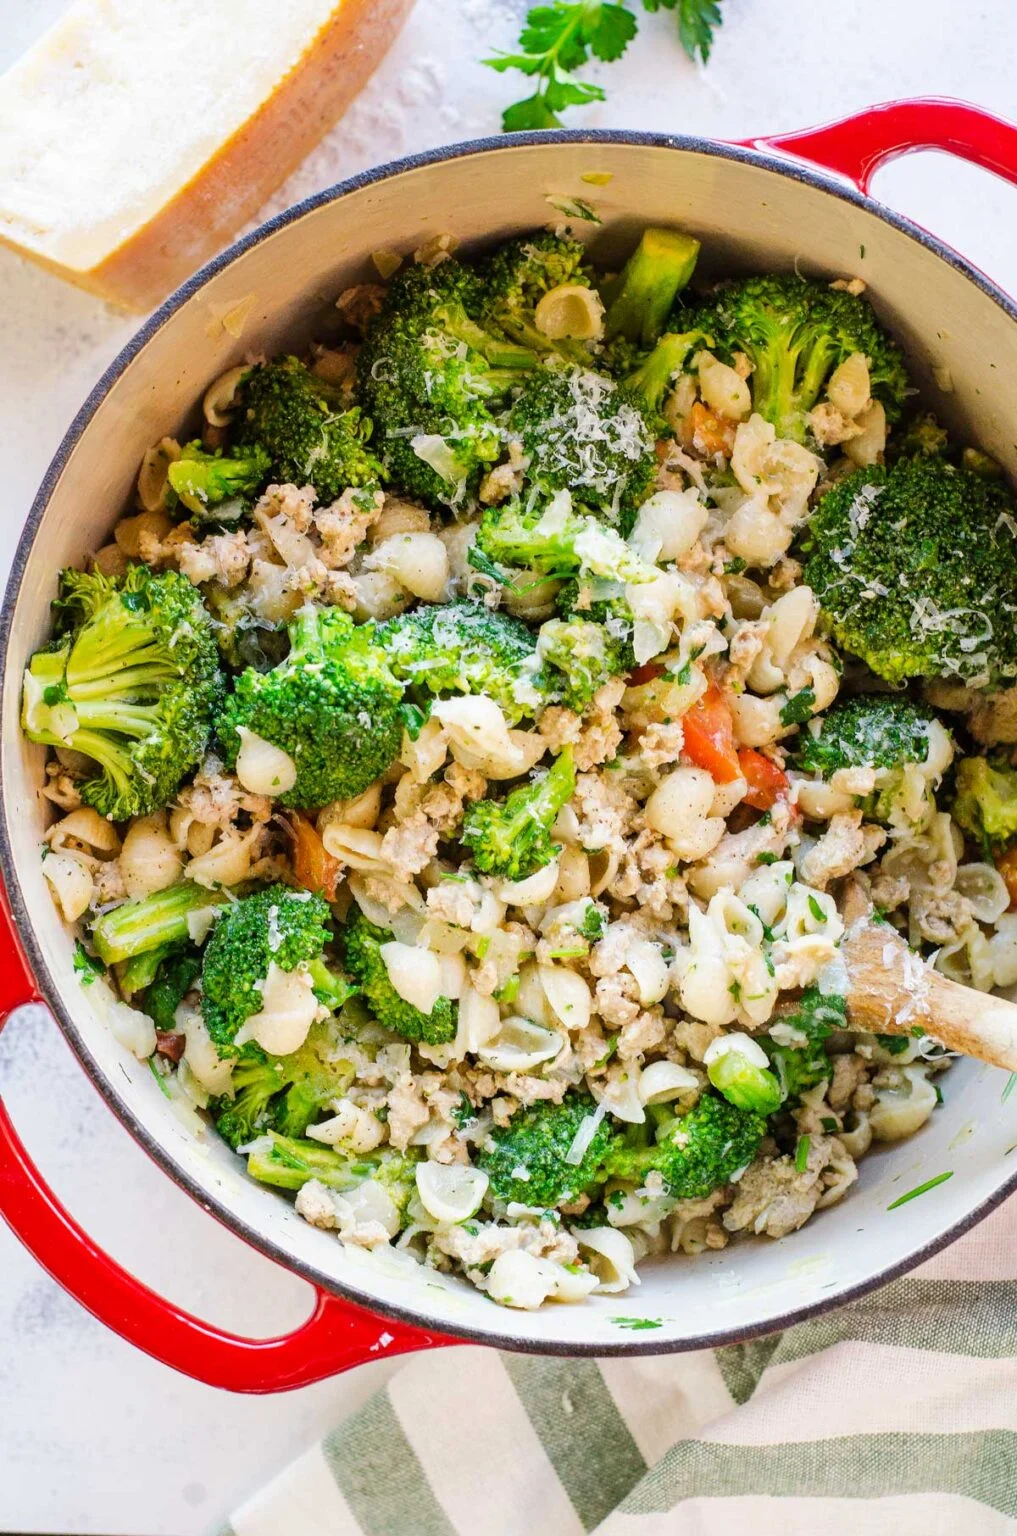
Ground turkey and broccoli pasta is a wholesome, balanced dish that brings together lean protein, fresh vegetables, and comforting pasta in one satisfying meal. It’s a great option when you want something hearty yet lighter than traditional beef-based pasta dishes. With simple ingredients and a straightforward cooking process, this recipe is perfect for busy weeknights or meal prepping for the week ahead.

What makes this dish especially appealing is its combination of textures and flavors. The tender ground turkey provides a savory base, while the broccoli adds freshness and a slight crunch. Juicy tomatoes and garlic bring brightness, and a sprinkle of Parmesan cheese ties everything together with a rich, savory finish. It’s a nutritious and delicious meal the whole family can enjoy.

1. Ground Turkey and Broccoli Pasta Recipe ( Yield: 6 Serving )

Ingredients

  • 1 large onion, chopped
  • 1 lb ground turkey
  • 1 tbsp olive oil, extra virgin
  • 3 cups short pasta (such as penne or fusilli)
  • 3 cups vegetable or chicken stock (low sodium)
  • 1 tsp salt
  • Ground black pepper, to taste
  • 1 lb broccoli florets
  • 3 tomatoes, diced
  • 1–2 garlic cloves, grated
  • Red pepper flakes, a pinch
  • 1/2 cup parsley, finely chopped
  • 1/2 cup grated Parmesan cheese

Instructions

Prepare the base

Heat the olive oil in a large pot or deep skillet over medium heat. Add the chopped onion and cook for 3–4 minutes until softened and translucent.

Cook the ground turkey

Add the ground turkey to the pot. Break it apart with a spoon and cook for about 5–7 minutes until fully browned and cooked through. Season with salt and black pepper.

Add garlic and spice

Stir in the grated garlic and a pinch of red pepper flakes. Cook for about 30 seconds until fragrant, being careful not to burn the garlic.

Incorporate tomatoes

Add the diced tomatoes and cook for 3–5 minutes, allowing them to soften and release their juices. This helps create a light, flavorful base for the sauce.

Add pasta and stock

Pour in the stock and bring the mixture to a gentle boil. Add the uncooked pasta and stir to combine. Ensure the pasta is mostly submerged in the liquid.

Cook the pasta

Reduce the heat to medium-low, cover, and let it simmer for about 8–10 minutes. Stir occasionally to prevent sticking and ensure even cooking.

Add broccoli

Stir in the broccoli florets and continue cooking for another 5–7 minutes, or until the pasta is tender and the broccoli is bright green and just cooked through.

Adjust consistency

If the mixture becomes too thick before the pasta is fully cooked, add a splash of additional stock or water as needed.

Finish with herbs and cheese

Remove from heat and stir in the chopped parsley and grated Parmesan cheese. Mix well until the cheese melts and coats the pasta.

Taste and serve

Taste and adjust seasoning with more salt and pepper if needed. Serve warm with extra Parmesan cheese on top if desired.

2. Tips for Perfect Ground Turkey and Broccoli Pasta

Using lean ground turkey keeps the dish lighter, but it’s important to cook it properly to maintain moisture. Avoid overcooking, as turkey can dry out quickly.

Cut the broccoli into evenly sized florets so they cook at the same rate. Adding them toward the end ensures they stay vibrant and slightly crisp rather than becoming mushy.

Cooking the pasta directly in the stock is a great technique that enhances flavor. The pasta absorbs the broth, making the entire dish more cohesive and flavorful.

Fresh tomatoes add a natural sweetness and acidity that balances the dish. If tomatoes are not in season, you can substitute with canned diced tomatoes for convenience.

Finally, add the Parmesan cheese off the heat to ensure it melts smoothly and doesn’t clump. This creates a light, creamy coating without needing heavy cream.

3. Frequently Asked Questions

Can I use a different protein instead of ground turkey?

Yes, ground chicken, beef, or even plant-based alternatives can be used. Each option will slightly change the flavor but still work well with the recipe.

Can I make this dish gluten-free?

You can substitute regular pasta with gluten-free pasta. Keep an eye on cooking time, as gluten-free pasta may require slight adjustments.

What other vegetables can I include?

You can add vegetables like zucchini, spinach, bell peppers, or peas to increase the nutritional value and variety.

How do I store leftovers?

Store leftovers in an airtight container in the refrigerator for up to 3 days. Reheat gently with a splash of water or broth to refresh the texture.

Can I make this recipe ahead of time?

Yes, this dish is great for meal prep. The flavors often deepen after sitting, making it even more delicious the next day.

4. Nutrition Information

Nutrient Amount per Serving
Calories 460 kcal
Protein 28 g
Carbohydrates 48 g
Fat 16 g
Saturated Fat 4 g
Fiber 5 g
Sugar 5 g
Sodium 480 mg

Ground turkey and broccoli pasta is a perfect example of a meal that is both nutritious and satisfying. With its lean protein, fresh vegetables, and comforting pasta, it strikes a great balance between health and flavor.

Whether you’re cooking for your family or preparing meals for the week, this recipe offers a simple, reliable option that doesn’t compromise on taste. Once you try it, you’ll appreciate how easy it is to create a wholesome and delicious dish with everyday ingredients.

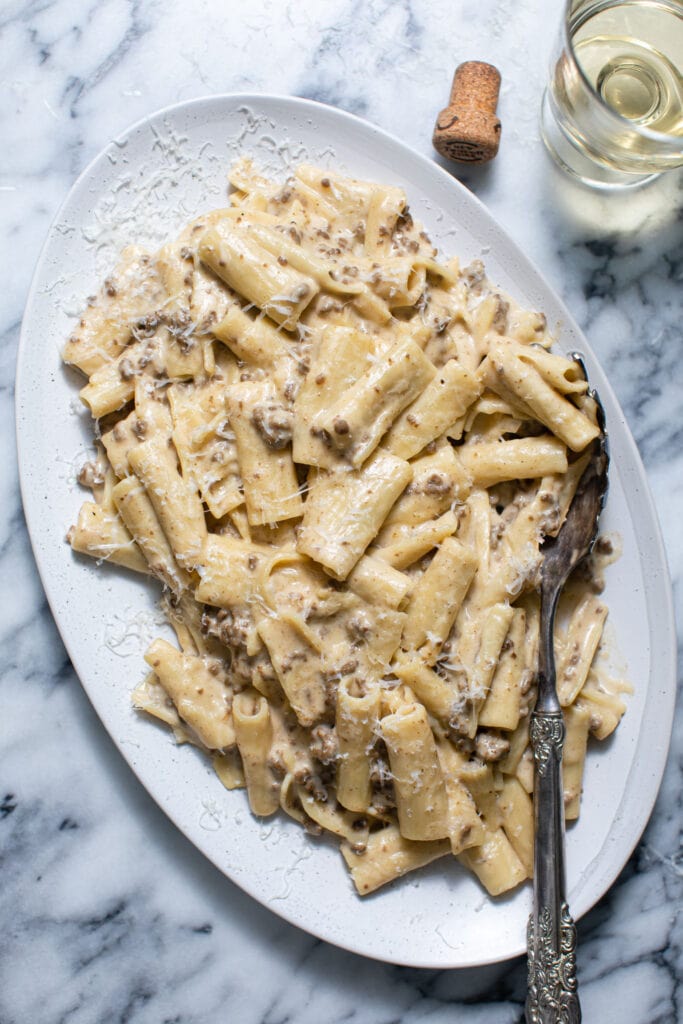
Creamy ground beef pasta is the ultimate comfort food—rich, hearty, and incredibly satisfying. This dish brings together tender pasta, savory ground beef, and a luscious, cheesy sauce that coats every bite. It’s the kind of meal that feels cozy and indulgent, perfect for family dinners, meal prep, or whenever you’re craving something warm and filling.

What makes this recipe especially appealing is its simplicity. Everything comes together in one pot, allowing the pasta to cook directly in the flavorful broth while absorbing all the savory goodness from the beef and aromatics. Finished with a blend of cheddar and Parmesan cheese, the result is a creamy, velvety pasta dish that’s both easy to make and packed with flavor.

1. Creamy Ground Beef Pasta Recipe ( Yield: 6 Serving )

Ingredients

  • 2 tablespoons unsalted butter
  • 1 lb ground beef
  • 1 teaspoon garlic powder
  • 1 large shallot, finely chopped
  • 1 lb dried short-cut pasta (such as rigatoni)
  • 4 cups (32 ounces) chicken or beef broth
  • 1 cup heavy whipping cream
  • 8 ounces sharp white cheddar cheese, shredded
  • 1 cup freshly grated Parmesan cheese, plus more for topping
  • Kosher salt and freshly ground black pepper, to taste

Instructions

Brown the ground beef

In a large pot or deep skillet over medium-high heat, melt the butter. Add the ground beef and cook for 5–7 minutes, breaking it apart with a spoon, until fully browned. Season with a pinch of salt, pepper, and garlic powder.

Add shallots

Stir in the finely chopped shallot and cook for another 2–3 minutes until softened and fragrant. This step builds a flavorful base for the sauce.

Add pasta and broth

Pour in the broth and add the uncooked pasta. Stir well to combine, ensuring the pasta is mostly submerged in the liquid.

Simmer the pasta

Bring the mixture to a gentle boil, then reduce the heat to medium-low. Cover and simmer for about 10–12 minutes, stirring occasionally, until the pasta is tender and most of the liquid has been absorbed.

Add cream

Stir in the heavy whipping cream and let it simmer for another 2–3 minutes. This begins to create the creamy base of the sauce.

Incorporate the cheese

Reduce the heat to low and gradually add the shredded cheddar cheese and grated Parmesan cheese. Stir continuously until the cheese melts completely and the sauce becomes smooth and creamy.

Adjust consistency

If the sauce is too thick, add a small splash of broth or water to loosen it. If it’s too thin, let it simmer uncovered for a few more minutes until it thickens.

Season to taste

Taste and adjust with additional salt and freshly ground black pepper as needed.

Serve and garnish

Remove from heat and serve immediately. Top with extra Parmesan cheese for added richness and flavor.

2. Tips for Perfect Creamy Ground Beef Pasta

Using freshly shredded cheese is essential for achieving a smooth and creamy sauce. Pre-shredded cheese often contains anti-caking agents that can prevent it from melting properly.

Cooking the pasta directly in the broth is a key technique in this recipe. It allows the pasta to absorb flavor while releasing starch into the liquid, naturally thickening the sauce.

Be mindful of heat when adding the cheese. Always reduce the heat to low before stirring it in, as high temperatures can cause the cheese to become grainy instead of creamy.

Choosing the right pasta shape also matters. Short, sturdy pasta like rigatoni or penne works best because it holds the sauce well and provides a satisfying texture.

Finally, taste as you go. Since both the broth and cheeses contain salt, it’s important to adjust seasoning gradually to avoid over-salting the dish.

3. Frequently Asked Questions

Can I use a different type of meat instead of ground beef?

Yes, ground turkey, chicken, or even sausage can be used as substitutes. Each will bring a slightly different flavor to the dish.

Can I make this recipe ahead of time?

Yes, you can prepare it ahead and store it in the refrigerator. When reheating, add a splash of broth or milk to restore the creamy texture.

What vegetables can I add to this pasta?

Vegetables like spinach, peas, mushrooms, or bell peppers can be added to enhance both nutrition and flavor.

Can I freeze creamy ground beef pasta?

It’s possible to freeze it, but the texture of the sauce may change slightly upon reheating. Stir well and add a bit of liquid when warming it up.

How can I make this dish lighter?

You can use a lower-fat cream or reduce the amount of cheese. The dish will still be flavorful but less rich.

4. Nutrition Information

Nutrient Amount per Serving
Calories 620 kcal
Protein 32 g
Carbohydrates 55 g
Fat 30 g
Saturated Fat 16 g
Fiber 3 g
Sugar 3 g
Sodium 520 mg

Creamy ground beef pasta is a comforting, crowd-pleasing dish that combines simple ingredients into something truly satisfying. Its rich, cheesy sauce and hearty texture make it a perfect choice for busy weeknights or relaxed family meals.

With its one-pot convenience and customizable nature, this recipe is as practical as it is delicious. Once you’ve made it, you’ll likely find yourself returning to it again and again, experimenting with different variations and making it your own signature comfort dish.

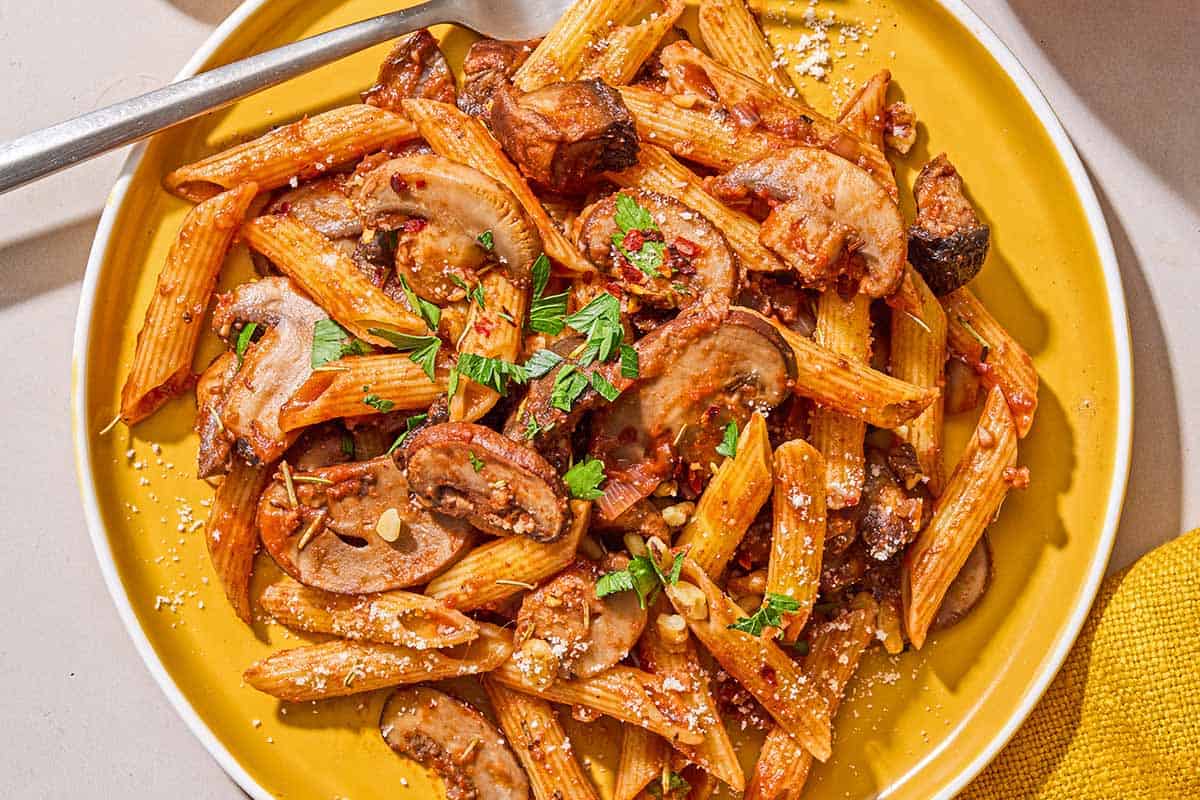
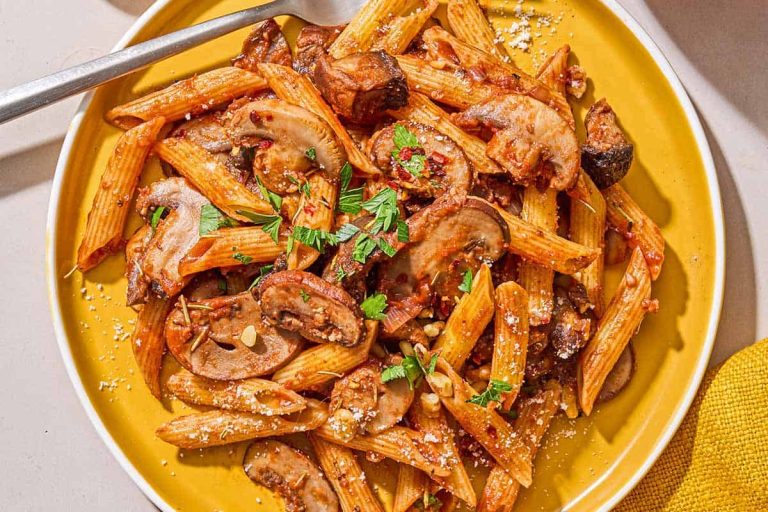
Garlic mushroom pasta is a deeply savory and satisfying dish that celebrates earthy flavors and simple ingredients. With a medley of mushrooms, aromatic garlic, and a rich, silky sauce, this recipe delivers bold flavor without relying on heavy cream. It’s hearty enough to stand on its own while still feeling light and balanced, making it perfect for both everyday meals and special occasions.

What makes this pasta truly special is the combination of different mushroom varieties. Each type brings its own texture and depth—some are meaty, others tender, all contributing to a layered, umami-rich experience. Paired with olive oil, herbs, and a touch of tomato paste and wine, this dish becomes complex, comforting, and incredibly delicious.

1. Garlic Mushroom Pasta Recipe ( Yield: 4 Serving )

Ingredients

  • 8 ounces short pasta, like penne or rigatoni
  • 1 tablespoon butter
  • 1/3 cup extra virgin olive oil
  • 2 shallots, minced
  • 5 garlic cloves, minced
  • 8 ounces baby bella mushrooms, sliced
  • 8 ounces white mushrooms, sliced
  • 8 ounces portobello mushrooms, roughly chopped
  • 1 teaspoon dried rosemary
  • 3 tablespoons tomato paste
  • 1/4 cup dry red wine (such as merlot)
  • 1/2 cup grated Parmesan cheese
  • 1/2 cup packed chopped parsley
  • 1/3 cup chopped walnuts
  • Kosher salt and black pepper, to taste
  • Red pepper flakes, to taste (optional)

Instructions

Cook the pasta

Bring a large pot of salted water to a boil. Add the pasta and cook according to package instructions until al dente. Reserve about 1/2 cup of pasta water before draining, then set the pasta aside.

Toast the walnuts (optional but recommended)

In a dry skillet over medium heat, toast the chopped walnuts for 2–3 minutes until fragrant. Stir frequently to avoid burning. Remove from the pan and set aside.

Start the base

In a large skillet or sauté pan, heat the olive oil and butter over medium heat. Once the butter has melted, add the minced shallots and cook for 2–3 minutes until softened and translucent.

Add garlic

Stir in the minced garlic and cook for about 30–60 seconds until fragrant. Be careful not to let it brown.

Cook the mushrooms

Add all the mushrooms to the pan. Increase the heat slightly to medium-high and cook for 8–10 minutes, stirring occasionally. The mushrooms will release moisture and then begin to brown. Continue cooking until most of the liquid has evaporated and the mushrooms are golden and slightly crispy at the edges.

Season and add herbs

Sprinkle in the dried rosemary, a pinch of salt, black pepper, and red pepper flakes if using. Stir to evenly distribute the seasoning.

Incorporate tomato paste

Add the tomato paste and cook for 2–3 minutes, stirring frequently. This step deepens the flavor and gives the dish a subtle richness.

Deglaze with wine

Pour in the red wine and scrape up any browned bits from the bottom of the pan. Let it simmer for 2–3 minutes until slightly reduced and the alcohol has cooked off.

Combine pasta and sauce

Add the cooked pasta to the skillet and toss to combine. Pour in a small amount of reserved pasta water to help create a light, cohesive sauce.

Add cheese and herbs

Stir in the grated Parmesan cheese and chopped parsley. Toss everything together until well combined and the cheese has melted into the sauce.

Finish with walnuts

Add the toasted walnuts and gently mix. They provide a subtle crunch that contrasts beautifully with the tender pasta and mushrooms.

Adjust seasoning and serve

Taste and adjust salt and pepper as needed. Serve immediately with extra Parmesan cheese and a sprinkle of parsley if desired.

2. Tips for Perfect Garlic Mushroom Pasta

Using a variety of mushrooms is key to achieving a rich, layered flavor. Each type contributes something unique, so combining them creates a more complex and satisfying dish.

Avoid overcrowding the pan when cooking mushrooms. Giving them enough space allows them to brown properly instead of steaming, which enhances their flavor and texture.

Take your time with the tomato paste. Cooking it for a few minutes before adding liquid helps remove any raw taste and brings out a deeper, slightly sweet richness.

Wine adds depth and acidity, balancing the earthiness of the mushrooms. Let it reduce properly to concentrate its flavor without overpowering the dish.

Finally, don’t skip the walnuts. They add a subtle crunch and nutty flavor that elevates the overall texture and makes the dish more interesting.

3. Frequently Asked Questions

Can I make this recipe without wine?

Yes, you can substitute the wine with vegetable broth or simply omit it. The dish will still be flavorful, though slightly less complex.

What can I use instead of walnuts?

You can substitute walnuts with pine nuts, almonds, or even omit them entirely if you prefer a nut-free version.

Is this dish vegetarian?

Yes, this recipe is vegetarian as long as the Parmesan cheese used is made without animal rennet.

Can I add protein to this pasta?

Absolutely. Grilled chicken, shrimp, or even tofu can be added to make the dish more filling.

How do I store leftovers?

Store leftovers in an airtight container in the refrigerator for up to 3 days. Reheat gently with a splash of water or olive oil to refresh the texture.

4. Nutrition Information

Nutrient Amount per Serving
Calories 520 kcal
Protein 14 g
Carbohydrates 48 g
Fat 30 g
Saturated Fat 6 g
Fiber 5 g
Sugar 5 g
Sodium 420 mg

Garlic mushroom pasta is a beautiful example of how simple ingredients can come together to create something deeply flavorful and satisfying. With its rich, earthy mushrooms, aromatic garlic, and perfectly balanced sauce, it’s a dish that feels both comforting and refined.

Whether you’re cooking for yourself or sharing a meal with others, this recipe offers a reliable and delicious option that’s easy to prepare yet full of character. Once you try it, it’s likely to become a staple in your kitchen, perfect for any occasion.

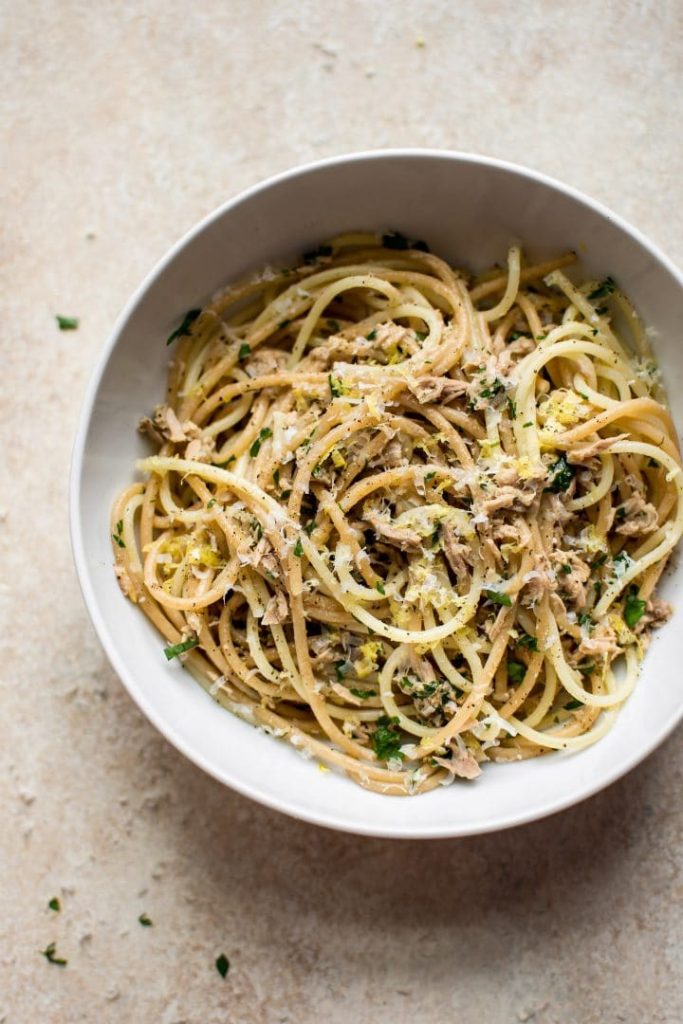
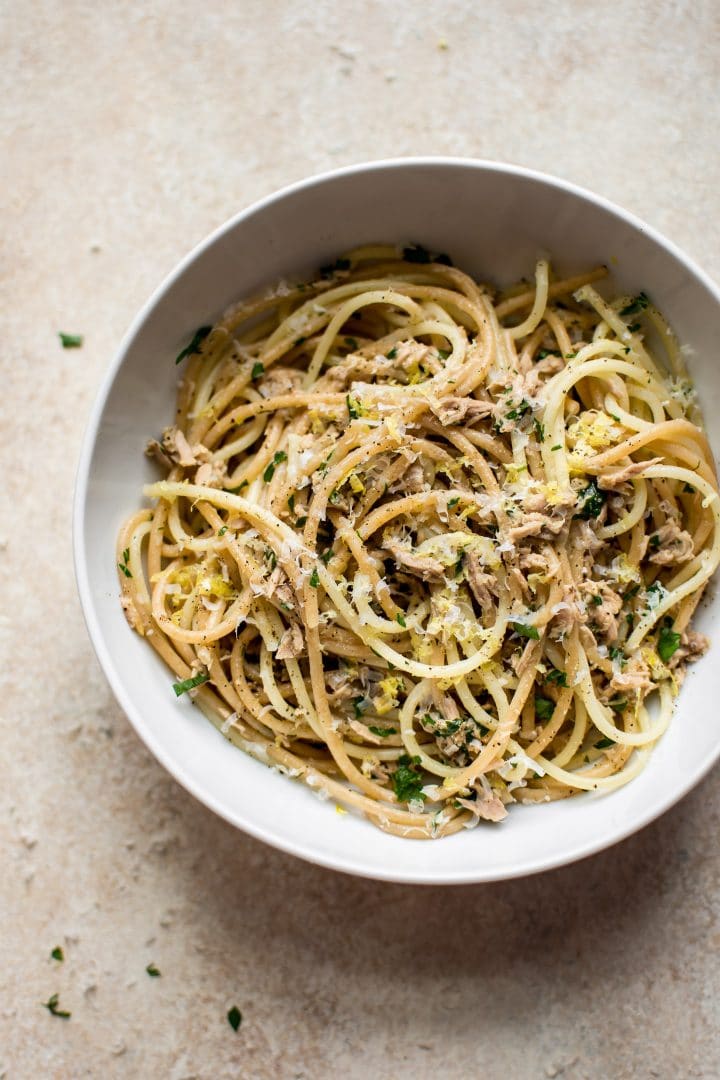
Tuna pasta with canned tuna is one of the simplest and most satisfying meals you can make with pantry staples. It’s quick, budget-friendly, and surprisingly flavorful, making it perfect for busy weeknights or when you want something comforting without much effort. With just a few ingredients like pasta, garlic, olive oil, and tuna, you can create a dish that feels both hearty and fresh.

What makes this recipe stand out is its balance of flavors. The richness of the tuna pairs beautifully with the aromatic garlic and olive oil, while a touch of lemon juice adds brightness and freshness. Finished with chopped parsley and a sprinkle of seasoning, this tuna pasta is light yet filling—proof that simple cooking can still be incredibly delicious.

1. Tuna Pasta Recipe With Canned Tuna ( Yield: 2 Serving )

Ingredients

  • 4 ounces uncooked pasta (spaghetti or your preferred type)
  • 2 tablespoons olive oil
  • 2 large cloves garlic, minced
  • 1 (5-ounce) can tuna, drained (preferably tuna packed in oil)
  • 1 teaspoon lemon juice
  • 1 tablespoon fresh parsley, chopped
  • Salt and pepper, to taste

Instructions

Cook the pasta

Bring a large pot of salted water to a boil. Add the pasta and cook according to package instructions until al dente, usually about 8–10 minutes. Stir occasionally to prevent sticking. Before draining, reserve about 1/4 cup of pasta water, then drain and set aside.

Prepare the garlic oil

Heat the olive oil in a large skillet over medium heat. Add the minced garlic and sauté gently for about 30–60 seconds until fragrant. Be careful not to burn the garlic, as it can turn bitter.

Add the tuna

Add the drained tuna to the skillet. Break it apart gently with a spoon or spatula, mixing it with the garlic and oil. Cook for 2–3 minutes until heated through and slightly infused with the garlic flavor.

Incorporate pasta

Add the cooked pasta directly to the skillet. Toss everything together so the pasta is well coated in the garlic oil and tuna mixture.

Adjust texture with pasta water

Pour in a small amount of the reserved pasta water and toss again. This helps create a light, silky coating that brings the ingredients together without making the dish heavy.

Add lemon juice

Drizzle in the lemon juice and toss to combine. The acidity brightens the flavors and balances the richness of the tuna.

Season to taste

Add salt and freshly ground black pepper as needed. Taste and adjust carefully, especially if your tuna is already salted.

Finish with fresh herbs

Sprinkle in the chopped parsley and give everything a final toss.

Serve immediately

Transfer to plates and serve warm. You can add an extra drizzle of olive oil or a bit more parsley for garnish if desired.

2. Tips for Perfect Tuna Pasta

Using good-quality canned tuna can make a noticeable difference in flavor. Tuna packed in olive oil tends to be richer and more tender compared to tuna packed in water, which can sometimes be drier.

Cooking the garlic gently is essential. Keeping the heat moderate ensures the garlic releases its aroma without browning too quickly, which would introduce bitterness into the dish.

Don’t skip reserving pasta water. Even though this recipe doesn’t use a heavy sauce, the starchy water helps bind the ingredients together and gives the pasta a smooth, cohesive texture.

Balance is key when adding lemon juice. Start with a small amount and adjust gradually to avoid overpowering the dish. The goal is a subtle brightness, not strong acidity.

Finally, serve the pasta immediately after mixing. This dish is best enjoyed fresh, when the flavors are vibrant and the texture is just right.

3. Frequently Asked Questions

Can I add vegetables to tuna pasta?

Yes, vegetables like cherry tomatoes, spinach, peas, or zucchini can be great additions. They add color, texture, and extra nutrition without complicating the recipe.

Is canned tuna healthy for regular meals?

Canned tuna is a good source of protein and omega-3 fatty acids. It can be part of a balanced diet when consumed in moderation.

Can I use a different type of pasta?

Absolutely. While spaghetti works well, you can use penne, fusilli, or any pasta shape you prefer. Short pasta shapes can help hold the tuna mixture better.

How do I store leftovers?

Store any leftovers in an airtight container in the refrigerator for up to 2 days. Reheat gently with a splash of water or olive oil to refresh the texture.

Can I make this dish without garlic?

Yes, you can omit the garlic if needed. You may want to add a pinch of dried herbs or a bit of onion for additional flavor.

4. Nutrition Information

Nutrient Amount per Serving
Calories 350 kcal
Protein 20 g
Carbohydrates 32 g
Fat 16 g
Saturated Fat 2.5 g
Fiber 2 g
Sugar 1 g
Sodium 300 mg

Easy tuna pasta with canned tuna is proof that delicious meals don’t have to be complicated. With just a handful of pantry ingredients and minimal cooking time, you can create a dish that is both comforting and full of flavor.

Whether you’re looking for a quick lunch, a simple dinner, or a budget-friendly meal, this recipe delivers every time. Once you try it, you’ll appreciate how versatile and satisfying such a simple dish can be—and it may just become one of your go-to recipes.

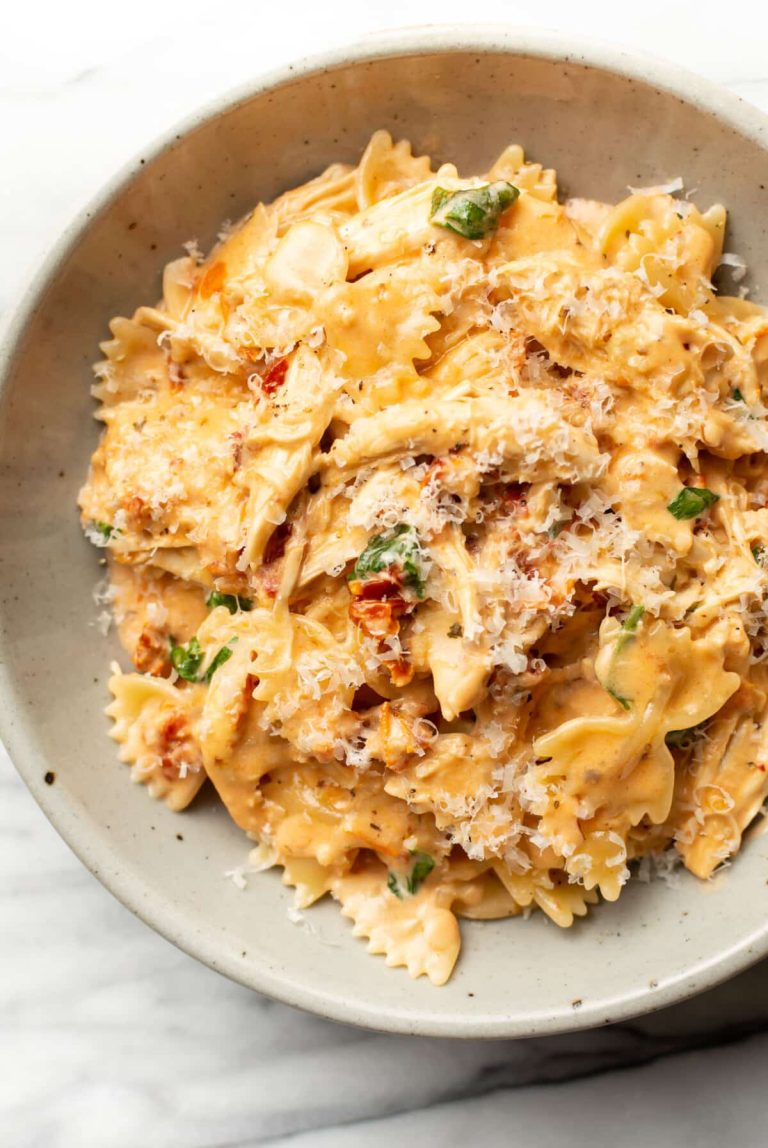
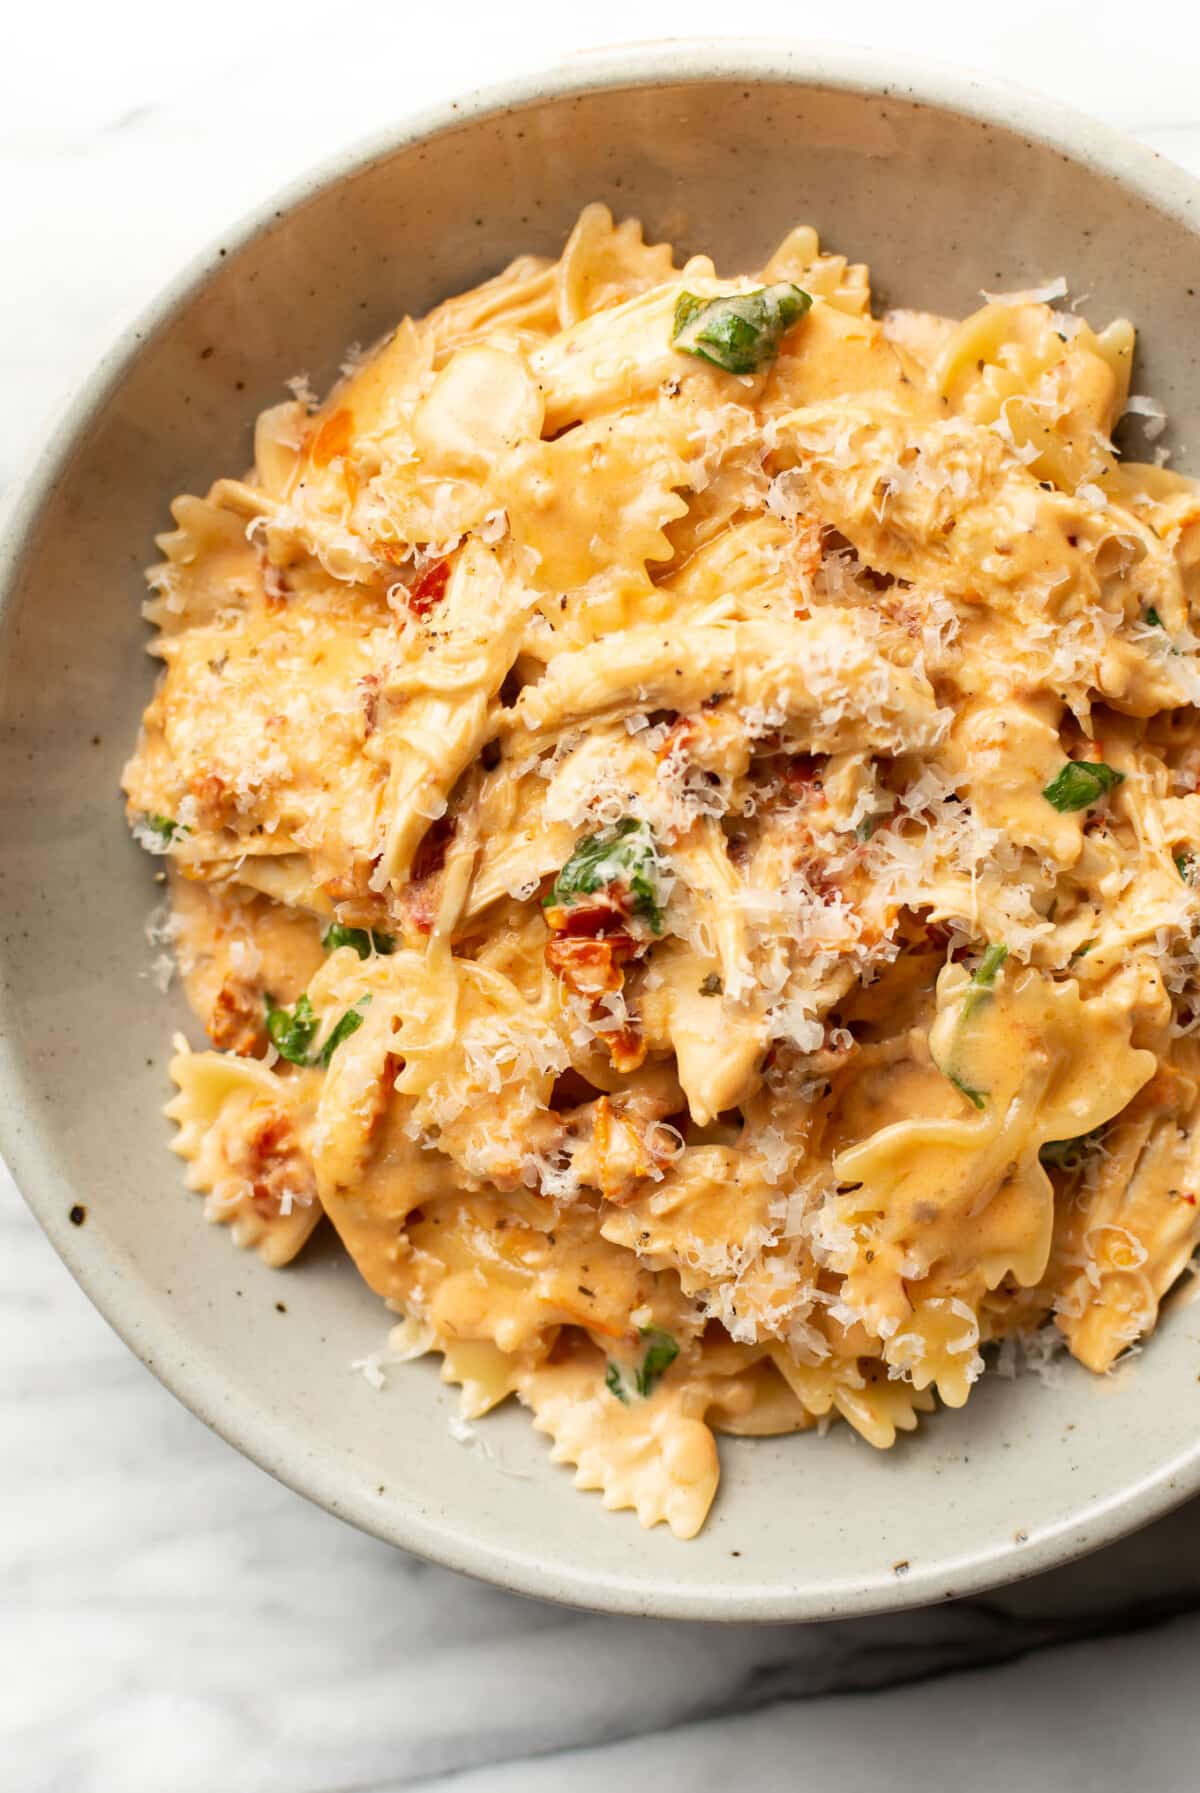
Marry Me Chicken Pasta is a rich, creamy, and flavor-packed dish that has taken the internet by storm—and for good reason. The name comes from its irresistible taste, with many claiming it’s so good it could inspire a marriage proposal. Combining tender chicken, a velvety cream sauce, tangy sun-dried tomatoes, and perfectly cooked pasta, this dish delivers bold, comforting flavors in every bite.

What makes this recipe stand out is its perfect balance of creamy, savory, and slightly tangy elements. The garlic, tomato paste, and herbs create depth, while the Parmesan cheese and cream bring everything together into a luscious sauce. Whether you’re cooking for a special occasion or simply want to elevate your weeknight dinner, this Marry Me Chicken Pasta is guaranteed to impress.


Marry Me Chicken Pasta Recipe ( Yield: 4 Serving )

Ingredients

  • 8 ounces uncooked pasta
  • 2 tablespoons butter
  • 1/2 tablespoon flour
  • 3–4 cloves garlic, minced
  • 1 tablespoon tomato paste
  • 1/3 cup dry white wine or chicken broth
  • 1 cup heavy/whipping cream
  • 1/3 cup sun-dried tomatoes, chopped if needed
  • 1/2 teaspoon dried oregano
  • 1/4 teaspoon crushed red pepper flakes
  • 2 cups cooked or rotisserie chicken, shredded
  • 1/3 cup freshly grated Parmesan cheese, plus more for serving
  • 1 small handful fresh basil, torn or chopped
  • Salt and pepper, to taste

Instructions

Cook the pasta

Bring a large pot of salted water to a boil. Add the pasta and cook according to package instructions until al dente. Before draining, reserve about 1/2 cup of pasta water, then drain and set aside.

Start the sauce base

In a large skillet over medium heat, melt the butter. Once melted, sprinkle in the flour and whisk continuously for about 1 minute to create a light roux. This step helps thicken the sauce later.

Add garlic and tomato paste

Stir in the minced garlic and cook for about 30 seconds until fragrant. Add the tomato paste and cook for another 1–2 minutes, stirring frequently, until it deepens in color and develops a richer flavor.

Deglaze the pan

Pour in the white wine (or chicken broth) and stir well, scraping up any bits from the bottom of the pan. Let it simmer for 2–3 minutes until slightly reduced.

Create the creamy sauce

Slowly pour in the heavy cream while stirring. Bring the mixture to a gentle simmer and let it cook for 4–5 minutes, allowing it to thicken slightly.

Add flavor components

Stir in the sun-dried tomatoes, dried oregano, and crushed red pepper flakes. These ingredients add a tangy, herby, and slightly spicy kick to the sauce.

Incorporate the chicken

Add the shredded cooked chicken to the skillet and stir to coat it in the sauce. Let it simmer for a few minutes so the chicken absorbs the flavors.

Add Parmesan cheese

Stir in the grated Parmesan cheese until it melts completely into the sauce, making it rich and creamy.

Combine with pasta

Add the cooked pasta to the skillet and toss everything together until evenly coated. If the sauce is too thick, add a splash of reserved pasta water to loosen it.

Finish with herbs and seasoning

Stir in the fresh basil and season with salt and pepper to taste. Adjust flavors as needed.

Serve and garnish

Remove from heat and serve immediately. Top with extra Parmesan cheese and more fresh basil for a beautiful and flavorful finish.

2. Tips for Perfect Marry Me Chicken Pasta

For the best results, use freshly grated Parmesan cheese rather than pre-packaged varieties. Fresh cheese melts more smoothly and enhances the overall creaminess of the sauce.

Don’t skip the step of cooking the tomato paste. Allowing it to caramelize slightly brings out a deeper, more complex flavor that elevates the entire dish.

Sun-dried tomatoes are a key ingredient in this recipe, providing a tangy contrast to the rich cream sauce. If they are packed in oil, you can use a bit of that oil for extra flavor when cooking.

Control the thickness of your sauce by adjusting with pasta water. Adding it gradually helps you achieve the perfect silky consistency without making the sauce too thin.

Finally, balance is everything. Taste as you go and adjust seasoning carefully, especially since Parmesan cheese and sun-dried tomatoes both contribute saltiness.

3. Frequently Asked Questions

Why is it called “Marry Me Chicken Pasta”?

The name comes from its rich, irresistible flavor. It’s often joked that the dish is so delicious it could inspire someone to propose after tasting it.

Can I use fresh chicken instead of rotisserie chicken?

Yes, you can cook and shred your own chicken breast or thighs. Simply season and cook them beforehand, then add them to the sauce as directed.

What type of pasta works best for this recipe?

This dish works well with many pasta shapes such as penne, rigatoni, or fettuccine. Choose one that holds sauce well for the best texture.

Can I make this recipe without wine?

Absolutely. Chicken broth is a great substitute and still provides depth of flavor without the use of alcohol.

How can I make this dish spicier or milder?

Adjust the amount of crushed red pepper flakes to your taste. You can increase it for more heat or omit it entirely for a milder version.

4. Nutrition Information

Nutrient Amount per Serving
Calories 590 kcal
Protein 34 g
Carbohydrates 48 g
Fat 30 g
Saturated Fat 16 g
Fiber 3 g
Sugar 4 g
Sodium 520 mg

Marry Me Chicken Pasta is more than just a trendy recipe—it’s a comforting, flavor-rich dish that brings together creamy textures, savory chicken, and bold, tangy accents. It’s easy enough to make on a weeknight but impressive enough to serve for special occasions.

Once you try it, you’ll understand why it has become such a beloved favorite. With its perfect balance of flavors and satisfying richness, this dish is sure to earn a permanent place in your recipe rotation.

Italian cuisine is famous for transforming simple ingredients into comforting, flavorful meals that bring people together. Ground beef is one of the most versatile ingredients in Italian cooking because it adds rich flavor, hearty texture, and satisfying protein to countless classic dishes.

If you are looking for comforting meals that taste like they took hours to make but are surprisingly simple, these easy ground beef Italian recipes deserve a place on your menu.

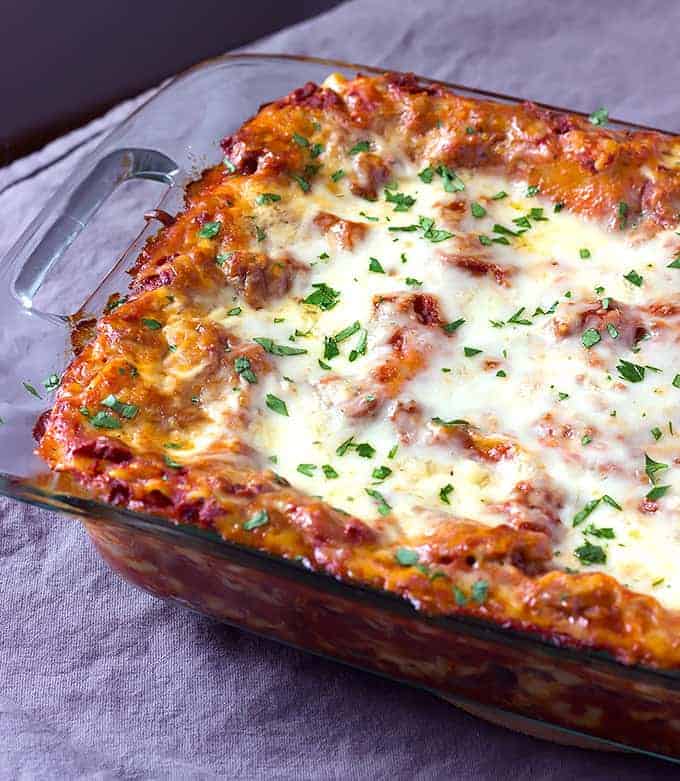
1. Lasagna Recipe

Lasagna is one of the most beloved Italian comfort foods in the world. Layers of tender pasta, seasoned ground beef, rich tomato sauce, creamy cheese, and melted mozzarella create a dish that is both hearty and satisfying.

The flavor combination is what makes lasagna so irresistible. The savory beef pairs perfectly with the slightly sweet tomato sauce, while the cheese adds richness and a creamy texture. Every bite offers a wonderful balance of flavors and textures.

Despite its impressive appearance, lasagna is surprisingly easy to make. Most of the work involves layering ingredients, making it an excellent choice for family dinners, meal prep, or special occasions.

View Recipe

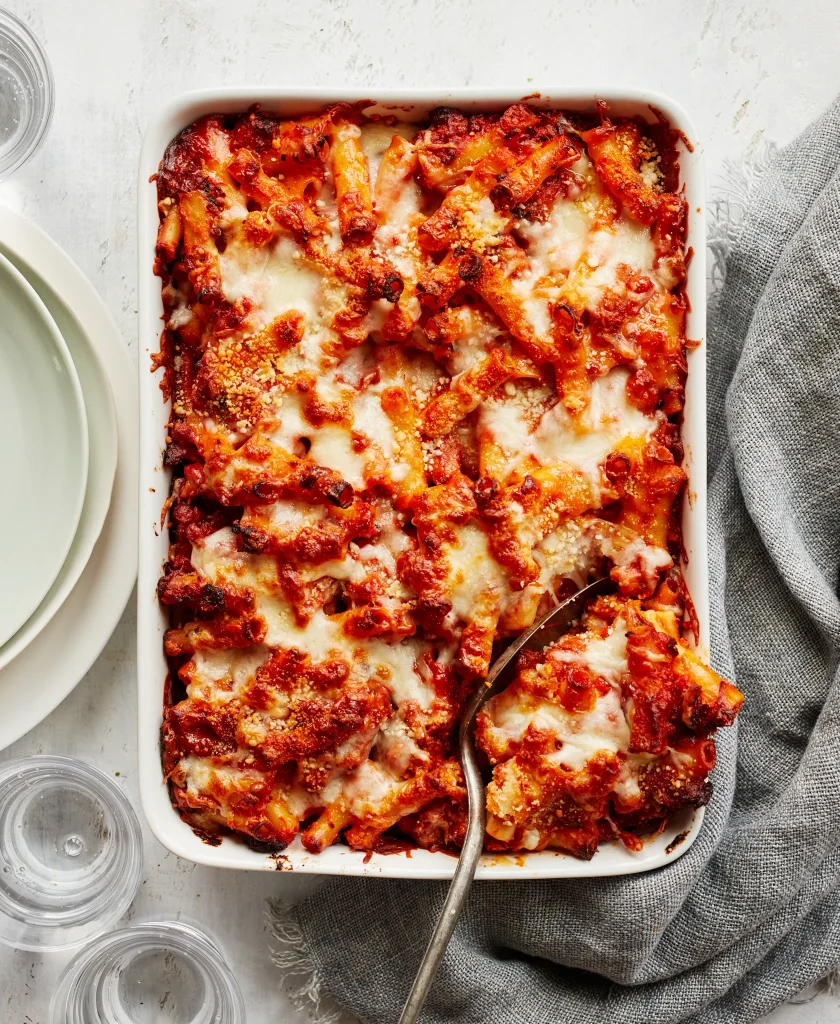
2. Baked Ziti Recipe

Baked ziti is often described as a simpler cousin of lasagna. It delivers many of the same comforting flavors but requires less assembly and preparation.

This dish combines pasta, seasoned ground beef, tomato sauce, and plenty of melted cheese. The pasta absorbs the flavors of the sauce while baking, creating a rich and delicious meal with a perfectly cheesy finish.

Baked ziti is easy because there is no need to carefully layer ingredients. Everything comes together quickly in one baking dish, making it ideal for busy weeknights when you still want a homemade Italian dinner.

View Recipe

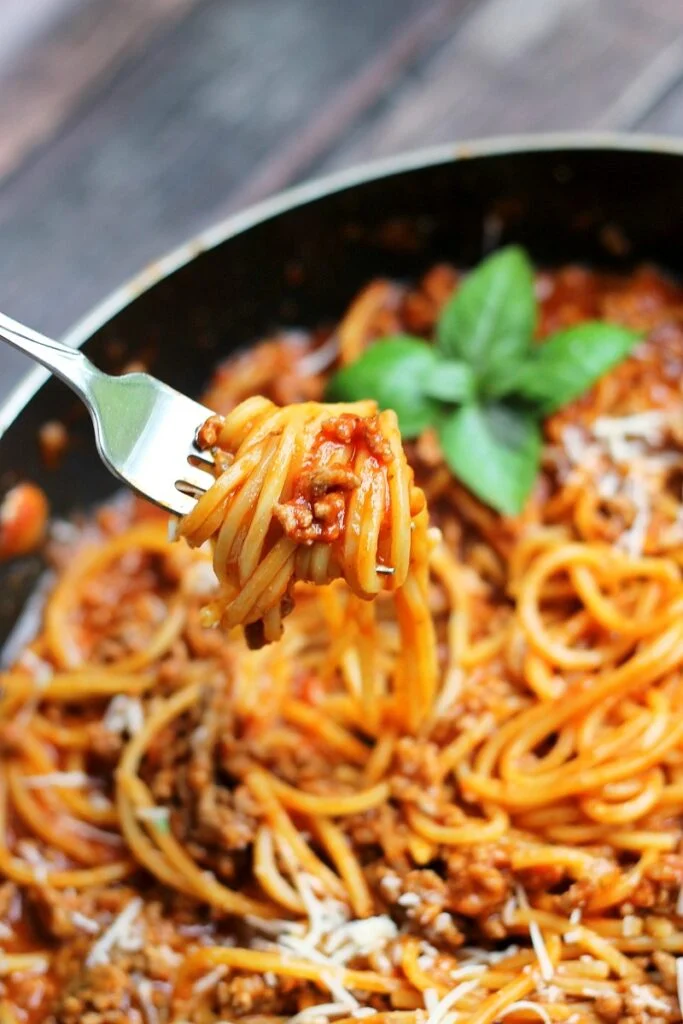
3. Spaghetti with Meat Sauce

Spaghetti with meat sauce is a timeless classic that never goes out of style. The combination of tender spaghetti noodles and a hearty ground beef tomato sauce creates a meal that is simple, comforting, and incredibly satisfying.
The beef adds depth and richness to the sauce, while garlic, herbs, and tomatoes provide classic Italian flavor. The result is a dish that feels both familiar and comforting.

One reason this recipe remains so popular is its simplicity. The sauce can simmer while the pasta cooks, allowing dinner to come together with minimal effort. It is an easy meal that consistently delivers great flavor.

View Recipe

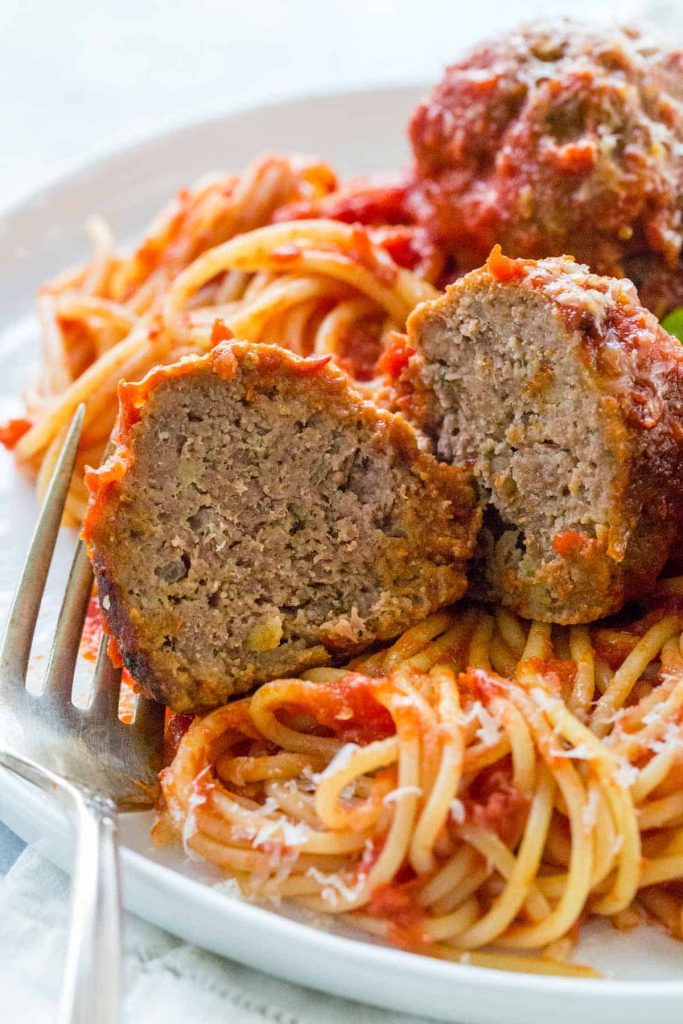
4. Italian Meatballs Recipe

Italian meatballs are a true crowd-pleaser. These flavorful beef meatballs are often served with pasta, tucked into sandwiches, or enjoyed on their own with marinara sauce.

The appeal of Italian meatballs comes from their juicy texture and savory flavor. Seasonings, herbs, and cheese work together to create meatballs that are tender and packed with taste.

They are considered easy because the ingredients are straightforward and the preparation process is simple. Once shaped, the meatballs cook quickly and can be paired with a variety of side dishes for a complete meal.

View Recipe

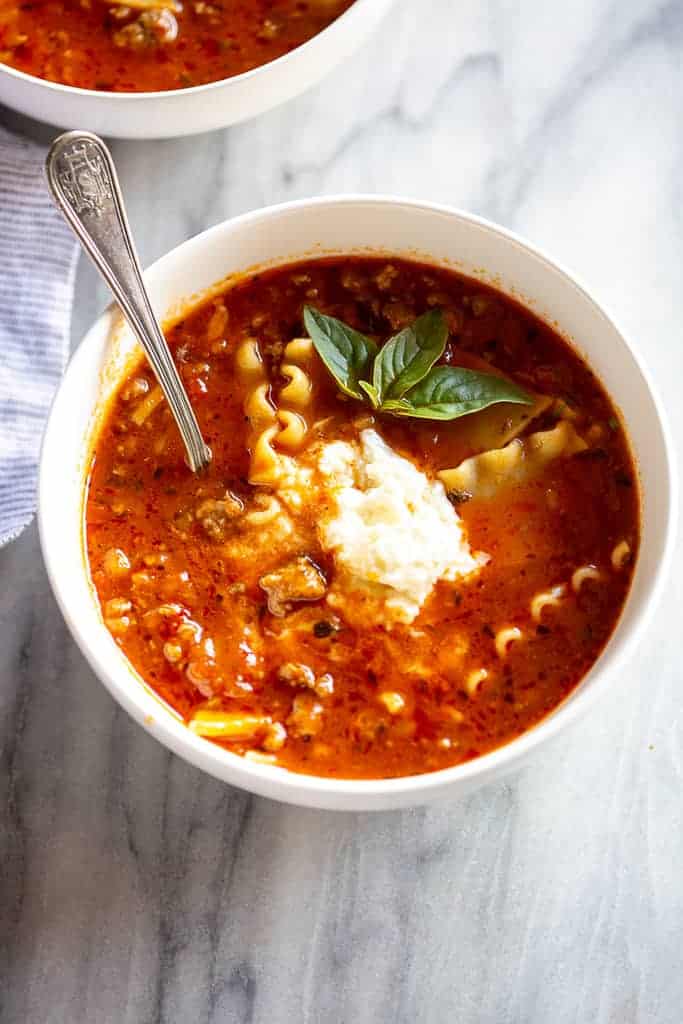
5. Lasagna Soup Recipe

Lasagna soup takes everything people love about traditional lasagna and transforms it into a warm, comforting bowl of soup. It features ground beef, tomato broth, pasta, and creamy cheese toppings that capture the essence of classic lasagna.

The flavors are rich and satisfying, with the beef and tomatoes creating a hearty base while the cheese adds creaminess and indulgence. Every spoonful delivers familiar lasagna flavors in a lighter and more approachable format.

Lasagna soup is easier than traditional lasagna because there is no layering required. Everything cooks together in a single pot, making cleanup simple and preparation much faster.

View Recipe

6. Stuffed Shells Recipe

Stuffed shells are both beautiful and comforting. Large pasta shells are filled with a delicious mixture and baked in sauce until hot and bubbly.

When ground beef is included, the filling becomes even heartier and more satisfying. The combination of pasta, cheese, beef, and tomato sauce creates a meal packed with Italian flavor.

Many people assume stuffed shells are complicated, but they are actually quite manageable. The shells are easy to fill, and the rest of the dish comes together with basic ingredients, making it perfect for family dinners and gatherings.

View Recipe

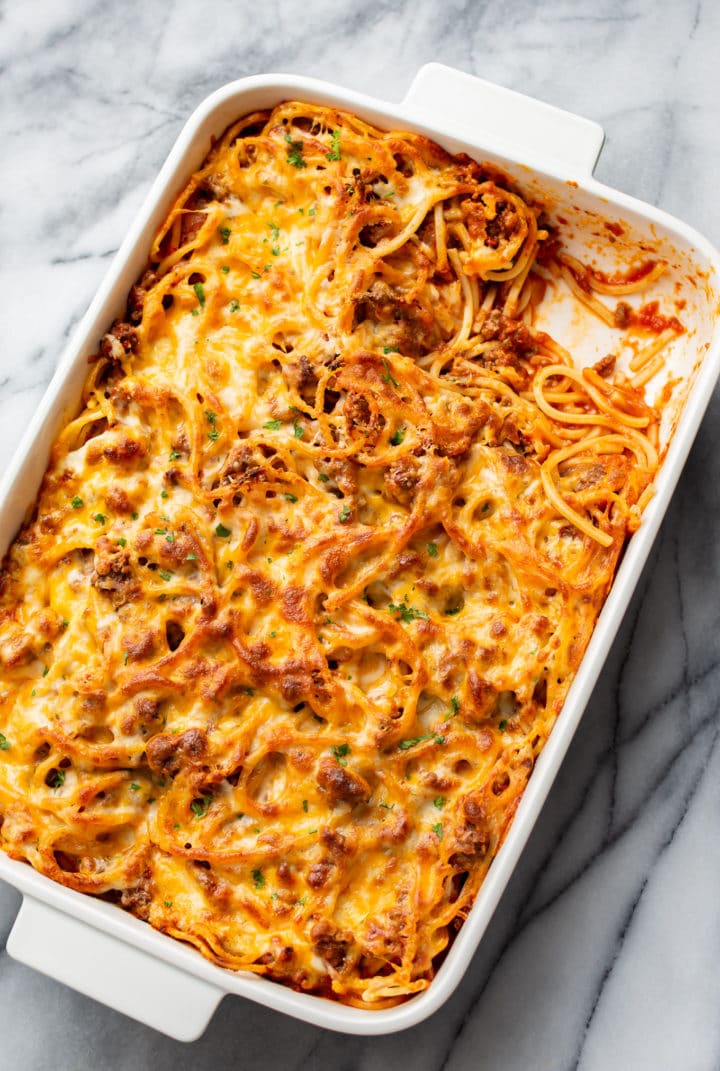
7. Baked Spaghetti Recipe

Baked spaghetti transforms a simple pasta dinner into a comforting casserole-style meal. Combining spaghetti, seasoned ground beef, sauce, and cheese creates a dish that is rich, hearty, and incredibly satisfying.

The baking process allows the flavors to blend together while creating a delicious cheesy topping. The result is a meal that feels extra special while still being easy to prepare.

This recipe is popular because it uses ingredients many people already have in their kitchens. It is a great way to turn an everyday pasta dish into something that feels warm, comforting, and family-friendly.

View Recipe

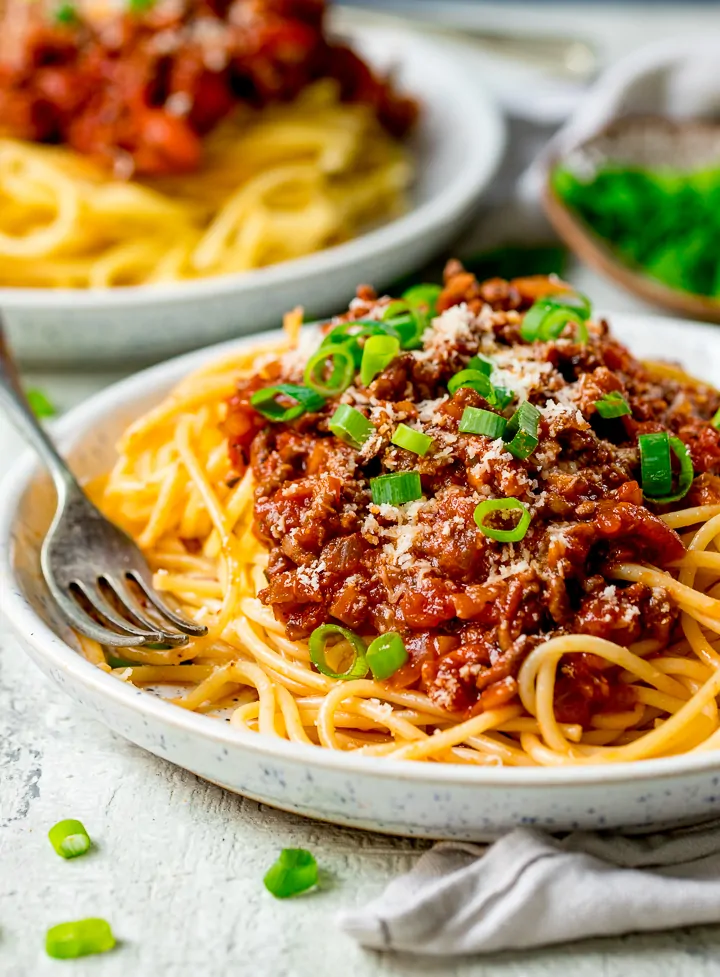
8. Spaghetti Bolognese

Spaghetti Bolognese is one of the most recognized Italian-inspired pasta dishes worldwide. The rich meat sauce is known for its deep flavor, hearty texture, and satisfying combination of ground beef and tomatoes.

Unlike simpler pasta sauces, Bolognese develops a richer and more complex taste as the ingredients cook together. The beef becomes tender while the sauce gains incredible depth and richness.

Even though it tastes like a restaurant-quality meal, Spaghetti Bolognese remains relatively easy to prepare. Most of the cooking time is hands-off, allowing the sauce to slowly develop flavor while requiring minimal attention.

View Recipe

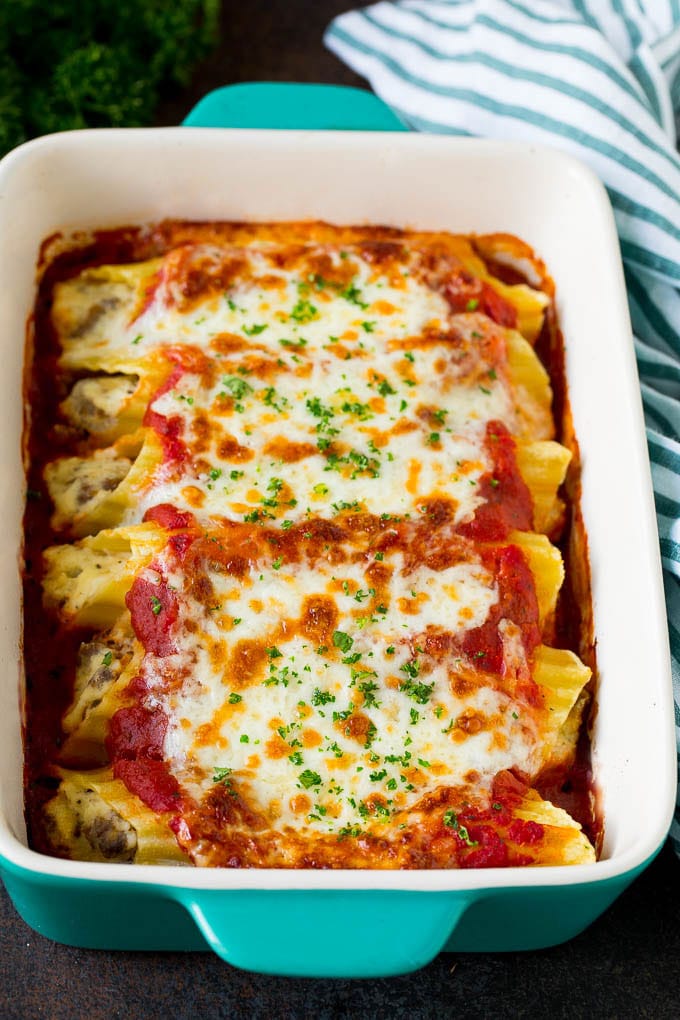
9. Manicotti Recipe

Manicotti is a classic baked pasta dish featuring large pasta tubes filled with flavorful ingredients and covered in sauce and cheese. Adding seasoned ground beef creates a heartier version that is perfect for family dinners.

The combination of tender pasta, rich beef filling, savory sauce, and melted cheese makes every bite satisfying. It is the type of meal that feels comforting and indulgent without being overly complicated.

Many home cooks appreciate manicotti because it looks impressive but relies on simple ingredients and easy preparation methods. It is a great option when you want a dish that feels special without requiring advanced cooking skills.

View Recipe

10. Rigatoni Bolognese

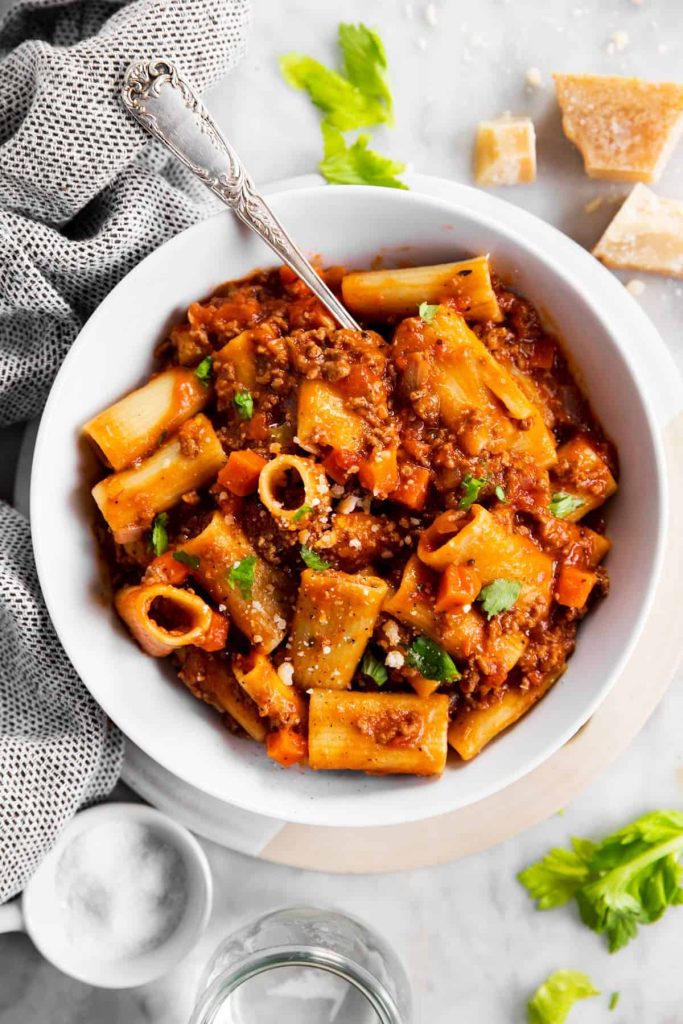
Rigatoni Bolognese combines one of Italy’s most beloved pasta shapes with a rich and hearty beef sauce. The ridges of rigatoni are perfect for holding onto the sauce, ensuring every bite is packed with flavor.

The ground beef creates a savory and satisfying base, while tomatoes, herbs, and seasonings provide the classic Italian taste people love. The result is a pasta dish that feels comforting, filling, and deeply flavorful.

This recipe is easy because the pasta shape naturally pairs well with thick sauces, making assembly simple. It is a reliable dinner option that delivers restaurant-style flavor with everyday ingredients.

View Recipe

Final Thoughts

Ground beef and Italian cooking are a perfect match. Together, they create meals that are comforting, flavorful, and satisfying while remaining approachable for home cooks of all skill levels.

Whether you are preparing a quick weeknight dinner or planning a comforting weekend meal, these easy Italian ground beef recipes offer delicious options that never disappoint.