Author

Clifford A. Wright

Browsing

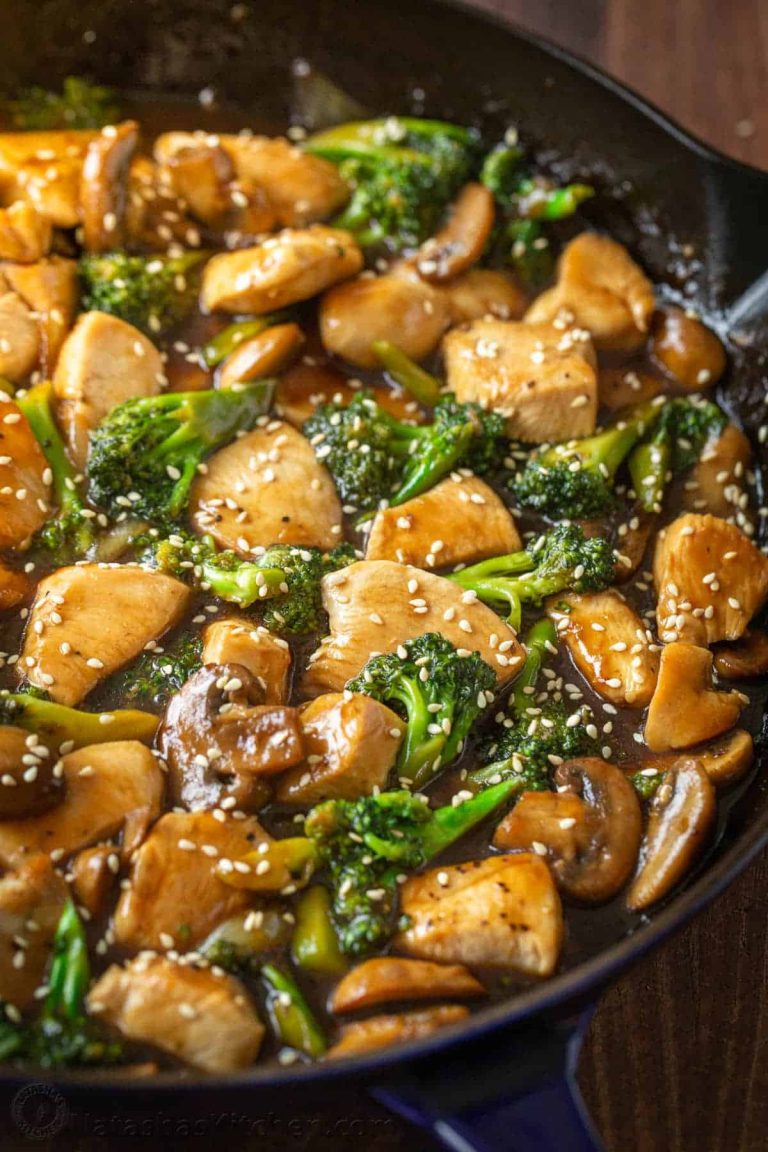
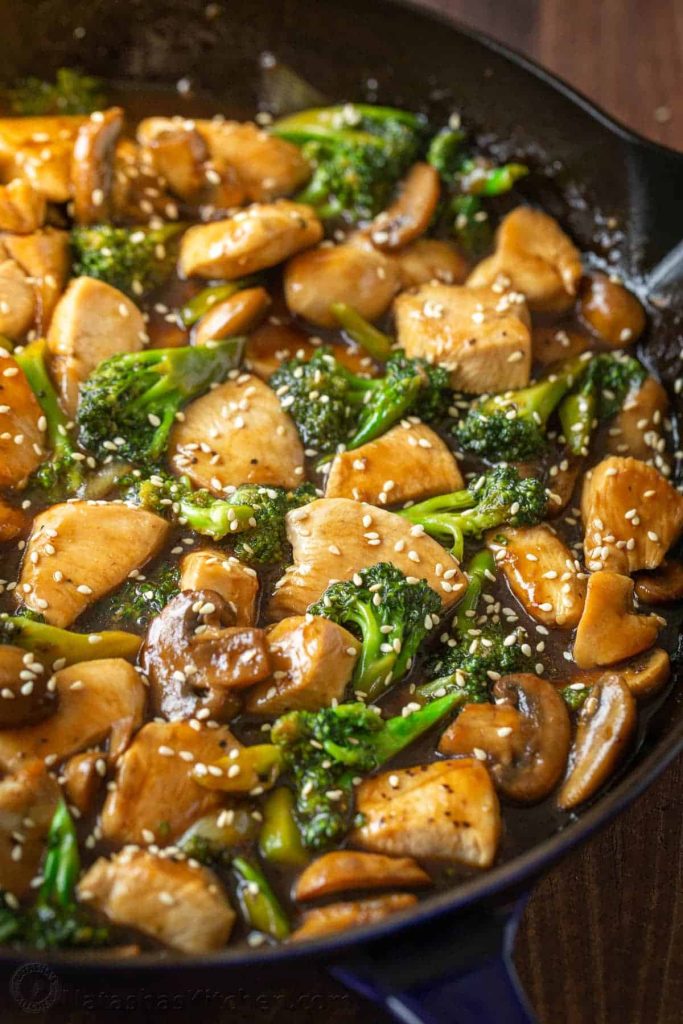
Chicken and Broccoli Stir Fry is a classic takeout favorite that’s surprisingly easy to make at home. Tender pieces of chicken, crisp broccoli, mushrooms, and onions are coated in a rich homemade sauce that’s savory, slightly sweet, and full of fresh garlic and ginger flavor.

This recipe is perfect for busy weeknights because it uses simple ingredients and cooks quickly in one skillet or wok. Serve it over steamed rice, brown rice, noodles, or cauliflower rice for a complete meal that’s healthier and fresher than takeout.
1. Chicken and Broccoli Stir Fry Recipe (Yield: 4 Servings)

Ingredients

Chicken and Broccoli

  • 1 pound boneless, skinless chicken breast, cut into ¾-inch pieces
  • 2 tablespoons cooking oil (extra light olive oil recommended), divided
  • 1 pound broccoli florets (about 5 cups)
  • 1 small yellow onion, sliced into strips
  • ½ pound white button mushrooms, thickly sliced

Stir Fry Sauce Ingredients

  • ⅔ cup low-sodium chicken broth
  • 3 tablespoons low-sodium soy sauce (or tamari for gluten-free)
  • 2 tablespoons packed light brown sugar (or honey, to taste)
  • 1 tablespoon cornstarch
  • 1 tablespoon sesame oil
  • 1 teaspoon fresh ginger, peeled and grated
  • 1 teaspoon grated garlic (about 2 small cloves)
  • ¼ teaspoon black pepper, plus more for seasoning the chicken

Instructions

In a small bowl or measuring cup, whisk together the chicken broth, soy sauce, brown sugar, cornstarch, sesame oil, grated ginger, garlic, and black pepper until the cornstarch is completely dissolved. Set the sauce aside.

Pat the chicken pieces dry with paper towels and lightly season them with black pepper.

Heat 1 tablespoon of the cooking oil in a large skillet or wok over medium-high heat.

Add the chicken in a single layer. Cook for about 5 to 6 minutes, stirring occasionally, until the pieces are golden brown and cooked through. Avoid overcrowding the pan so the chicken browns instead of steaming.

Transfer the cooked chicken to a clean plate and keep it nearby.

Add the remaining tablespoon of oil to the skillet.

Add the broccoli florets and cook for about 3 minutes, stirring frequently. If the broccoli seems too firm, add 2 tablespoons of water and cover the pan for 1 minute to lightly steam it while maintaining its bright green color.

Add the sliced onions and mushrooms. Continue cooking for another 4 to 5 minutes until the onions soften and the mushrooms release most of their moisture.

Return the cooked chicken to the skillet with the vegetables.

Whisk the prepared sauce one more time because the cornstarch may have settled.

Pour the sauce evenly over the chicken and vegetables.

Stir continuously for about 2 to 3 minutes as the sauce comes to a gentle simmer. The cornstarch will thicken the sauce until it coats every piece of chicken and every vegetable with a glossy finish.

Taste and adjust the seasoning if needed by adding a little extra soy sauce or a drizzle of honey to suit your preference.

Remove the skillet from the heat immediately once the sauce has thickened and the broccoli remains crisp-tender.

Serve hot over steamed jasmine rice, brown rice, noodles, or cauliflower rice. Garnish with sesame seeds or sliced green onions if desired.
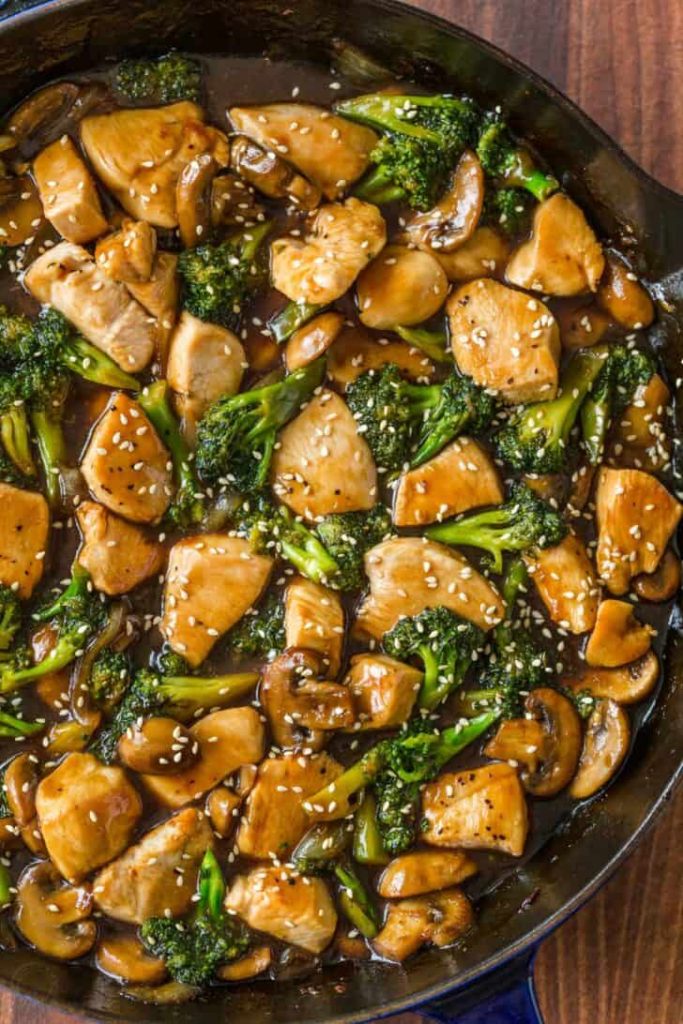
2. Tips for Perfect Chicken and Broccoli Stir Fry

Cut the chicken into evenly sized pieces so everything cooks at the same rate and stays tender.

Pat the chicken dry before cooking. Dry chicken browns much better and develops more flavor than wet chicken.

Use fresh broccoli whenever possible. Fresh florets hold their texture better during stir-frying and stay bright green.

Prepare the sauce before heating the skillet. Stir-frying moves quickly, so having everything ready helps prevent overcooking.

Cook the vegetables until they are crisp-tender instead of soft. They should still have a slight bite for the best texture.

Whisk the sauce again just before adding it to the pan because the cornstarch naturally settles to the bottom.

Cook over medium-high heat for the best stir-fry flavor and to prevent the vegetables from becoming watery.

Serve immediately after cooking while the vegetables remain crisp and the sauce is silky and glossy.

3. Frequently Asked Questions

Can I use chicken thighs instead of chicken breast?

Yes. Boneless, skinless chicken thighs work wonderfully and produce even juicier results.

Can I use frozen broccoli?

Yes. Thaw and drain it well before cooking to avoid adding excess moisture to the stir fry.

How do I make this recipe gluten-free?

Use tamari or certified gluten-free soy sauce instead of regular soy sauce, and verify that all other ingredients are gluten-free.

Can I prepare this meal ahead of time?

Yes. You can chop the vegetables, cut the chicken, and mix the sauce a day ahead. Store everything separately in the refrigerator until you’re ready to cook.

What other vegetables work well in this recipe?

Bell peppers, carrots, snap peas, zucchini, baby corn, bok choy, or water chestnuts are all excellent additions that complement the sauce beautifully.

4. Nutrition Information

Nutrient Amount Per Serving
Calories 355
Protein 34 g
Total Fat 14 g
Saturated Fat 2 g
Carbohydrates 21 g
Fiber 4 g
Sugar 10 g
Sodium 640 mg
Cholesterol 75 mg
Iron 2 mg

This Chicken and Broccoli Stir Fry Recipe is an easy homemade dinner that’s packed with tender chicken, colorful vegetables, and a rich, flavorful sauce. Ready in about 30 minutes, it’s a healthier alternative to takeout without sacrificing the bold flavors everyone loves.

With fresh ingredients, simple preparation, and endless customization options, this stir fry is a recipe you’ll reach for again and again. Pair it with your favorite rice or noodles for a satisfying meal that’s perfect for busy weeknights, family dinners, or meal prep.
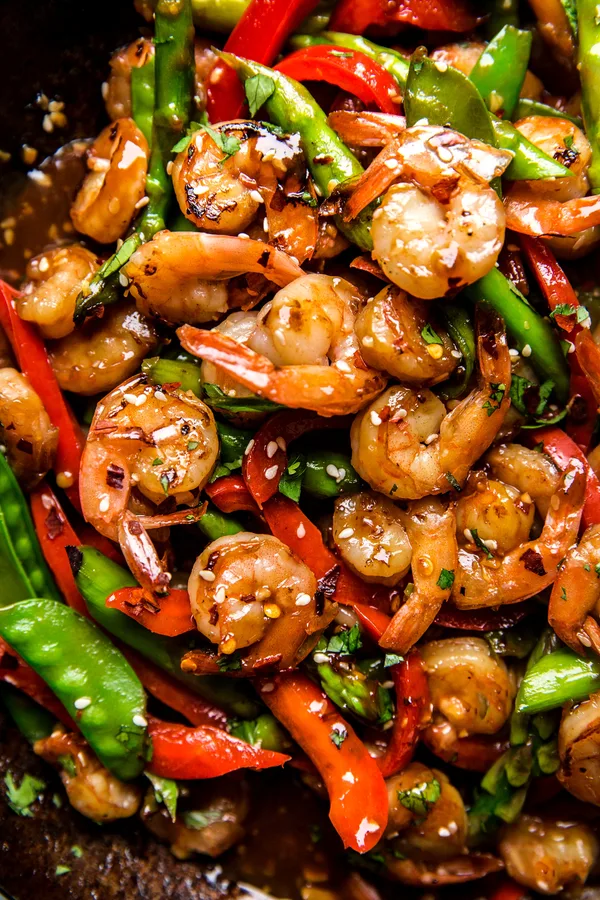
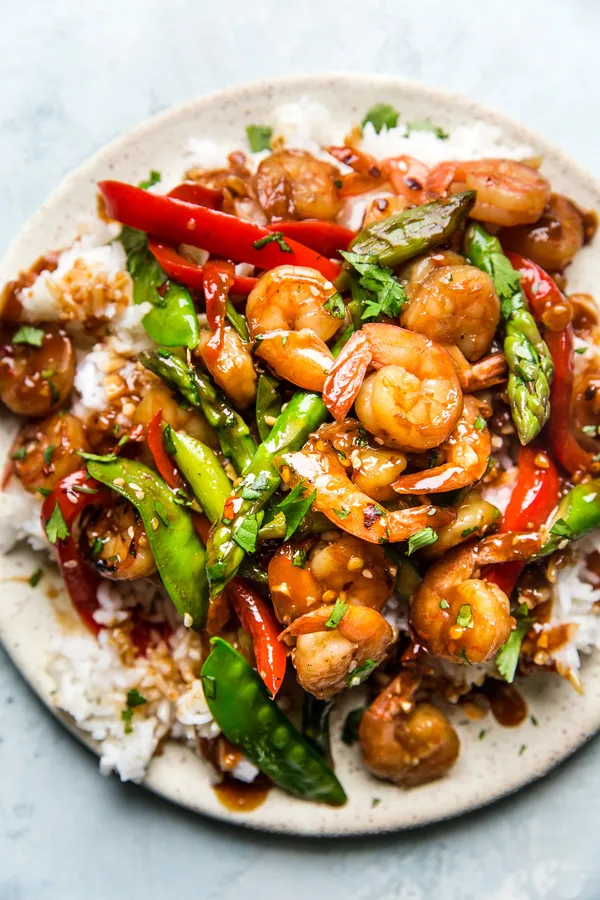
Shrimp Stir Fry is one of the easiest dinners you can make when you’re short on time but still want a fresh, homemade meal. Tender shrimp cook in just a few minutes and are paired with colorful vegetables in a savory sauce that’s slightly sweet with a touch of heat.

This recipe is perfect for busy weeknights because everything cooks in a single skillet or wok. Serve it over steamed rice, brown rice, quinoa, or noodles for a complete meal that the whole family will enjoy.

1. Shrimp Stir Fry Recipe (Yield: 6 Servings)

Ingredients

  • 2 pounds large raw tail-on shrimp, peeled and deveined
  • 1 cup snow peas
  • 1 red bell pepper, thinly sliced
  • ½ pound asparagus, trimmed and cut into 2-inch pieces
  • 1 tablespoon vegetable oil
  • 6 garlic cloves, minced
  • ¼ cup low-sodium soy sauce or tamari
  • 2 tablespoons light brown sugar
  • 1 tablespoon toasted sesame oil
  • 1 tablespoon chili sauce, such as sambal oelek
  • 1 tablespoon cornstarch

Instructions

Pat the shrimp dry with paper towels to remove excess moisture. Dry shrimp sear better and develop more flavor during cooking.

In a small bowl, whisk together the soy sauce, brown sugar, sesame oil, chili sauce, and cornstarch until the cornstarch is fully dissolved. Set the sauce aside.

Heat a large wok or heavy skillet over medium-high heat until hot. Add the vegetable oil and swirl to coat the pan.

Add the asparagus and cook for about 3 minutes, stirring frequently. Since asparagus takes slightly longer to cook than the other vegetables, giving it a head start helps everything finish at the same time.

Add the sliced bell pepper and snow peas. Continue stir-frying for another 2 to 3 minutes until the vegetables become crisp-tender while still retaining their bright color.

Transfer the vegetables to a clean plate and set aside.

Add the minced garlic to the same skillet and cook for about 30 seconds, stirring constantly until fragrant. Be careful not to let it brown.

Add the shrimp in a single layer. Cook for about 1½ to 2 minutes on the first side until they begin turning pink.

Flip the shrimp and cook for another 1 to 2 minutes. The shrimp should be just cooked through and opaque. Avoid overcooking, as shrimp become rubbery very quickly.

Return the cooked vegetables to the skillet with the shrimp.

Give the prepared sauce another quick whisk, then pour it into the pan.

Stir everything together continuously for about 2 to 3 minutes as the sauce comes to a gentle simmer and thickens enough to coat the shrimp and vegetables evenly.

Taste the sauce and adjust the seasoning if desired. Add a splash of soy sauce for extra saltiness or a little more chili sauce if you enjoy additional heat.

Remove the skillet from the heat immediately once the sauce has thickened.

Serve the shrimp stir fry hot over steamed rice, jasmine rice, brown rice, cauliflower rice, or noodles. Garnish with sliced green onions, toasted sesame seeds, or a squeeze of fresh lime juice if desired.

2. Tips for Perfect Shrimp Stir Fry

Use large or jumbo shrimp for the best texture. They stay juicy during stir-frying and are less likely to overcook.

Pat the shrimp completely dry before cooking. Removing excess moisture helps the shrimp sear instead of steam.

Prepare all of your ingredients before turning on the stove. Stir-frying happens quickly, so having everything ready makes cooking much easier.

Cook the vegetables until they are crisp-tender rather than soft. They should still have a slight bite and vibrant color.

Don’t overcrowd the pan. If necessary, cook the shrimp in two batches so they brown evenly instead of releasing too much liquid.

Whisk the sauce again just before pouring it into the skillet. Cornstarch settles quickly, and mixing it ensures the sauce thickens properly.

Remove the shrimp from the heat as soon as they become opaque. Overcooked shrimp lose their tender texture.

Serve the stir fry immediately after cooking. Fresh stir-fry tastes best when the vegetables are crisp and the sauce is glossy.

3. Frequently Asked Questions

Can I use frozen shrimp?

Yes. Thaw the shrimp completely and pat them dry before cooking to prevent excess water from thinning the sauce.

Can I substitute different vegetables?

Absolutely. Broccoli, mushrooms, zucchini, carrots, snap peas, baby corn, or bok choy all work well in this recipe.

Can I make this recipe ahead of time?

You can prepare the sauce and chop the vegetables ahead of time, but the stir fry is best cooked just before serving for the freshest texture.

How do I store leftovers?

Store leftover shrimp stir fry in an airtight container in the refrigerator for up to three days. Reheat gently in a skillet over medium heat until warmed through.

Is this recipe gluten-free?

It can be. Simply use tamari or a certified gluten-free soy sauce and confirm that your chili sauce is also gluten-free.

4. Nutrition Information

Nutrient Amount Per Serving
Calories 285
Protein 36 g
Total Fat 8 g
Saturated Fat 1.5 g
Carbohydrates 15 g
Fiber 3 g
Sugar 8 g
Sodium 720 mg
Cholesterol 285 mg
Iron 3 mg

This Shrimp Stir Fry Recipe is an easy meal that’s packed with colorful vegetables, tender shrimp, and a flavorful homemade sauce. It comes together in about 30 minutes, making it a perfect option for busy weeknights while still delivering fresh, restaurant-quality flavor.

Once you’ve mastered this simple recipe, you can easily customize it with your favorite vegetables or adjust the spice level to suit your taste. Serve it over rice or noodles for a satisfying homemade dinner that’s quick, healthy, and sure to become a regular part of your meal rotation.

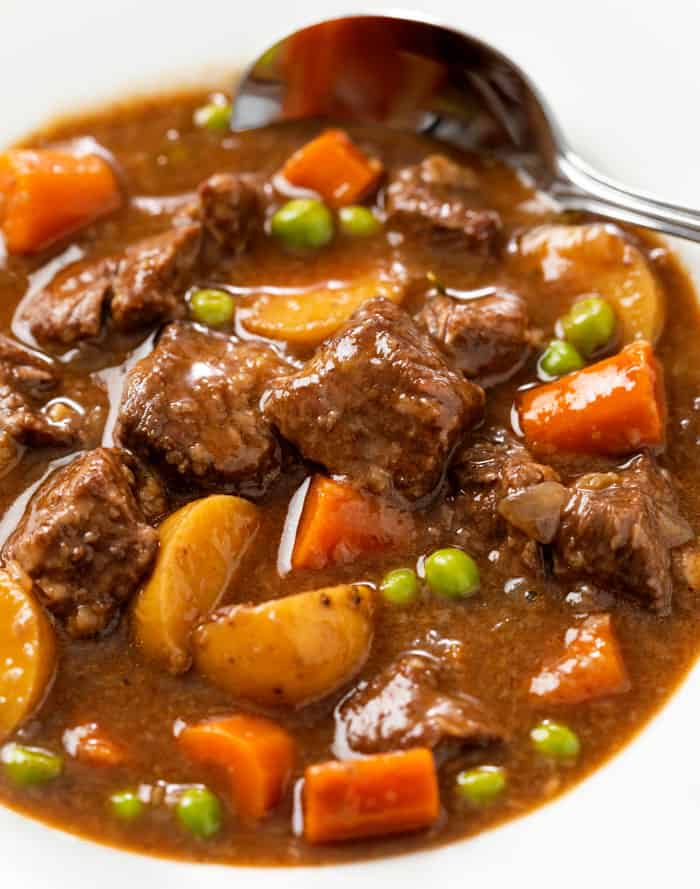
Slow Cooker Beef Stew is a classic comfort food that’s perfect for busy days. Tender beef, hearty vegetables, and a rich savory broth come together in the slow cooker to create a warm and satisfying meal the whole family will enjoy.

This easy recipe requires just a little prep before the slow cooker does the rest of the work. The result is a flavorful beef stew with melt-in-your-mouth meat and perfectly cooked vegetables that’s ideal for weeknight dinners or cozy weekends at home.

1. Slow Cooker Beef Stew Recipe (Yield: 6 Servings)

Ingredients

  • 2½ pounds beef stew meat (chuck roast, rump roast, or bottom round), cut into bite-sized pieces
  • ½ teaspoon black pepper
  • ½ teaspoon garlic salt
  • ½ teaspoon celery salt
  • ¼ cup all-purpose flour
  • 3–6 tablespoons olive oil
  • 3 tablespoons cold butter, divided
  • 2 cups yellow onions, diced
  • 4 cloves garlic, minced
  • 1 cup Cabernet Sauvignon or Merlot
  • 4 cups beef broth
  • 2 beef bouillon cubes
  • 2 tablespoons Worcestershire sauce
  • 3 tablespoons tomato paste
  • 5 medium carrots, cut into 1-inch chunks
  • 1 pound baby Yukon Gold potatoes, halved or quartered
  • 2 bay leaves
  • 1 sprig fresh rosemary
  • 1 cup frozen peas
  • ¼ cup cold water
  • 3 tablespoons cornstarch (optional, for thickening)

Instructions

Pat the beef dry with paper towels. Dry meat browns much better and develops deeper flavor. Season the beef evenly with the black pepper, garlic salt, and celery salt. Sprinkle the flour over the meat and toss until every piece is lightly coated.

Heat 3 tablespoons of olive oil in a large skillet over medium-high heat. If needed, add more oil while browning the beef in batches. Avoid overcrowding the pan so each piece develops a rich brown crust. Transfer the browned beef to the slow cooker as each batch is finished.

Reduce the heat to medium and add 1 tablespoon of butter to the same skillet. Add the diced onions and cook for about 5 minutes until softened and lightly golden. Stir in the minced garlic and cook for another minute until fragrant.

Pour the wine into the skillet to deglaze the pan, scraping up all of the flavorful browned bits from the bottom. Allow the wine to simmer for about 5 minutes to slightly reduce.

Whisk in the tomato paste until fully combined. Add the beef broth, Worcestershire sauce, and beef bouillon cubes. Stir until the bouillon dissolves completely.

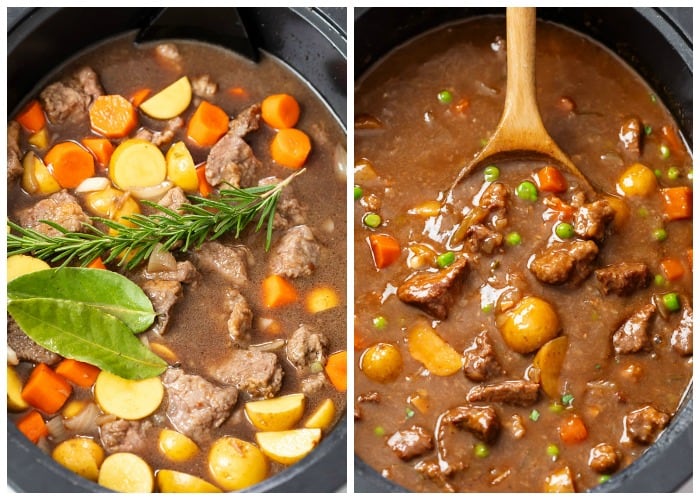
Pour the flavorful broth mixture over the beef in the slow cooker. Add the carrots, potatoes, bay leaves, and rosemary sprig. Stir everything together gently so the vegetables are coated in the broth.

Cover the slow cooker with the lid. Cook on LOW for 7 to 8 hours or on HIGH for 4 to 5 hours. The beef should become fork tender, and the vegetables should be perfectly cooked without falling apart.

About 30 minutes before serving, stir in the frozen peas. If you prefer a thicker stew, whisk together the cold water and cornstarch until smooth. Slowly pour the slurry into the slow cooker while stirring gently. Cover again and cook for another 20 to 30 minutes until the broth thickens.

Remove the rosemary sprig and bay leaves before serving. Stir in the remaining 2 tablespoons of cold butter until completely melted. The butter gives the broth a silky texture and adds extra richness.

Taste the stew and adjust the seasoning if needed. Serve hot with crusty bread, homemade biscuits, or warm dinner rolls for a comforting meal.

2. Tips for Perfect Slow Cooker Beef Stew

A well-marbled chuck roast is one of the best cuts for slow cooker stew because the connective tissue breaks down during cooking, creating incredibly tender beef.

Take the time to brown the meat before adding it to the slow cooker. This extra step creates deeper flavor and gives the finished stew a richer taste.

Use a dry red wine like Cabernet Sauvignon or Merlot for the broth. The alcohol cooks off while leaving behind wonderful depth and complexity.

Cut the carrots and potatoes into larger chunks so they hold their shape throughout the long cooking time.

Avoid opening the slow cooker lid too often. Every time the lid is removed, valuable heat escapes and increases the cooking time.

Fresh herbs like rosemary provide more natural flavor than dried herbs during slow cooking.

If your stew becomes too thick after adding the cornstarch slurry, simply stir in a little extra beef broth until you reach your desired consistency.

For even better flavor, make the stew a day ahead. The flavors continue to develop overnight, making leftovers even more delicious.

3. Frequently Asked Questions

Can I prepare this stew the night before?

Yes. You can brown the beef, prepare the broth mixture, and chop all the vegetables the night before. Store everything separately in the refrigerator, then assemble everything in the slow cooker the next morning.

What can I use instead of red wine?

If you prefer not to cook with wine, simply replace it with additional beef broth. A splash of balsamic vinegar or unsweetened grape juice can also add some depth to the broth.

Can I freeze leftover beef stew?

Absolutely. Allow the stew to cool completely before transferring it to freezer-safe containers. Freeze for up to three months. Thaw overnight in the refrigerator and reheat gently on the stovetop or in the microwave.

Why did my vegetables become too soft?

Vegetables cut into small pieces tend to cook faster during long slow cooking. Cutting them into larger chunks helps them stay tender while maintaining their texture.

What side dishes go well with beef stew?

Fresh dinner rolls, crusty artisan bread, garlic bread, mashed potatoes, buttered noodles, or a crisp green salad all pair beautifully with this hearty stew and help soak up the flavorful broth.

4. Nutrition Information

Nutrient Amount Per Serving
Calories 545
Protein 40 g
Carbohydrates 26 g
Fat 30 g
Saturated Fat 11 g
Cholesterol 135 mg
Sodium 980 mg
Fiber 5 g
Sugar 6 g
Potassium 1,180 mg
Iron 5 mg
Vitamin A 8,900 IU
Vitamin C 20 mg
Calcium 85 mg

This Slow Cooker Beef Stew Recipe is the kind of comforting meal that never goes out of style. Tender beef, wholesome vegetables, and a rich, savory broth come together with very little hands-on effort, making it perfect for busy weekdays or cozy weekends at home. It’s a satisfying dish that’s easy to prepare, easy to customize, and always a welcome addition to the dinner table.

Once you make this hearty stew, it’s likely to become a regular favorite in your meal rotation. Pair it with warm bread, enjoy the leftovers for lunch, or freeze a batch for another day. No matter how you serve it, this classic slow cooker recipe delivers homemade comfort in every bite.

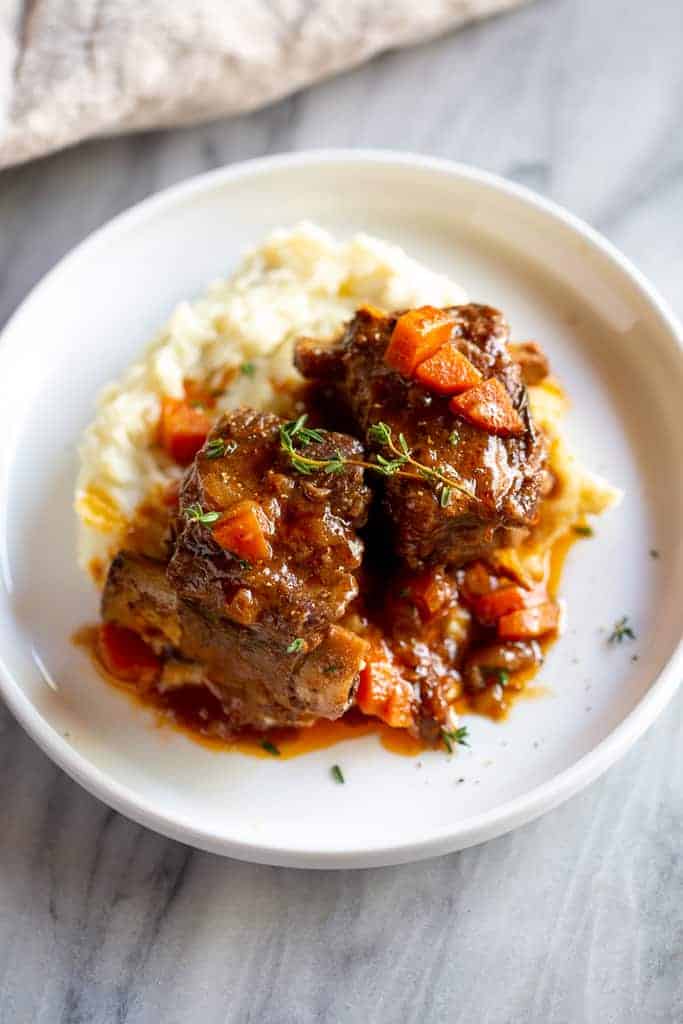
Braised Beef Short Ribs are a cozy and comforting dish that feels special but is easy to enjoy at home. When cooked slowly, the beef becomes very tender and full of rich flavor from the red wine, broth, vegetables, and herbs.

This recipe does take a few hours in the oven, but most of that time is hands-off. While the ribs cook, the sauce becomes deeper and tastier. Serve them with mashed potatoes, noodles, polenta, or roasted vegetables for a warm and satisfying meal.

1. Braised Beef Short Ribs Recipe (Yield: 4 Servings)

Ingredients

  • 8 whole beef short ribs, bone-in
  • 3 tablespoons olive oil
  • 1 yellow onion, diced
  • 3 carrots, chopped
  • Salt and black pepper, to taste
  • ¼ cup all-purpose flour
  • 1 cup dry red wine
  • 2½ cups low-sodium beef broth
  • 2 tablespoons tomato paste
  • 2 sprigs fresh thyme
  • 2 sprigs fresh rosemary

Instructions

Preheat your oven to 325°F (163°C).

Pat the beef short ribs dry with paper towels. Removing excess moisture helps the meat develop a rich brown crust during searing. Season all sides generously with salt and freshly ground black pepper.

Lightly coat each short rib with the all-purpose flour, shaking off any excess. The flour helps create a beautiful crust and slightly thickens the braising liquid as it cooks.

Heat the olive oil in a large Dutch oven or heavy oven-safe pot over medium-high heat.

Working in batches if necessary, sear the short ribs for about 2 to 3 minutes per side until deeply browned on all surfaces. Avoid overcrowding the pot, which can prevent proper browning. Transfer the browned ribs to a plate.

Reduce the heat to medium. Add the diced onion and chopped carrots to the same pot. Cook for about 6 to 8 minutes, stirring occasionally, until the vegetables soften and begin to caramelize.

Stir in the tomato paste and cook for 1 to 2 minutes, allowing it to darken slightly and develop a richer flavor.

Pour in the red wine, scraping the bottom of the pot with a wooden spoon to loosen all of the flavorful browned bits. Simmer for about 5 minutes to reduce the wine by roughly one-third.

Add the beef broth and stir well to combine with the wine and vegetables.

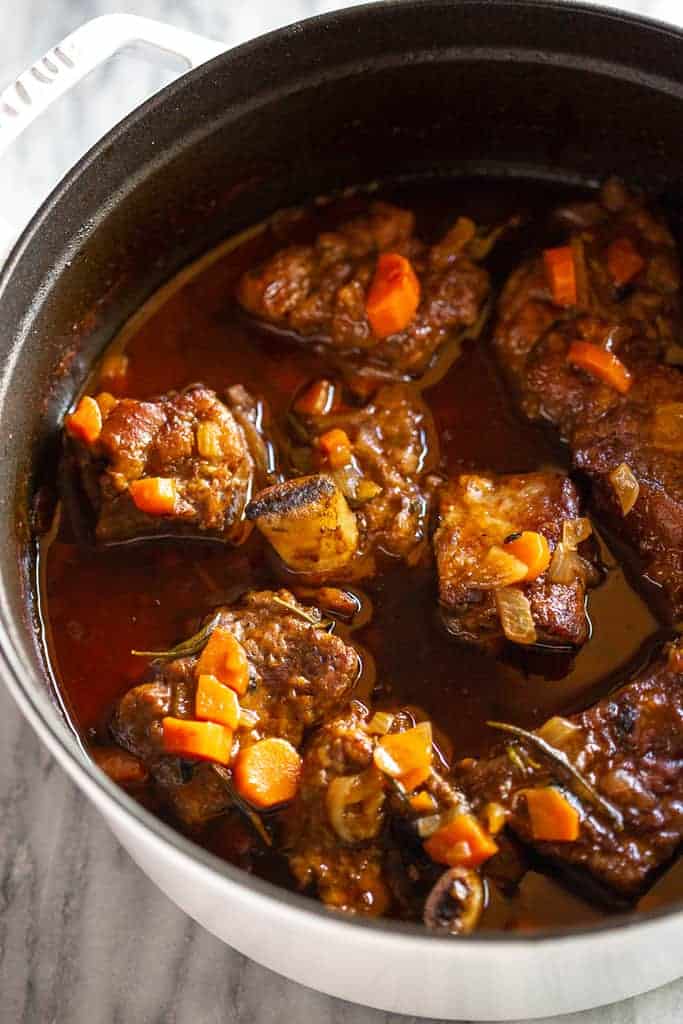
Return the browned short ribs to the pot, arranging them in a single layer. The liquid should come about two-thirds of the way up the sides of the meat. Add a little extra broth if needed.

Lay the thyme and rosemary sprigs over the ribs.

Bring the liquid to a gentle simmer on the stovetop, then cover the Dutch oven with a tight-fitting lid.

Transfer the pot to the preheated oven and braise for about 2½ to 3 hours. Turn the short ribs once halfway through cooking to ensure even braising.

The ribs are done when the meat is extremely tender and easily pulls away from the bone with a fork.

Carefully transfer the cooked short ribs to a serving platter and tent loosely with foil to keep warm.

Discard the thyme and rosemary stems from the sauce.

If desired, skim excess fat from the surface of the braising liquid. For a thicker sauce, simmer it uncovered over medium heat for 10 to 15 minutes until slightly reduced.

Spoon the rich sauce and vegetables over the beef before serving.

Serve hot with mashed potatoes, creamy polenta, buttered egg noodles, roasted vegetables, or crusty bread to soak up the flavorful sauce.

2. Tips for Perfect Braised Beef Short Ribs

Choose well-marbled bone-in short ribs. The fat slowly melts during braising, producing exceptionally tender meat and a flavorful sauce.

Take the time to brown the ribs thoroughly before braising. A deep, golden crust adds layers of rich flavor that cannot be achieved later in the cooking process.

Use a dry red wine like Cabernet Sauvignon, Merlot, or Pinot Noir for the best balance of richness and acidity.

Keep the braising liquid at a gentle simmer rather than a rapid boil. Slow, even cooking helps break down the connective tissue without drying out the meat.

Use a heavy Dutch oven with a tight-fitting lid to maintain even heat and retain moisture throughout the long cooking time.

If making the dish ahead, refrigerate the finished short ribs overnight. The flavors deepen, and the hardened fat can easily be removed before reheating.

Reduce the sauce after cooking if you’d like a richer, more concentrated gravy to spoon over the meat.

Serve the short ribs with creamy mashed potatoes, polenta, or buttered noodles that can absorb every bit of the delicious braising sauce.

3. Frequently Asked Questions

Can I make Braised Beef Short Ribs a day ahead?

Yes. In fact, many cooks prefer preparing them a day in advance because the flavors continue to develop overnight, making the dish even more delicious.

Can I substitute another cut of beef?

Chuck roast is a good alternative if short ribs are unavailable, although bone-in short ribs provide the richest flavor and most tender texture.

What type of wine works best for braising?

Dry red wines such as Cabernet Sauvignon, Merlot, Pinot Noir, or Syrah all work well because they add depth without excessive sweetness.

Can I freeze leftover braised short ribs?

Absolutely. Store the cooled meat and sauce together in airtight freezer-safe containers for up to three months. Thaw overnight before reheating gently.

How do I reheat the leftovers without drying them out?

Reheat the short ribs slowly over low heat on the stovetop or in a covered baking dish in a 325°F oven with some of the braising sauce until warmed through.

4. Nutrition Information

Nutrient Amount Per Serving
Calories 695
Protein 46 g
Total Fat 46 g
Saturated Fat 17 g
Carbohydrates 14 g
Fiber 2 g
Sugar 4 g
Sodium 610 mg
Cholesterol 165 mg
Iron 5 mg

This Braised Beef Short Ribs Recipe is a classic comfort food that’s well worth the time it takes to prepare. Slow braising transforms the beef into incredibly tender, flavorful meat while creating a rich, savory sauce infused with vegetables, herbs, and red wine.

Perfect for Sunday dinners, holidays, or special occasions, this recipe delivers impressive results with simple ingredients and straightforward techniques. Serve it alongside your favorite comforting side dishes, and you’ll have an unforgettable homemade meal that’s sure to become a family favorite.

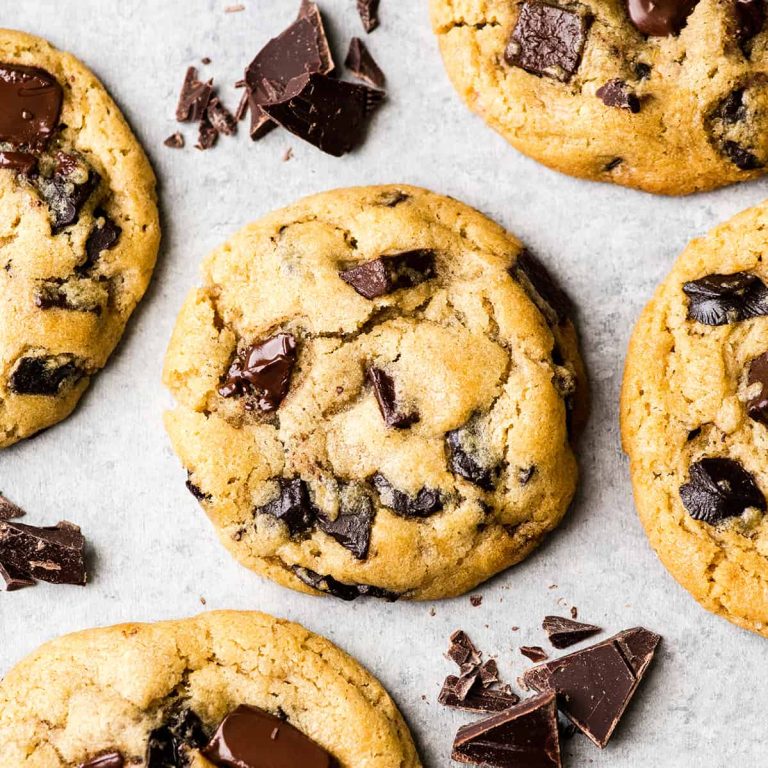
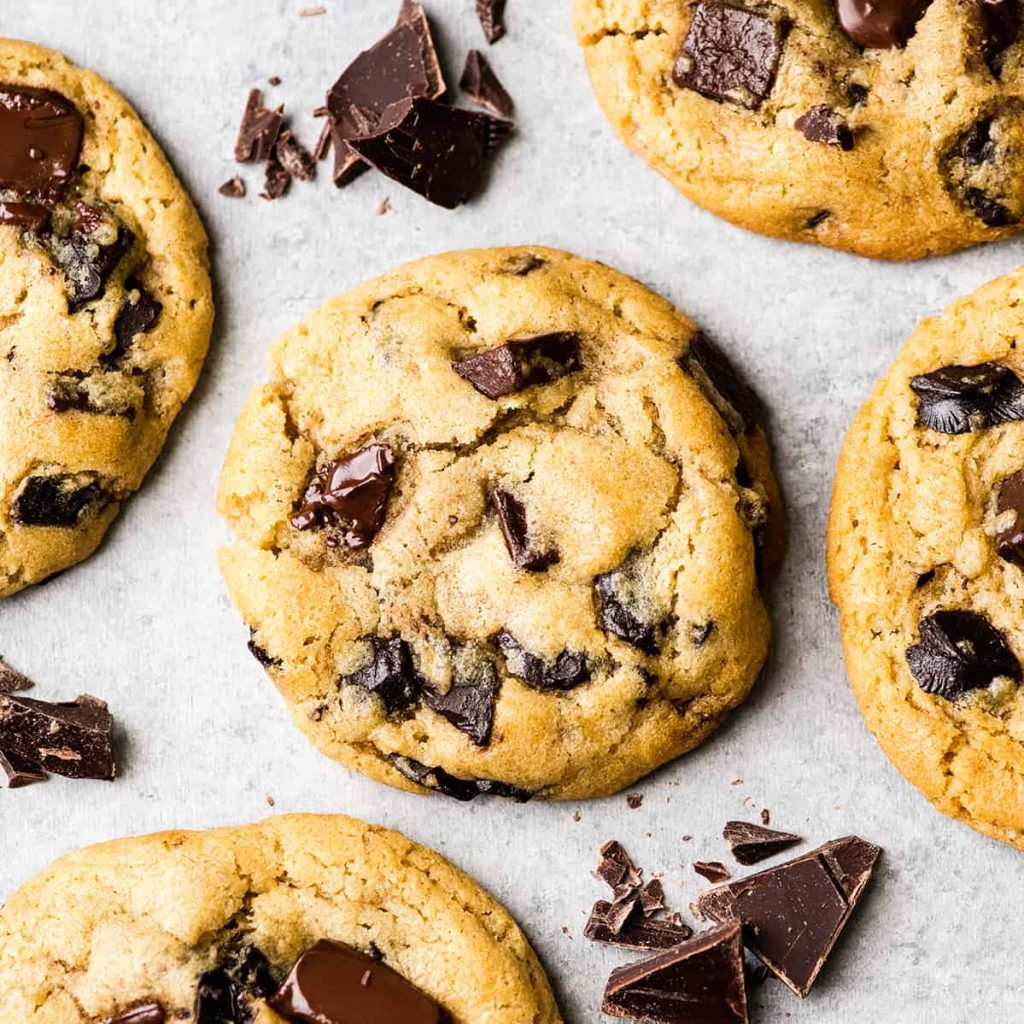
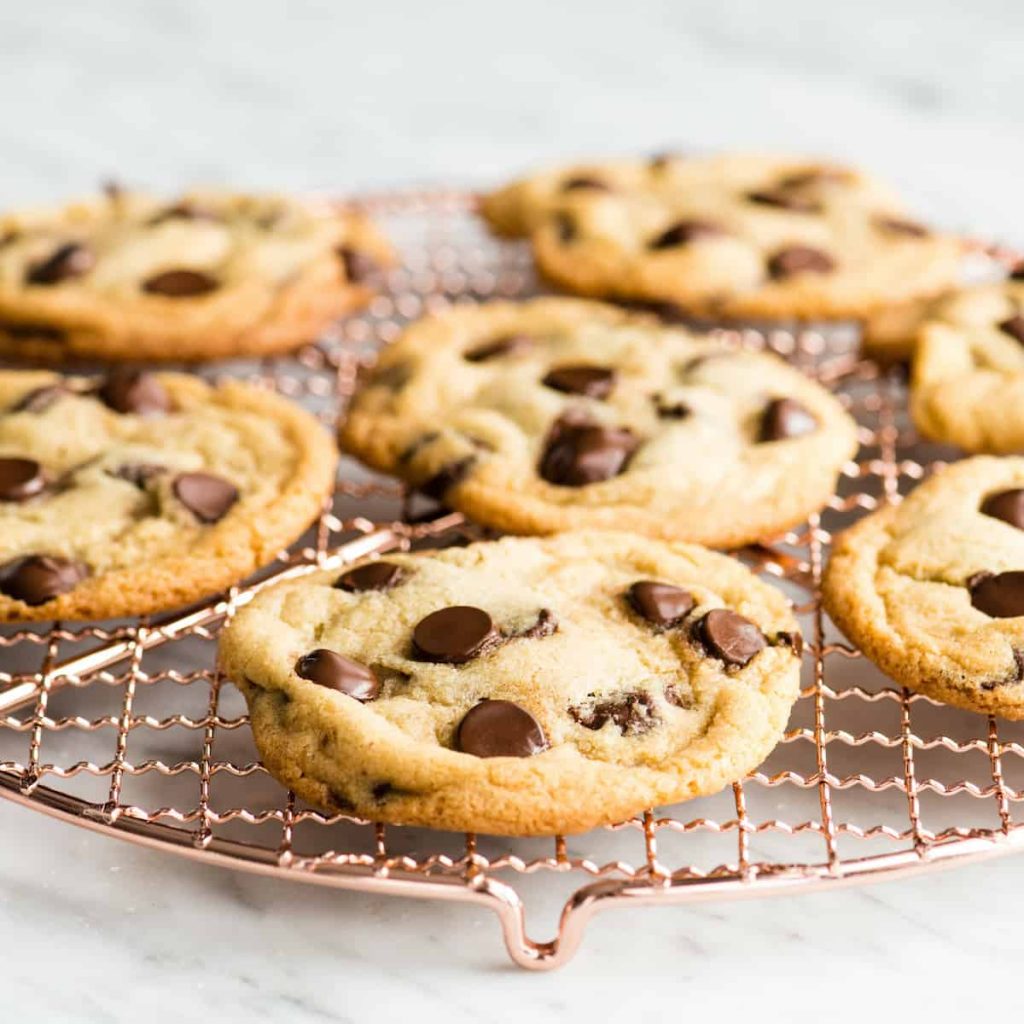
Few homemade treats are as comforting as a batch of warm chocolate chip cookies fresh from the oven. With crisp golden edges, soft and chewy centers, and plenty of melty chocolate chips in every bite, this classic recipe never goes out of style. It’s perfect for holidays, bake sales, family gatherings, or simply satisfying a sweet craving.

This easy recipe uses everyday pantry ingredients and comes together in just a few simple steps. Whether you’re an experienced baker or making cookies for the first time, these chocolate chip cookies are reliable, delicious, and sure to become a favorite recipe you’ll return to again and again.

1. Chocolate Chip Cookie Recipe (Yield: 36 Cookies)

Ingredients

  • 1 cup salted butter, softened
  • 1 cup granulated sugar
  • 1 cup packed light brown sugar
  • 2 teaspoons pure vanilla extract
  • 2 large eggs
  • 3 cups all-purpose flour
  • 1 teaspoon baking soda
  • ½ teaspoon baking powder
  • 1 teaspoon sea salt
  • 2 cups (12 ounces) chocolate chips

Equipment

  • Measuring spoons
  • Measuring cups
  • KitchenAid mixer or stand mixer
  • Spatula
  • 3 baking sheets
  • Parchment paper
  • Cookie scoop
  • Silicone baking mat (optional)
  • Hand mixer (if not using a stand mixer)

Instructions

Preheat your oven to 375°F (190°C). Line your baking sheets with parchment paper or silicone baking mats to prevent sticking and encourage even baking.

In a medium bowl, whisk together the flour, baking soda, baking powder, and sea salt. Set the dry ingredients aside.

In a large mixing bowl or the bowl of a stand mixer, beat the softened butter, granulated sugar, and brown sugar on medium speed for about 3 to 4 minutes. Continue mixing until the butter becomes light, creamy, and fluffy. Proper creaming creates cookies with a soft texture and even rise.

Add the vanilla extract and mix until incorporated.

Beat in the eggs one at a time, mixing well after each addition. Scrape down the sides of the bowl with a spatula to ensure everything is evenly combined.

Gradually add the dry ingredients to the butter mixture. Mix on low speed until the flour is almost fully incorporated. Avoid overmixing, as this can make the cookies tougher.

Fold in the chocolate chips using a spatula or mix on low speed just until evenly distributed throughout the dough.

If time allows, cover the bowl and chill the cookie dough for at least 30 minutes. Chilling helps prevent excessive spreading and develops a richer flavor.

Using a medium cookie scoop or about 2 tablespoons of dough, portion the dough onto the prepared baking sheets. Leave approximately 2 inches of space between each cookie to allow room for spreading.

Bake for 8 to 11 minutes, depending on your oven. The cookies are ready when the edges are lightly golden while the centers still appear slightly soft.

Remove the baking sheets from the oven and allow the cookies to cool on the pans for about 5 minutes. During this time, the residual heat will finish baking the centers.

Transfer the cookies to a wire cooling rack to cool completely.

Serve warm for gooey chocolate chips or allow them to cool completely before storing in an airtight container.

2. Tips for Perfect Homemade Chocolate Chip Cookies

Use softened butter instead of melted butter. Softened butter creams properly with the sugar, producing cookies with a soft, chewy texture and better structure.

Measure the flour accurately by spooning it into the measuring cup and leveling it off with a knife. Too much flour can make cookies dry and dense.

Brown sugar contributes moisture and chewiness. Be sure to pack it firmly into the measuring cup for consistent results.

Chill the dough whenever possible. Even 30 minutes of chilling helps prevent cookies from spreading too much while creating thicker, chewier cookies.

Use high-quality chocolate chips or chopped chocolate for the richest flavor and the best melting texture.

Avoid overbaking. The centers should still look slightly underdone when you remove the cookies from the oven because they continue cooking on the hot baking sheet.

Rotate the baking sheets halfway through baking if your oven has hot spots. This helps the cookies bake evenly.

Store cookies in an airtight container with a slice of bread. The bread helps maintain moisture, keeping the cookies soft for several days.

3. Frequently Asked Questions

Can I freeze the cookie dough?

Yes. Scoop the dough into portions and freeze them on a baking sheet. Once frozen, transfer the dough balls to a freezer-safe bag for up to three months. Bake directly from frozen, adding one to two extra minutes to the baking time.

Why did my cookies spread too much?

Warm butter, insufficient flour, or skipping the chilling step can all cause cookies to spread excessively during baking.

Can I use unsalted butter instead?

Absolutely. Substitute unsalted butter and increase the added salt by about ¼ teaspoon to maintain the same flavor balance.

How do I keep chocolate chip cookies soft?

Store them in an airtight container at room temperature with a slice of bread. The bread helps retain moisture and keeps the cookies soft.

Can I add other mix-ins?

Yes. Chopped walnuts, pecans, toffee bits, white chocolate chips, or peanut butter chips all make delicious additions while keeping the recipe easy to customize.

4. Nutrition Information

Nutrient Amount Per Cookie
Calories 185
Protein 2 g
Total Fat 9 g
Saturated Fat 5 g
Carbohydrates 25 g
Fiber 1 g
Sugar 16 g
Sodium 140 mg
Cholesterol 25 mg
Calcium 20 mg

This Chocolate Chip Cookie Recipe delivers everything you could want in a homemade cookie: buttery flavor, chewy centers, crisp edges, and plenty of rich chocolate in every bite. It’s simple enough for everyday baking yet impressive enough to share with friends and family during holidays and special occasions.

Once you’ve mastered this classic recipe, you’ll always have a dependable dessert that’s easy to make and guaranteed to disappear quickly. Bake a batch for your next gathering, pack them into lunchboxes, or enjoy one fresh from the oven with a cold glass of milk for a timeless homemade treat.

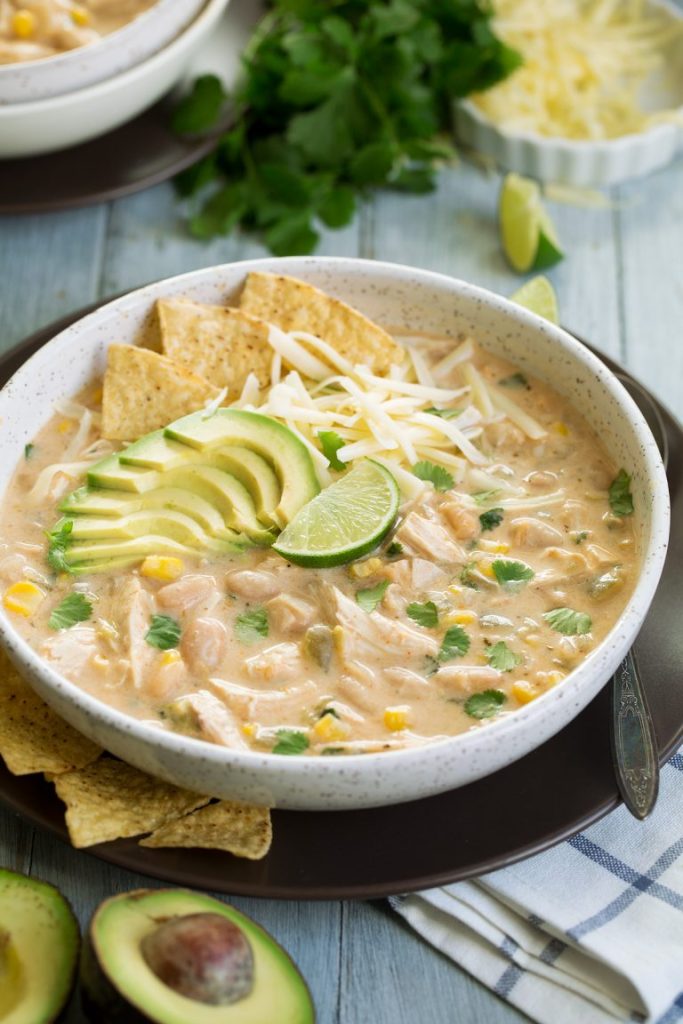
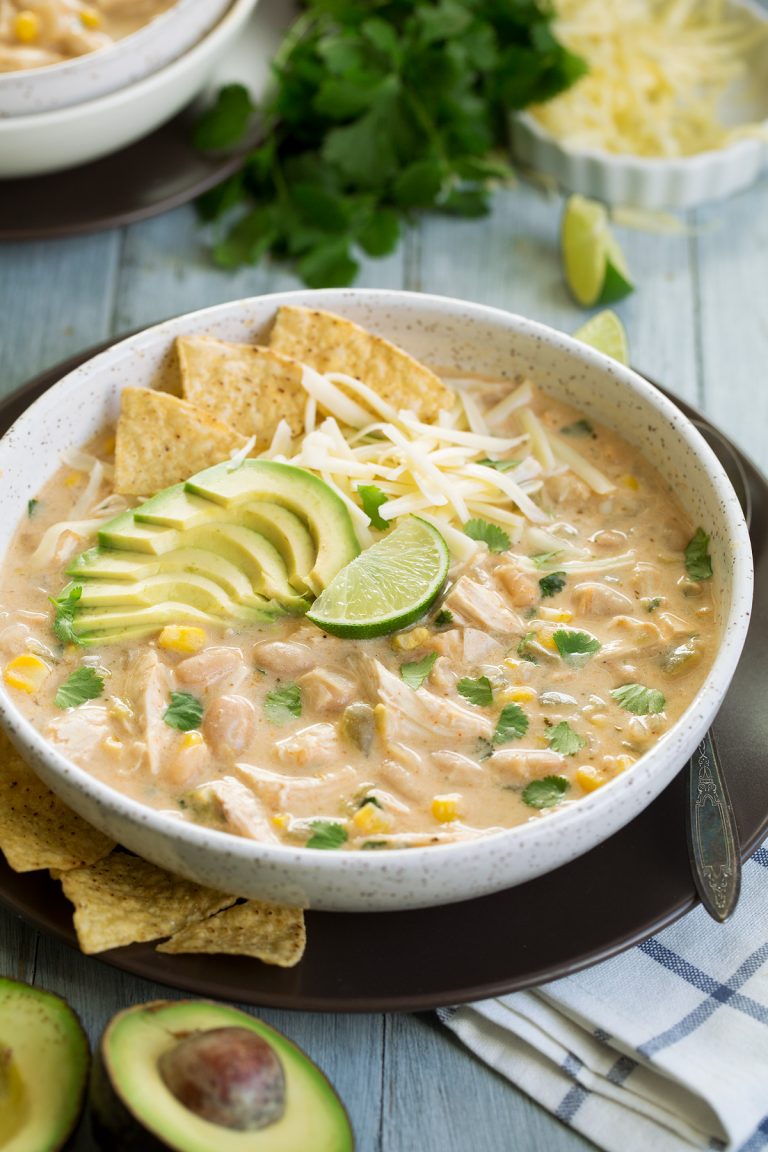
White Chicken Chili is a cozy, satisfying meal that’s perfect for chilly evenings, busy weeknights, or casual family dinners. Unlike traditional beef chili, this version is made with tender shredded chicken, creamy white beans, sweet corn, green chiles, and a rich broth that’s finished with Neufchatel cheese for an irresistibly smooth texture.

One of the best things about this recipe is its flexibility. You can prepare it on the stovetop for a quick dinner or let the Crock Pot do the work while you’re busy. Either way, you’ll end up with a flavorful bowl of creamy chili that’s easy to customize with your favorite toppings.

1. Easy White Chicken Chili Recipe (Yield: 6 Servings)

Ingredients

  • 1 small yellow onion, diced
  • 1 tablespoon olive oil
  • 2 cloves garlic, finely minced
  • 2 (14.5-ounce) cans low-sodium chicken broth
  • 1 (7-ounce) can diced green chiles
  • 1½ teaspoons ground cumin
  • ½ teaspoon paprika
  • ½ teaspoon dried oregano
  • ½ teaspoon ground coriander
  • ¼ teaspoon cayenne pepper
  • Salt and freshly ground black pepper, to taste
  • 1 (8-ounce) package Neufchatel cheese (light cream cheese), softened and cut into small cubes
  • 1¼ cups frozen or fresh corn
  • 2 (15-ounce) cans cannellini beans, drained and rinsed
  • 2½ cups shredded cooked rotisserie or leftover chicken
  • 1 tablespoon fresh lime juice
  • 2 tablespoons chopped fresh cilantro, plus extra for garnish

Optional for serving: tortilla chips or tortilla strips, shredded Monterey Jack cheese, sliced avocado

Instructions

Stovetop Method

Heat the olive oil in a large Dutch oven or heavy-bottomed soup pot over medium heat.

Add the diced onion and cook for about 5 minutes until softened and translucent. Stir occasionally to prevent browning.

Add the minced garlic and cook for another 30 seconds until fragrant. Then pour in both cans of chicken broth and stir in the diced green chiles.

Next, add the cumin, paprika, oregano, coriander, cayenne pepper, a pinch of salt, and freshly ground black pepper. Stir well to combine the seasonings.

Bring the mixture to a gentle boil, then reduce the heat to maintain a low simmer.

Add the corn, drained cannellini beans, and shredded cooked chicken. Stir everything together and simmer uncovered for 15 to 20 minutes so the flavors blend.

Reduce the heat to low. Add the softened cubes of Neufchatel cheese a few at a time, stirring continuously until completely melted into the broth. Avoid boiling after adding the cheese, as high heat may cause it to separate.

Stir in the fresh lime juice and chopped cilantro.

Taste and adjust the seasoning with additional salt, pepper, or cayenne if desired.

Ladle the chili into bowls and garnish with extra cilantro, shredded Monterey Jack cheese, sliced avocado, and crunchy tortilla strips or chips.

Crock Pot Method

Heat the olive oil in a skillet over medium heat. Cook the diced onion for about 5 minutes until softened, then stir in the garlic and cook for another 30 seconds.

Transfer the onion mixture to a 5- or 6-quart Crock Pot.

Next, add the chicken broth, diced green chiles, cumin, paprika, oregano, coriander, cayenne pepper, corn, cannellini beans, and shredded chicken.

Cover and cook on Low for 4 to 6 hours or High for 2 to 3 hours.

About 30 minutes before serving, add the softened Neufchatel cheese cubes. Stir until melted and smooth.

Just before serving, stir in the lime juice and chopped cilantro. Serve hot with your favorite toppings.

2. Tips for Perfect White Chicken Chili

Use rotisserie chicken for the easiest preparation and excellent flavor. It’s tender, juicy, and saves valuable cooking time.

Allow the Neufchatel cheese to soften at room temperature before adding it to the chili. Softened cheese melts much more smoothly into the broth.

Cook over gentle heat after adding the cheese. High heat can cause dairy to separate, resulting in a grainy texture.

Drain and rinse the cannellini beans before using them. This removes excess starch and sodium while keeping the broth clean and creamy.

For a thicker chili, mash about half a cup of the beans with a fork before stirring them into the pot. The mashed beans naturally thicken the broth.

Fresh lime juice should always be added at the end of cooking. It brightens the flavors without losing its freshness.

If using frozen corn, there’s no need to thaw it first. It will cook perfectly in the broth.

Set up a toppings bar with shredded cheese, avocado, tortilla strips, sour cream, cilantro, and jalapeños so everyone can customize their own bowl.

3. Frequently Asked Questions

Can I use chicken breasts instead of rotisserie chicken?

Yes. Cook boneless, skinless chicken breasts until fully cooked, then shred them before adding them to the chili.

Can I make this recipe ahead of time?

Absolutely. White Chicken Chili often tastes even better the next day after the flavors have had time to develop in the refrigerator.

Can I freeze White Chicken Chili?

Yes, although dairy-based soups may separate slightly after thawing. Stir gently while reheating to restore a creamy consistency.

What beans can I substitute for cannellini beans?

Great Northern beans or navy beans are excellent alternatives and provide a similar creamy texture.

What should I serve with White Chicken Chili?

Cornbread, crusty bread, tortilla chips, a simple green salad, Mexican rice, or baked potatoes all pair wonderfully with this chili.

4. Nutrition Information

Nutrient Amount Per Serving
Calories 365
Protein 29 g
Total Fat 13 g
Saturated Fat 5 g
Carbohydrates 31 g
Fiber 8 g
Sugar 4 g
Sodium 690 mg
Cholesterol 70 mg
Calcium 120 mg

This Easy White Chicken Chili Recipe is a comforting meal that’s packed with tender chicken, creamy beans, sweet corn, flavorful green chiles, and a perfectly seasoned broth. It’s simple enough for busy weeknights yet satisfying enough to serve for family dinners, game days, or casual gatherings.

Thanks to the flexibility of both stovetop and slow cooker methods, you can choose the cooking style that best fits your schedule. Add your favorite toppings, serve it with warm cornbread or tortilla chips, and enjoy a homemade bowl of creamy White Chicken Chili that’s sure to become a regular favorite in your recipe collection.

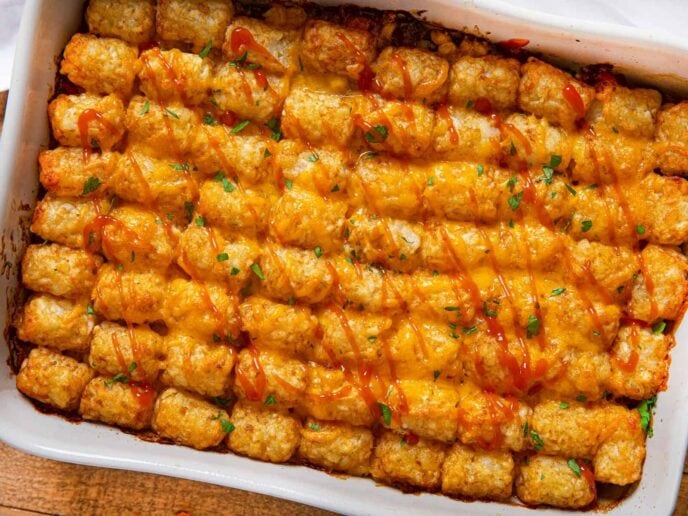
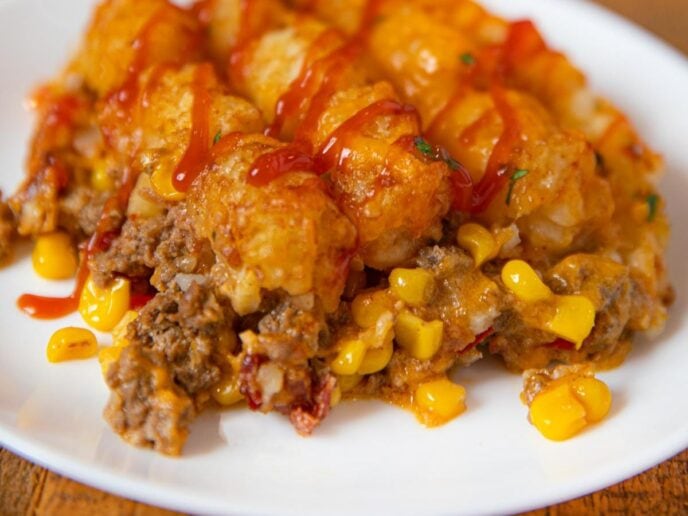
Cowboy Casserole is the ultimate comfort food for busy weeknights and family dinners. Packed with seasoned ground beef, sweet corn, creamy mushroom sauce, crispy bacon, plenty of cheddar cheese, and a golden layer of crunchy tater tots, this casserole is filling, flavorful, and incredibly easy to prepare.

One of the best things about this recipe is that it comes together with simple pantry ingredients and bakes in one dish, making cleanup just as easy as the cooking. It’s a meal the whole family will love, and it’s perfect for potlucks, casual gatherings, or meal prepping for the week ahead.

1. Cowboy Casserole Recipe (Yield: 6 Servings)

Ingredients

  • ½ pound ground beef (85/15)
  • 1 cup corn (fresh, frozen, or canned and drained)
  • ⅔ cup condensed cream of mushroom soup
  • 1 cup shredded cheddar cheese, divided
  • ⅓ cup whole milk
  • ¼ cup sour cream
  • 1 teaspoon onion powder
  • ½ teaspoon black pepper
  • ½ cup cooked bacon, crumbled
  • 32 ounces frozen tater tots

Instructions

Preheat your oven to 375°F (190°C). Lightly grease a 9×13-inch baking dish with cooking spray or butter.

Heat a large skillet over medium-high heat. Add the ground beef and cook for 6 to 8 minutes, breaking it into small crumbles as it browns. Continue cooking until no pink remains.

Drain any excess grease from the skillet and return the cooked beef to the pan.

Add the onion powder and black pepper to the beef, stirring well to evenly season the meat.

Stir in the condensed cream of mushroom soup, whole milk, and sour cream. Mix until the sauce is smooth and creamy.

Add the corn, half of the shredded cheddar cheese, and about half of the crumbled bacon. Stir until everything is evenly combined and the cheese begins to melt into the sauce.

Transfer the beef mixture into the prepared baking dish and spread it into an even layer.

Arrange the frozen tater tots over the top in a single layer, placing them close together for full coverage. Keeping the tots in one layer helps them become evenly crisp while baking.

Place the casserole in the preheated oven and bake uncovered for 35 to 40 minutes, or until the tater tots are golden brown and crispy.

Remove the casserole from the oven and sprinkle the remaining cheddar cheese evenly over the tater tots. Scatter the remaining crumbled bacon across the top.

Return the casserole to the oven for another 5 to 8 minutes, just until the cheese is fully melted and bubbly.

Allow the casserole to rest for about 5 to 10 minutes before serving. This helps the filling set slightly and makes serving cleaner.

Serve warm with a simple green salad, steamed vegetables, coleslaw, or roasted broccoli for a complete meal.

2. Tips for Perfect Cowboy Casserole

Brown the ground beef well before combining it with the sauce. Well-caramelized beef develops deeper flavor and creates a richer casserole.

Drain excess grease thoroughly so the finished casserole stays creamy instead of oily.

Freshly shred the cheddar cheese whenever possible. Fresh cheese melts more smoothly than pre-shredded varieties.

Arrange the frozen tater tots in a single, even layer. Avoid overlapping them so every tot becomes crispy during baking.

Bake the casserole uncovered. This allows the tater tots to brown properly while preventing them from becoming soft.

Reserve part of the cheese and bacon for the final topping. Adding them near the end keeps the bacon crisp and creates a beautifully melted cheese layer.

Let the casserole rest for several minutes before serving. This gives the creamy filling time to thicken slightly and makes it easier to scoop.

For extra flavor, garnish each serving with sliced green onions, chopped parsley, diced jalapeños, or a dollop of sour cream.

3. Frequently Asked Questions

Can I make Cowboy Casserole ahead of time?

Yes. Assemble the casserole up to one day in advance, cover it tightly, and refrigerate. Add the frozen tater tots just before baking for the crispiest topping.

Can I substitute another cream soup?

Absolutely. Cream of chicken, cream of celery, or cream of cheddar soup all work well and provide slightly different flavors.

Can I freeze Cowboy Casserole?

Yes. Assemble the casserole before baking, wrap it tightly, and freeze for up to three months. Thaw overnight in the refrigerator before baking according to the recipe directions.

What vegetables can I add?

Diced bell peppers, peas, carrots, mushrooms, green beans, or black beans all make delicious additions while keeping the casserole hearty.

How do I store and reheat leftovers?

Store leftovers in an airtight container in the refrigerator for up to four days. Reheat individual servings in the microwave or warm the casserole in a 350°F oven until heated through to help restore the crispness of the tater tots.

4. Nutrition Information

Nutrient Amount Per Serving
Calories 545
Protein 20 g
Total Fat 33 g
Saturated Fat 13 g
Carbohydrates 43 g
Fiber 4 g
Sugar 3 g
Sodium 760 mg
Cholesterol 65 mg
Calcium 220 mg

This Cowboy Casserole Recipe is a satisfying one-pan meal that’s easy enough for busy weeknights yet comforting enough for family gatherings. With its creamy beef filling, sweet corn, smoky bacon, crispy tater tots, and melted cheddar cheese, every bite delivers the perfect combination of textures and flavors.

Once you’ve made this casserole, you’ll appreciate how simple it is to customize with your favorite vegetables, cheeses, or seasonings. It’s a dependable recipe that’s sure to become a regular part of your dinner rotation whenever you’re craving a hearty, comforting homemade meal.

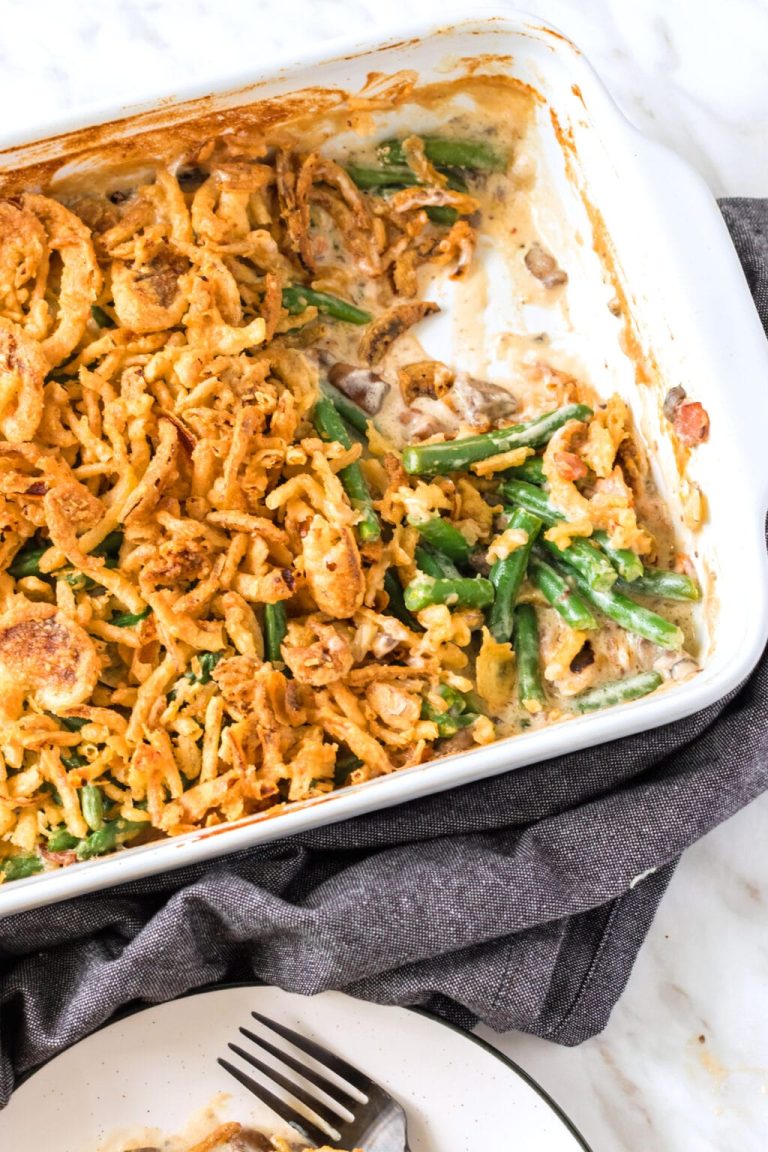
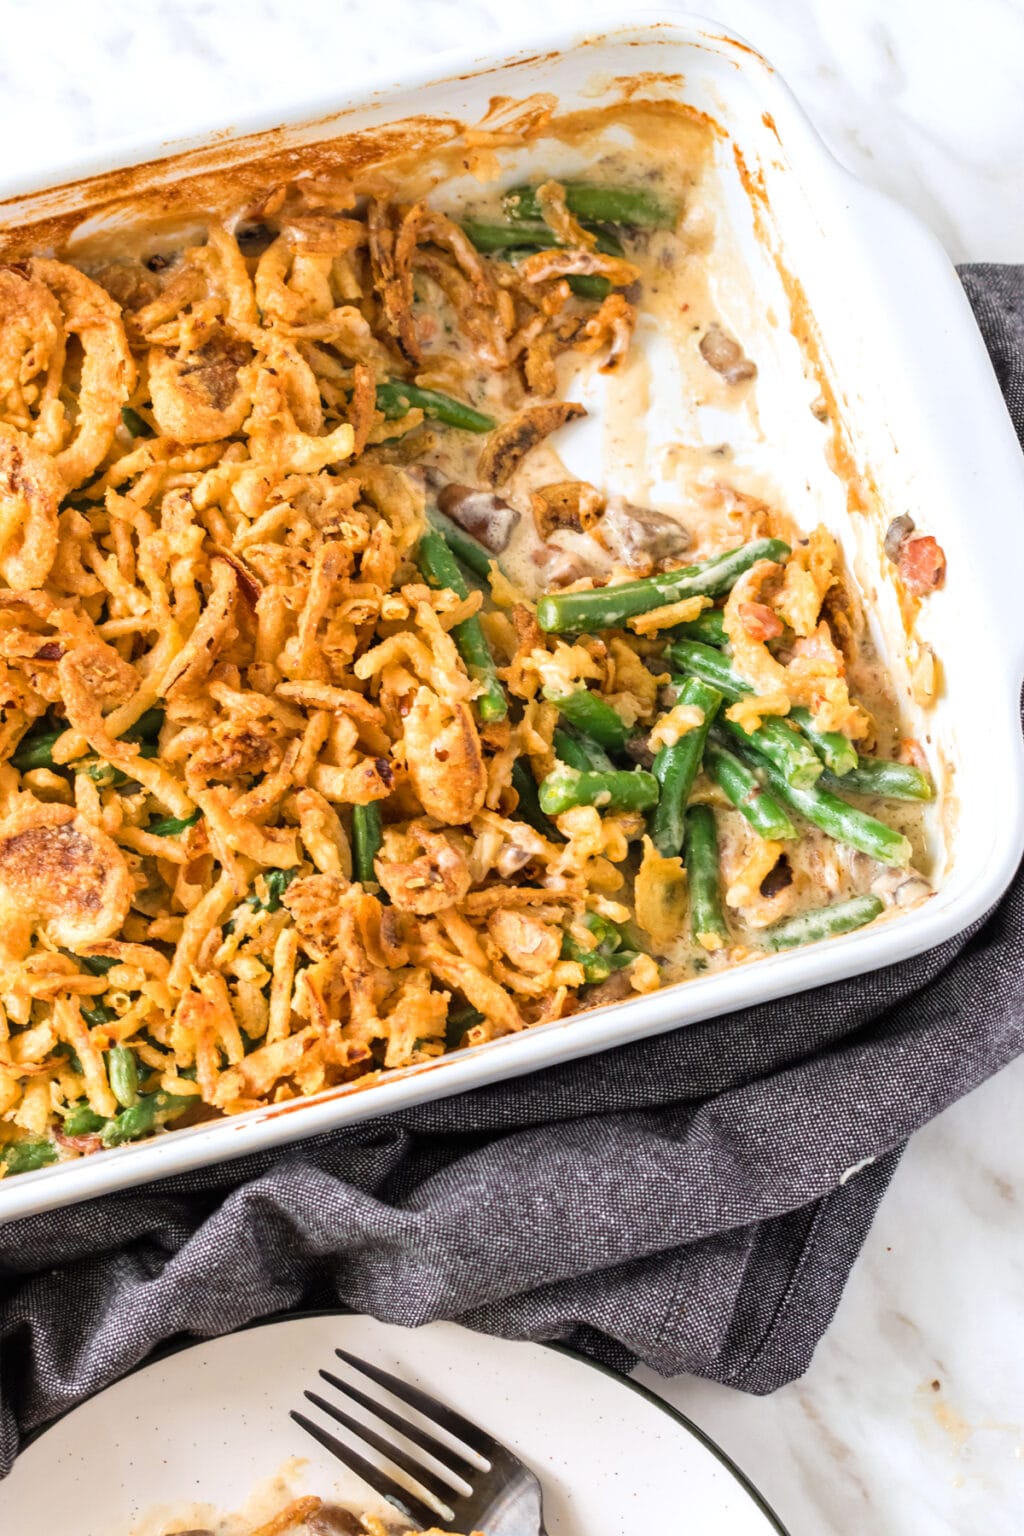
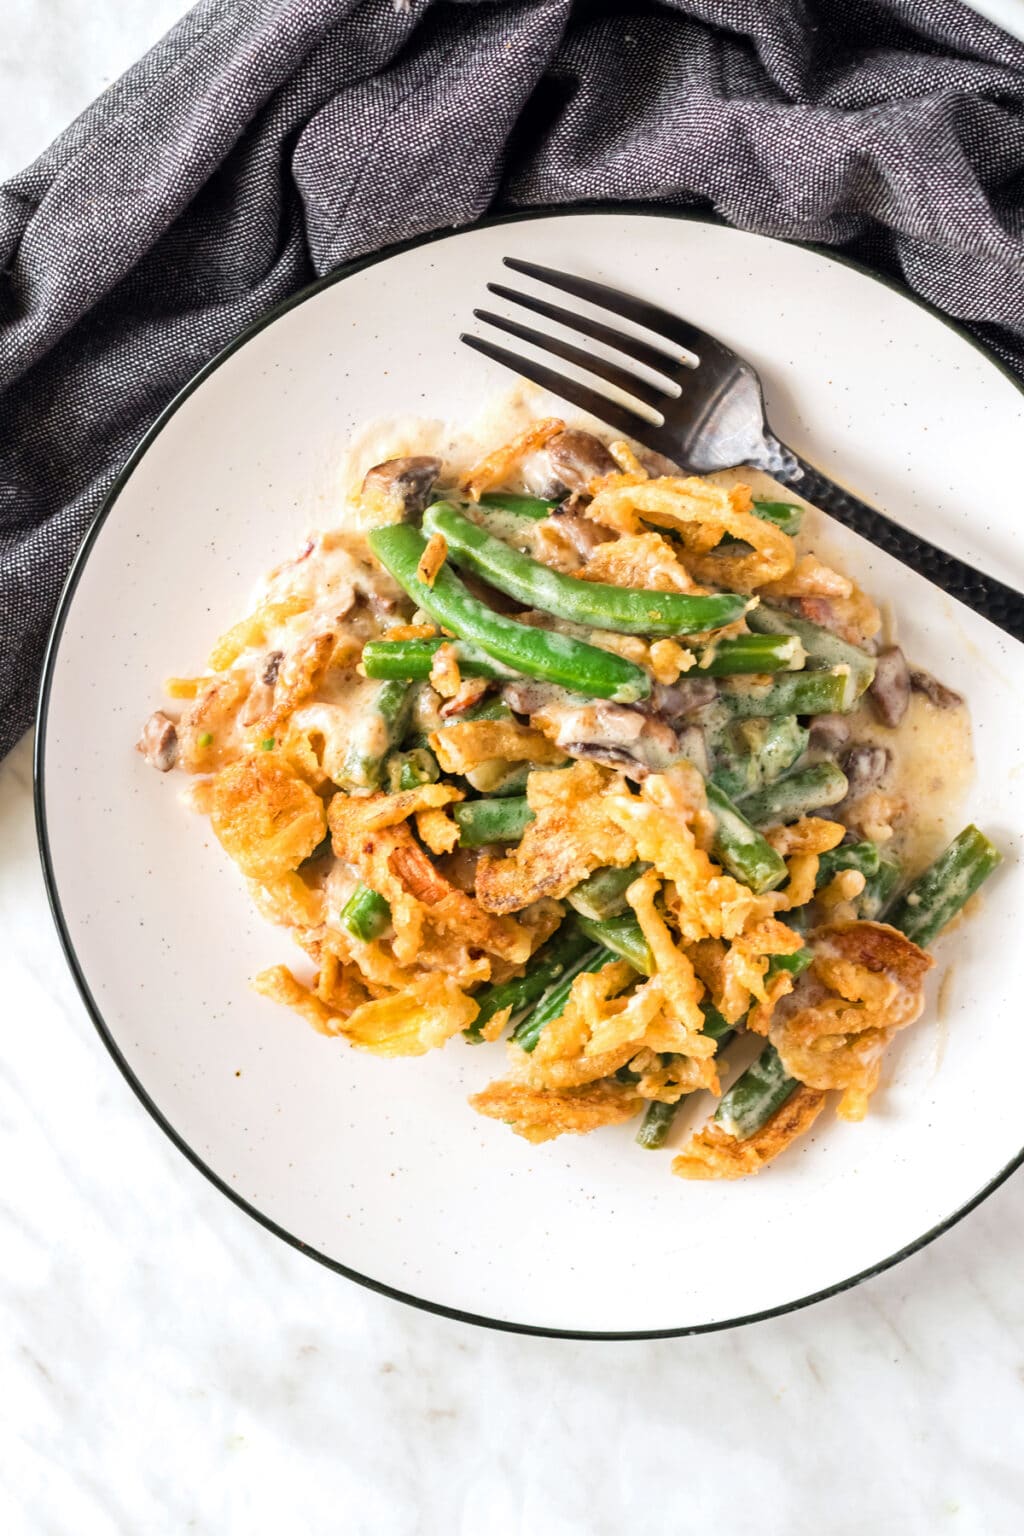
Green Bean Casserole is a classic comfort food that’s a favorite at holiday dinners, family gatherings, and Sunday suppers. This homemade version takes the traditional casserole to the next level by using fresh green beans, crispy bacon, sautéed mushrooms, and a rich, creamy cheese sauce instead of canned soup.

Although it’s a popular Thanksgiving side dish, this casserole is delicious enough to enjoy throughout the year. The combination of tender green beans, savory mushrooms, smoky bacon, creamy white cheddar sauce, and crunchy French fried onions creates a dish that’s full of flavor and texture in every bite.

1. Green Bean Casserole Recipe (Yield: 6 Servings)

Ingredients

  • 3 slices thick-cut bacon, diced
  • ½ cup finely chopped yellow onion
  • 2 cloves garlic, minced
  • 12 ounces fresh button or cremini mushrooms, chopped
  • 3 tablespoons butter
  • 3 tablespoons all-purpose flour
  • 1 cup half-and-half
  • 1 cup chicken broth
  • ½ cup shredded white Cheddar cheese
  • ¾ teaspoon salt
  • ¼ teaspoon freshly ground black pepper
  • 1 pound fresh green beans, trimmed & halved
  • 1 can quality French fried onions

Instructions

Preheat your oven to 375°F (190°C). Lightly grease a 9×9-inch or 2-quart baking dish with butter or nonstick cooking spray.

Prepare the green beans by bringing a large pot of salted water to a boil. Add the trimmed green beans and cook for about 5 minutes until they become bright green and slightly tender. Immediately transfer them to a bowl of ice water to stop the cooking process. After two minutes, drain thoroughly and pat dry with paper towels.

Place the diced bacon into a large skillet over medium heat. Cook until the bacon becomes crispy and has rendered most of its fat, about 8 to 10 minutes.

Use a slotted spoon to transfer the cooked bacon to a paper towel-lined plate, leaving about one tablespoon of bacon drippings in the skillet for extra flavor.

Add the chopped onion to the skillet and cook for about 4 minutes until softened. Stir in the minced garlic and cook for another 30 seconds until fragrant.

Add the chopped mushrooms and cook for 8 to 10 minutes, stirring occasionally. Continue cooking until the mushrooms release their moisture and begin to brown.

Reduce the heat to medium-low and add the butter to the skillet. Once melted, sprinkle in the flour and stir continuously for about 1 minute to form a smooth roux. Cooking the flour removes its raw taste and helps create a creamy sauce.

Gradually whisk in the chicken broth, followed by the half-and-half. Continue whisking until the mixture becomes smooth and begins to thicken, about 4 to 5 minutes.

Stir in the shredded white Cheddar cheese until completely melted and incorporated into the sauce.

Season the sauce with salt and freshly ground black pepper. Taste and adjust the seasoning if necessary.

Add the blanched green beans and half of the cooked bacon to the sauce. Fold everything together gently until the green beans are evenly coated.

Transfer the mixture into the prepared baking dish and spread it into an even layer.

Sprinkle about half of the French fried onions over the top.

Bake uncovered for 20 minutes until the casserole is bubbling around the edges.

Remove the casserole from the oven and top with the remaining French fried onions and reserved bacon pieces.

Return the casserole to the oven for an additional 8 to 10 minutes, or until the onions are golden brown and crispy.

Allow the casserole to rest for 5 to 10 minutes before serving. This gives the sauce time to thicken slightly and makes serving easier.

Serve warm alongside roast turkey, ham, chicken, beef, or your favorite holiday meal.

2. Tips for Perfect Green Bean Casserole

Use fresh green beans instead of canned for the best texture. They stay tender while maintaining a pleasant bite after baking.

Always blanch the green beans before assembling the casserole. This preserves their bright green color and prevents them from becoming overcooked in the oven.

Cook the mushrooms until all of their moisture has evaporated before making the sauce. This creates a richer flavor and prevents a watery casserole.

Freshly shred the white Cheddar cheese for a smoother, creamier sauce. Pre-shredded cheese often contains additives that affect melting.

Add the French fried onions in two stages. Baking some inside the casserole adds flavor, while adding the rest near the end keeps them wonderfully crispy.

Allow the sauce to thicken before adding the vegetables. A properly thickened sauce coats the green beans evenly and prevents the casserole from becoming runny.

Let the casserole rest for several minutes after baking. This helps the sauce set slightly for cleaner servings.

For an extra layer of flavor, garnish with fresh chopped parsley or a small sprinkle of grated Parmesan cheese before serving.

3. Frequently Asked Questions

Can I prepare Green Bean Casserole ahead of time?

Yes. Assemble the casserole without the final layer of French fried onions, cover, and refrigerate for up to 24 hours. Add the remaining onions just before baking so they stay crispy.

Can I use frozen green beans?

Yes. Frozen green beans work well when thawed and drained thoroughly. They don’t require as much blanching since they are partially cooked before freezing.

How should I store leftovers?

Store leftover casserole in an airtight container in the refrigerator for up to four days. Reheat in the oven for the best texture or microwave individual portions.

Can I freeze Green Bean Casserole?

Yes, but freeze it before adding the French fried onions. Add the onions fresh when reheating after thawing for the crispiest topping.

What main dishes pair well with Green Bean Casserole?

This casserole pairs beautifully with roasted turkey, baked ham, roast beef, grilled chicken, pork loin, or holiday meals featuring mashed potatoes and stuffing.

4. Nutrition Information

Nutrient Amount Per Serving
Calories 335
Protein 11 g
Total Fat 24 g
Saturated Fat 11 g
Carbohydrates 20 g
Fiber 4 g
Sugar 6 g
Sodium 620 mg
Cholesterol 45 mg
Calcium 180 mg

This homemade Green Bean Casserole Recipe is a delicious upgrade from the classic version, featuring fresh green beans, smoky bacon, sautéed mushrooms, and a rich, creamy cheese sauce topped with crispy French fried onions. It’s comforting, flavorful, and perfect for holidays or everyday family dinners.

Once you’ve made this from-scratch version, you’ll see how easy it is to create a side dish that’s both elegant and satisfying. Serve it alongside your favorite main course and enjoy a casserole that’s sure to become a tradition for years to come.

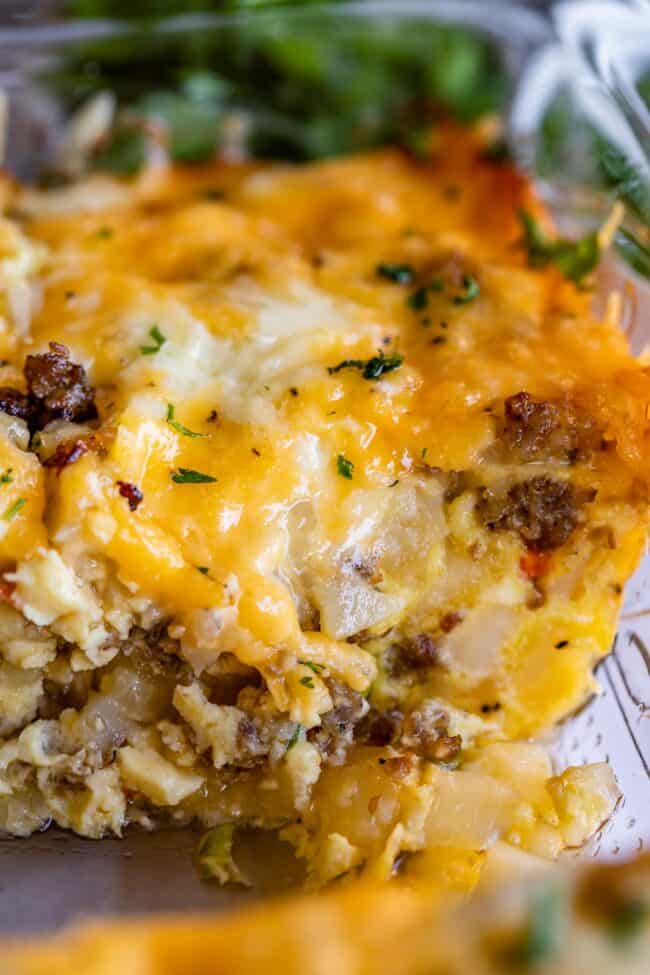
A warm, hearty breakfast casserole is one of the best ways to start the day, especially when you’re feeding family or hosting guests. This Sausage Breakfast Casserole combines crispy hash browns, savory breakfast sausage, colorful peppers, fluffy eggs, and plenty of melted cheese into one comforting dish that’s easy to prepare and perfect for weekends, holidays, or brunch gatherings.

One of the best things about this recipe is that it can be assembled ahead of time, making busy mornings much less stressful. After a quick bake, you’ll have a golden, cheesy casserole that’s filling, flavorful, and ready to serve with fresh fruit, toast, or your favorite breakfast sides.

1. Sausage Breakfast Casserole Recipe (Yield: 10 Servings)

Ingredients

  • ½ cup butter (1 stick)
  • 1 (30-ounce) package shredded hash brown potatoes
  • Salt and black pepper, to taste
  • 1 pound bulk breakfast sausage
  • ½ green bell pepper, chopped
  • ½ red bell pepper, chopped
  • ½ small onion, diced
  • 1½ cups shredded Monterey Jack cheese, packed
  • 1½ cups shredded sharp Cheddar cheese, packed
  • 8 large eggs
  • 1⅓ cups half-and-half, heavy cream, evaporated milk, or whole milk
  • 1 teaspoon seasoned salt
  • ½ teaspoon kosher salt (or ¼ teaspoon table salt)
  • ½ teaspoon black pepper
  • ¼ teaspoon dry mustard (optional)

Equipment

  • 9×13-inch baking dish

Instructions

Preheat your oven to 375°F (190°C). Lightly grease a 9×13-inch baking dish with cooking spray or butter to prevent sticking.

Melt the butter and pour it evenly into the bottom of the prepared baking dish.

Spread the shredded hash brown potatoes evenly over the melted butter. If using frozen hash browns, thaw them first and gently squeeze out any excess moisture with paper towels. Season lightly with salt and black pepper.

Bake the hash brown layer for about 20 minutes until it begins to set and lightly brown around the edges. This step helps create a firmer base for the casserole.

Meanwhile, cook the breakfast sausage in a large skillet over medium heat. Break it into small crumbles as it cooks until it is fully browned with no pink remaining.

Add the chopped green pepper, red pepper, and diced onion to the skillet with the sausage. Continue cooking for 4 to 5 minutes until the vegetables soften slightly while still maintaining a little texture.

Drain any excess grease from the sausage mixture and allow it to cool for several minutes.

Evenly spread the cooked sausage and vegetable mixture over the partially baked hash brown layer.

Sprinkle the shredded Monterey Jack cheese evenly over the sausage, followed by the shredded sharp Cheddar cheese.

In a large mixing bowl, whisk together the eggs, half-and-half, seasoned salt, kosher salt, black pepper, and dry mustard until completely blended and slightly frothy.

Slowly pour the egg mixture evenly over the entire casserole, allowing it to settle naturally between the layers.

Place the casserole into the oven and bake uncovered for 35 to 45 minutes. The casserole is done when the center is fully set, the cheese is melted and lightly golden, and a knife inserted into the middle comes out clean.

If the cheese begins browning too quickly before the eggs finish cooking, loosely cover the casserole with aluminum foil during the final portion of baking.

Remove the casserole from the oven and allow it to rest for 10 minutes before slicing. This resting time helps the eggs firm up and makes serving much easier.

Slice into ten portions and serve warm with salsa, hot sauce, sour cream, fresh fruit, toast, biscuits, or avocado slices.

2. Tips for Perfect Sausage Breakfast Casserole

Thaw frozen hash browns completely before using them. Removing excess moisture prevents the casserole from becoming watery.

Bake the hash browns briefly before adding the remaining ingredients. This creates a firmer bottom layer with better texture.

Cook the sausage until well browned to develop richer flavor before adding it to the casserole.

Drain excess grease thoroughly after cooking the sausage. This keeps the casserole rich without becoming oily.

Freshly shred the cheese from a block whenever possible. Fresh cheese melts more smoothly and produces a creamier texture than pre-shredded varieties.

Whisk the eggs thoroughly until fully combined with the dairy. A well-mixed custard creates an even, fluffy texture throughout the casserole.

Allow the casserole to rest before cutting. This simple step helps the slices hold together beautifully.

For extra flavor, garnish with chopped green onions, fresh parsley, diced tomatoes, or sliced avocado just before serving.

3. Frequently Asked Questions

Can I assemble this casserole the night before?

Yes. Assemble the entire casserole, cover it tightly, and refrigerate overnight. Let it sit at room temperature for about 20 minutes before baking the next morning.

Can I use different breakfast meats?

Absolutely. Bacon, diced ham, turkey sausage, chorizo, or cooked Italian sausage all work well as substitutes for breakfast sausage.

Can I freeze this casserole?

Yes. Bake the casserole completely, cool it thoroughly, and freeze individual portions or the entire casserole for up to three months. Thaw overnight before reheating.

What side dishes pair well with breakfast casserole?

Fresh fruit, biscuits, cinnamon rolls, yogurt, fresh berries, breakfast pastries, or a simple green salad all complement this hearty dish.

How do I know when the casserole is fully cooked?

The center should be firm, the cheese should be melted and lightly golden, and a knife inserted into the middle should come out clean without any runny egg mixture.

4. Nutrition Information

Nutrient Amount Per Serving
Calories 445
Protein 20 g
Total Fat 33 g
Saturated Fat 15 g
Carbohydrates 18 g
Fiber 2 g
Sugar 2 g
Sodium 690 mg
Cholesterol 190 mg
Calcium 300 mg

This Sausage Breakfast Casserole is an easy, satisfying meal that’s perfect for feeding a crowd or preparing ahead for busy mornings. Layers of crispy hash browns, savory sausage, colorful vegetables, fluffy eggs, and melted cheese create a comforting breakfast that’s sure to become a family favorite.

With simple ingredients and straightforward preparation, this casserole is versatile enough for weekend brunches, holiday breakfasts, meal prep, or everyday family meals. Once you’ve tried it, you’ll appreciate how easy it is to customize with your favorite cheeses, vegetables, and breakfast meats while enjoying delicious results every time.

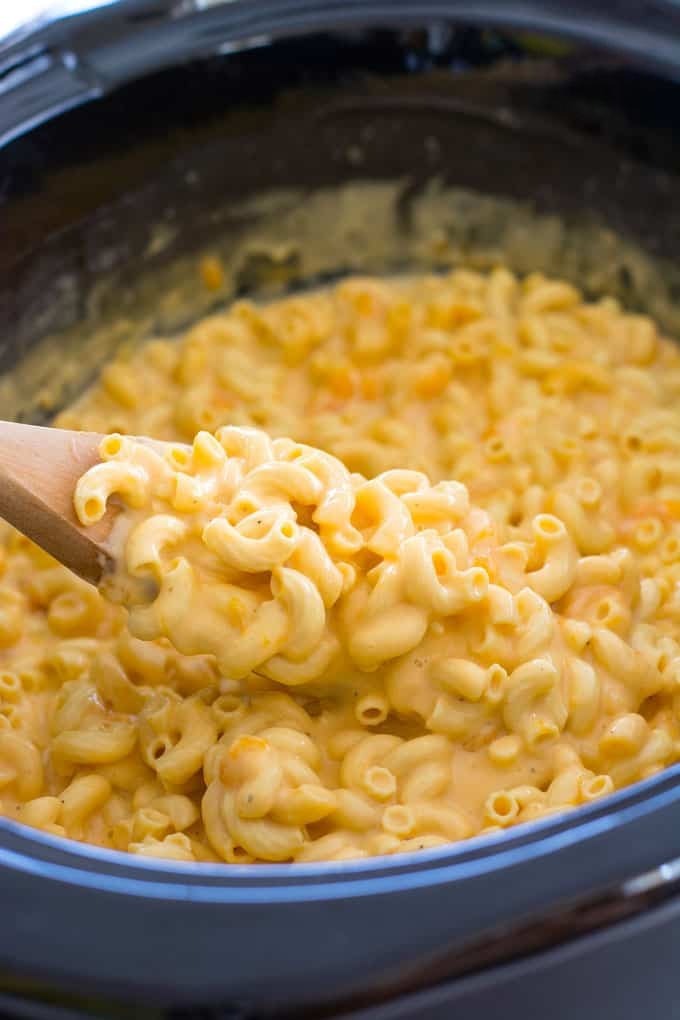
Crock Pot Mac and Cheese is one of the easiest comfort food recipes you can make. The slow cooker does most of the work, transforming simple ingredients into a creamy, cheesy pasta dish that’s perfect for family dinners, holiday meals, potlucks, and game day gatherings. Every bite is rich, smooth, and packed with homemade flavor.

Unlike boxed versions, this recipe uses freshly shredded cheese and real dairy for an extra creamy sauce that coats every piece of pasta. With just a little preparation and a few hours in the slow cooker, you’ll have a crowd-pleasing side dish that can easily become the star of the meal.

1. Crock Pot Mac and Cheese (Yield: 8 Servings)

Ingredients

  • 1 pound elbow pasta, uncooked
  • 2½ cups whole milk
  • 12 ounces evaporated milk
  • 12 ounces extra sharp cheddar cheese (about 3 cups), freshly shredded
  • 4 ounces American cheese (about 1 cup), freshly shredded from the deli
  • 1 teaspoon salt
  • ½ teaspoon black pepper
  • ½ teaspoon dry mustard
  • ¼ teaspoon garlic powder
  • Dash of cayenne pepper, to taste
  • ¼ cup butter, cubed

Things You’ll Need

  • 5- to 6-quart Crock Pot
  • Food processor or box grater for shredding cheese
  • Liquid measuring cup
  • Measuring cups and spoons
  • Large mixing bowl
  • Wooden spoon or silicone spatula
  • Colander

Instructions

Bring a large pot of salted water to a rolling boil. Add the elbow pasta and cook it for about 2 to 3 minutes less than the package directions. The pasta should still be quite firm because it will continue cooking in the slow cooker.

Drain the pasta thoroughly in a colander. Do not rinse it, as the starch remaining on the pasta helps the cheese sauce cling to every piece.

While the pasta drains, shred the extra sharp cheddar and American cheese yourself using a food processor or box grater. Freshly shredded cheese melts much more smoothly than pre-shredded cheese, which often contains anti-caking agents.

Lightly grease the inside of a 5- to 6-quart Crock Pot with butter or nonstick cooking spray. This helps prevent sticking and makes cleanup easier.

Transfer the drained pasta to the slow cooker.

Pour in the whole milk and evaporated milk, stirring gently to coat the pasta evenly.

Add the shredded cheddar cheese and shredded American cheese over the pasta.

Sprinkle in the salt, black pepper, dry mustard, garlic powder, and a small dash of cayenne pepper. The cayenne won’t make the dish spicy but adds a subtle depth of flavor.

Scatter the cubed butter evenly over the top of the mixture.

Stir everything together gently until the ingredients are evenly distributed. Avoid overmixing, which can cause the pasta to break apart.

Cover the Crock Pot with the lid and cook on Low for 2 to 2½ hours. Avoid cooking on High, as excessive heat can cause the dairy to separate and create a grainy texture.

About every 45 minutes, gently stir the mac and cheese to encourage even melting and prevent the cheese from sticking around the edges.

Begin checking the pasta after 2 hours. The macaroni should be perfectly tender, and the cheese sauce should be thick, creamy, and smooth.

If the sauce appears slightly thinner than you’d like, leave the lid off for the final 10 to 15 minutes of cooking. The extra moisture will evaporate, naturally thickening the sauce.

Once the mac and cheese reaches your preferred consistency, turn the slow cooker to the Warm setting until you’re ready to serve.

Serve immediately while hot and creamy. Garnish with freshly cracked black pepper, chopped parsley, or a light sprinkle of paprika if desired.

2. Tips for Perfect Crock Pot Mac and Cheese

Always shred your own cheese from a block. Freshly shredded cheese melts much more smoothly and creates a creamier sauce than pre-shredded cheese.

Cook the pasta slightly under al dente before adding it to the Crock Pot. This prevents it from becoming overly soft during slow cooking.

Whole milk and evaporated milk provide the rich, creamy texture that makes this recipe so satisfying. Lower-fat milk may produce a thinner sauce.

Cook on the Low setting whenever possible. Slow, gentle heat helps the cheese melt evenly without becoming grainy.

Stir the mixture gently every 45 minutes. This keeps the cheese sauce smooth and ensures even cooking throughout the slow cooker.

Avoid lifting the lid too often. Every time the lid is removed, heat escapes and can extend the cooking time.

If serving at a party, keep the slow cooker on the Warm setting instead of Low to maintain the creamy consistency without overcooking the pasta.

For extra flavor, stir in cooked crumbled bacon, diced jalapeños, caramelized onions, or chopped fresh herbs just before serving.

3. Frequently Asked Questions

Can I make Crock Pot Mac and Cheese ahead of time?

Yes. You can cook it several hours in advance and keep it on the Warm setting until serving. Stir occasionally and add a small splash of warm milk if the sauce thickens too much.

Can I use different cheeses?

Absolutely. Gruyère, Monterey Jack, Colby Jack, Gouda, Fontina, or Pepper Jack all blend well with cheddar and create delicious variations.

Why is my cheese sauce grainy?

Grainy cheese sauce is usually caused by overheating or using pre-shredded cheese. Cooking on Low and shredding cheese from a block help produce the smoothest results.

How should I store leftovers?

Store cooled leftovers in an airtight container in the refrigerator for up to four days. Reheat gently with a splash of milk to restore the creamy texture.

Can I freeze Crock Pot Mac and Cheese?

Yes. Allow it to cool completely before freezing in airtight containers for up to two months. Thaw overnight in the refrigerator and reheat slowly with additional milk if needed.

4. Nutrition Information

Nutrient Amount Per Serving
Calories 520
Protein 23 g
Total Fat 24 g
Saturated Fat 14 g
Carbohydrates 50 g
Fiber 2 g
Sugar 6 g
Sodium 710 mg
Cholesterol 70 mg
Calcium 480 mg

Crock Pot Mac and Cheese is a comforting classic that’s incredibly easy to prepare and always a favorite at the dinner table. With tender pasta, freshly shredded cheese, and a rich homemade sauce, this slow cooker recipe delivers creamy, cheesy goodness in every bite.

Once you’ve mastered the basic recipe, it’s easy to customize with your favorite cheeses, seasonings, or mix-ins to make it your own. It’s the perfect dish for holidays, potlucks, family dinners, or anytime you’re craving homemade comfort food with minimal effort.