Author

Clifford A. Wright

Browsing

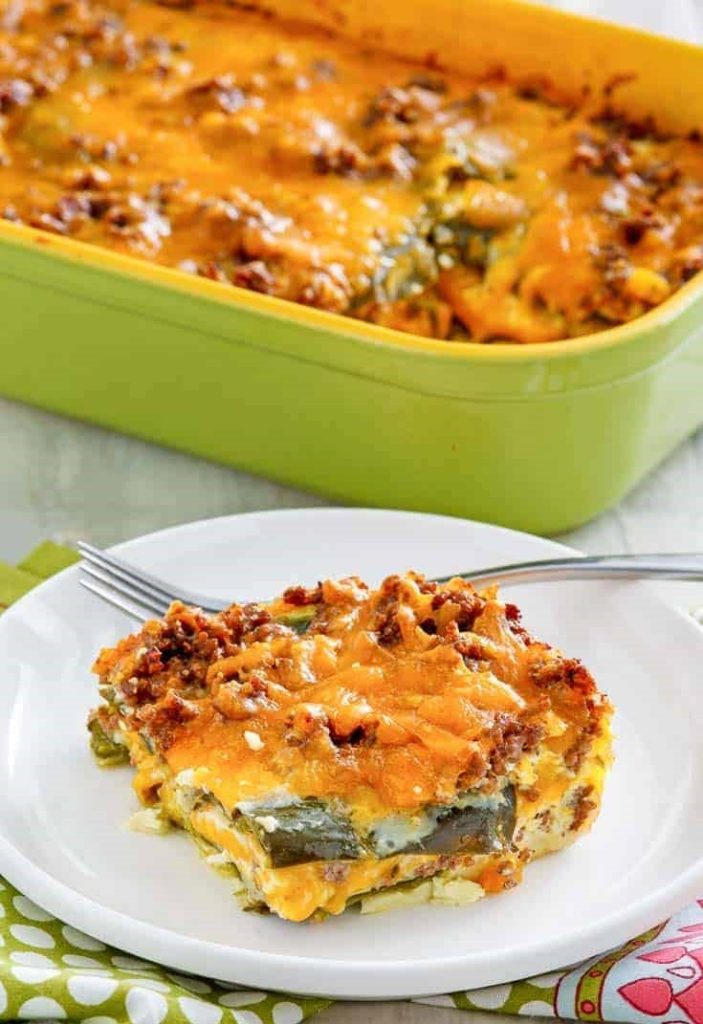
If you love the flavors of traditional chile rellenos but want an easier way to enjoy them, this Baked Beef Chiles Rellenos Casserole Recipe is the perfect solution. Instead of stuffing and frying individual peppers, everything is layered into one baking dish, creating a hearty, cheesy casserole that’s simple enough for busy weeknights and impressive enough for family gatherings.

Tender roasted green chiles, flavorful ground beef, plenty of melted Cheddar cheese, and a light, fluffy egg batter bake together into a comforting meal that’s packed with classic Southwestern flavor. Pair it with Mexican rice, refried beans, or a crisp green salad for a complete dinner everyone will enjoy.

1. Baked Beef Chiles Rellenos Casserole Recipe (Yield: 8 Servings)

Ingredients

  • 16 ounces shredded Cheddar cheese
  • 4 large eggs
  • 1½ cups milk
  • ½ cup all-purpose flour
  • Salt and black pepper, to taste
  • 1 (7-ounce) can Ortega whole green chiles
  • 1 pound ground beef, cooked, browned, and crumbled

Instructions

Preheat your oven to 350°F (175°C). Lightly grease a 9×13-inch baking dish with cooking spray or a thin coating of butter to prevent sticking.

Cook the ground beef in a large skillet over medium-high heat until it is completely browned, breaking it apart with a wooden spoon as it cooks. Drain any excess grease thoroughly and season lightly with salt and black pepper. Allow the beef to cool slightly while preparing the remaining ingredients.

Open the can of whole green chiles and carefully drain away the liquid. Lay the chiles on several layers of paper towels and gently pat them dry. Removing excess moisture helps the casserole bake evenly without becoming watery.

Spread half of the shredded Cheddar cheese evenly across the bottom of the prepared baking dish.

Arrange the whole green chiles over the cheese layer. If necessary, gently flatten the chiles so they cover most of the surface.

Evenly distribute the cooked ground beef over the chiles, spreading it into an even layer without pressing it down too firmly.

Top the beef with the remaining shredded Cheddar cheese, making sure it reaches the edges of the baking dish for even melting.

In a large mixing bowl, whisk together the eggs until smooth. Add the milk, flour, salt, and black pepper. Continue whisking until the batter is completely smooth and free of lumps. The consistency should resemble a thin pancake batter.

Slowly pour the egg mixture evenly over the layered casserole, allowing it to settle naturally between the beef, cheese, and chiles.

Place the casserole into the preheated oven and bake uncovered for 40 to 45 minutes. The casserole is finished when the center is fully set, the edges are lightly browned, and the top has puffed slightly.

To check for doneness, insert a knife into the center. It should come out clean without liquid batter remaining.

Remove the casserole from the oven and let it rest for about 10 minutes before slicing. Resting allows the egg layer to firm up, making it easier to serve clean portions.

Serve warm with salsa, sour cream, sliced avocado, chopped cilantro, or your favorite hot sauce. This casserole also pairs beautifully with Spanish rice, black beans, roasted vegetables, or tortilla chips.

2. Tips for Perfect Baked Beef Chiles Rellenos Casserole

Drain the cooked ground beef thoroughly before assembling the casserole. Excess grease can make the finished dish heavy and oily.

Pat the canned green chiles dry before layering them into the baking dish. Removing extra moisture helps the casserole maintain a firm texture.

Freshly shredded Cheddar cheese melts more smoothly than pre-shredded cheese, which often contains anti-caking agents.

Whisk the egg batter thoroughly until completely smooth. A lump-free batter creates a light, even texture throughout the casserole.

Pour the batter slowly over the layers instead of all at once. This allows it to spread evenly into every corner of the dish.

Avoid overbaking. Remove the casserole once the center is set to keep the egg layer soft and tender instead of rubbery.

Allow the casserole to rest before slicing. This simple step helps the layers hold together beautifully when served.

For extra flavor, garnish each serving with chopped cilantro, diced tomatoes, sliced jalapeños, green onions, or a spoonful of fresh salsa.

3. Frequently Asked Questions

Can I use fresh roasted poblano peppers instead of canned green chiles?

Yes. Roasted, peeled poblano peppers are an excellent substitute and provide an even more authentic chile relleno flavor.

Can I prepare this casserole ahead of time?

Absolutely. Assemble the casserole up to one day in advance, cover it tightly, and refrigerate. Bake it just before serving, adding a few extra minutes if baking directly from the refrigerator.

Can I freeze leftovers?

Yes. Allow the casserole to cool completely before wrapping individual portions or the entire casserole tightly. Freeze for up to three months and thaw overnight in the refrigerator before reheating.

What side dishes pair well with this casserole?

Mexican rice, cilantro lime rice, refried beans, black beans, corn salad, roasted vegetables, tortilla chips, or a fresh green salad all make excellent accompaniments.

Can I use a different type of cheese?

Certainly. Monterey Jack, Pepper Jack, Colby Jack, or a Mexican cheese blend all melt beautifully and can be used alone or combined with Cheddar for additional flavor.

4. Nutrition Information

Nutrient Amount Per Serving
Calories 390
Protein 27 g
Total Fat 28 g
Saturated Fat 15 g
Carbohydrates 8 g
Fiber 1 g
Sugar 3 g
Sodium 620 mg
Cholesterol 170 mg
Calcium 390 mg

This Easy Baked Beef Chiles Rellenos Casserole Recipe delivers all the comforting flavors of classic chile rellenos in a simple, family-friendly casserole. With layers of roasted green chiles, seasoned ground beef, melted Cheddar cheese, and a fluffy baked egg topping, it’s an easy meal that comes together with minimal effort and maximum flavor.

Once you’ve made this casserole, you’ll appreciate how versatile it is for weeknight dinners, potlucks, holiday brunches, or meal prep. Add your favorite toppings and side dishes to make it your own, and enjoy a delicious homemade Southwestern-inspired meal that everyone will request again and again.
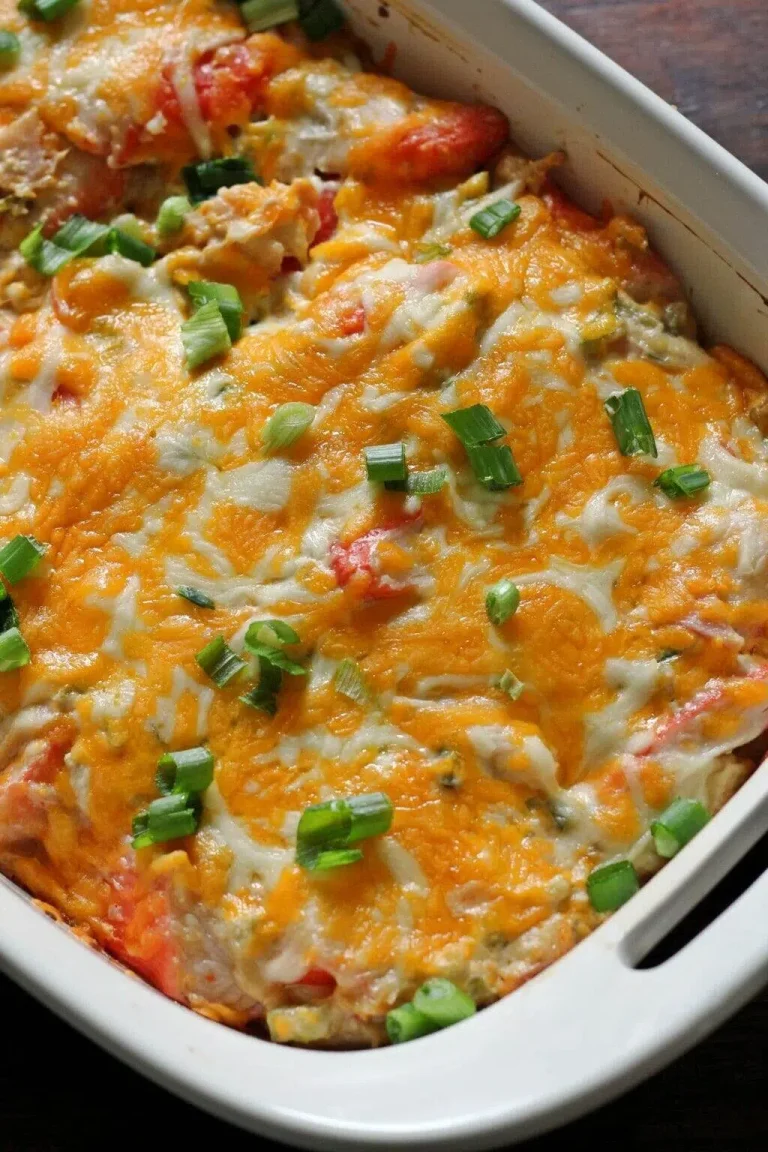
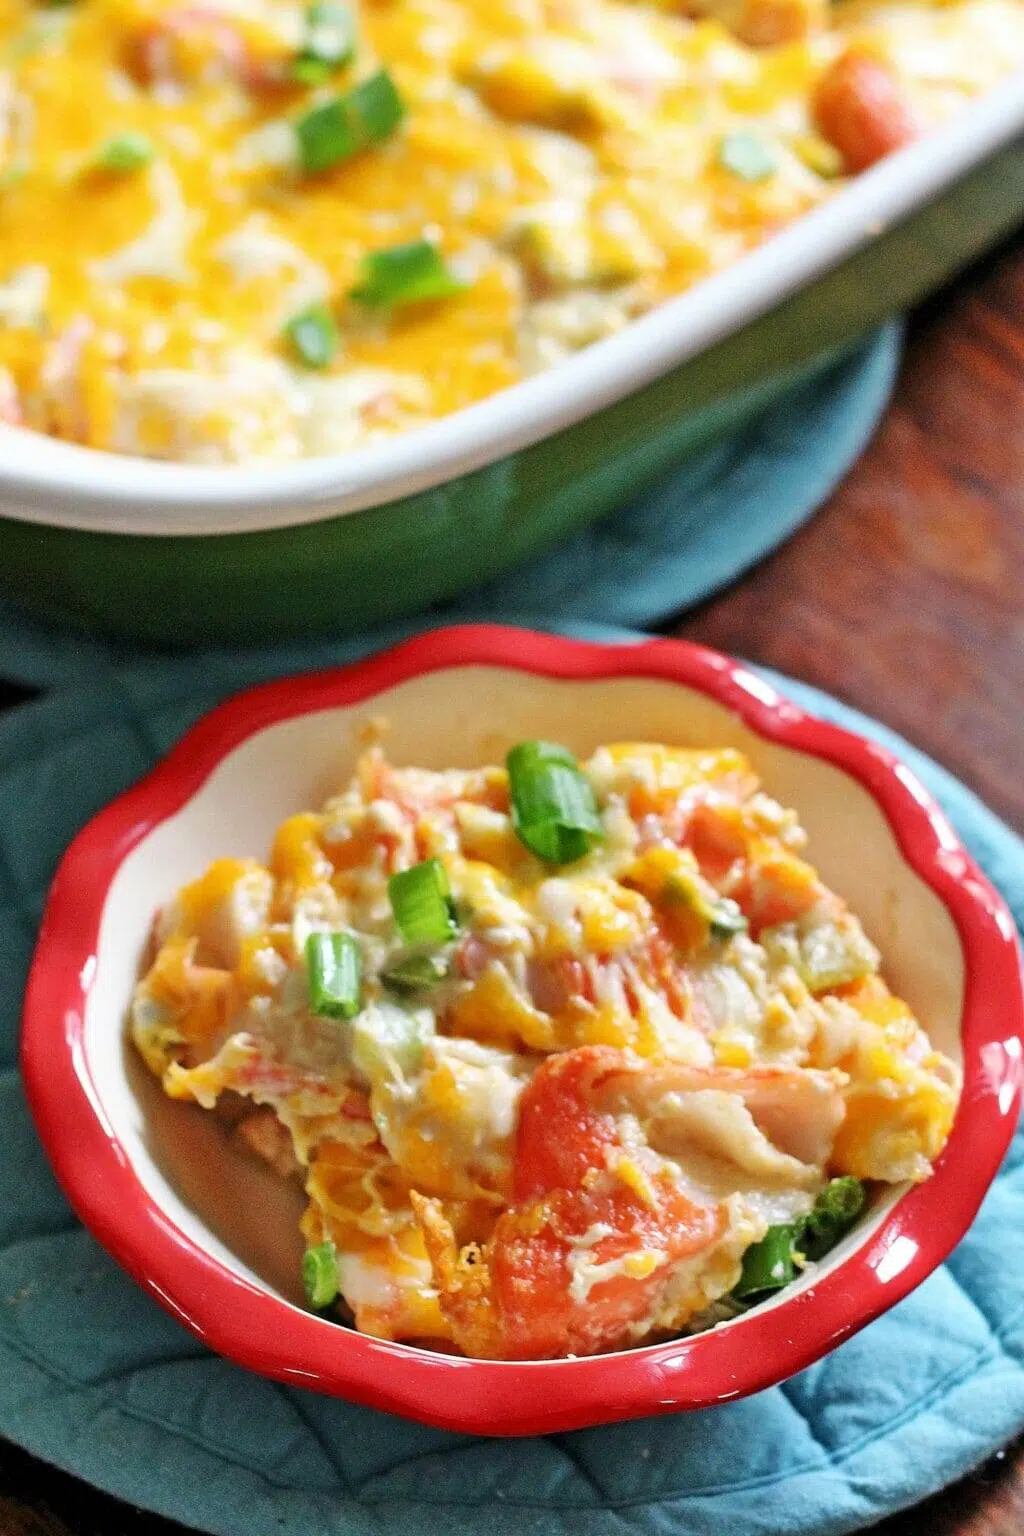
If you’ve ever visited a Chinese buffet, you’ve probably noticed the rich, creamy crab casserole that’s always one of the first dishes to disappear. With its cheesy topping, tender imitation crab, and creamy filling, it’s a comforting side dish that pairs well with fried rice, noodles, vegetables, or even enjoyed on its own.

The good news is that you can easily recreate this buffet favorite at home using simple ingredients from your local grocery store. This recipe combines imitation crab, cream cheese, sour cream, and two kinds of cheese for a casserole that’s creamy, flavorful, and perfect for family dinners, holiday gatherings, or potlucks.

1. Chinese Buffet Crab Casserole Recipe (Yield: 8 Servings)

Ingredients

  • 16 ounces imitation crab meat, chopped into bite-sized pieces
  • ½ cup sour cream
  • 1½ tablespoons fresh lemon juice
  • 1 teaspoon lemon zest
  • ½ teaspoon garlic powder (or 1 garlic clove, minced)
  • 1 cup shredded mozzarella cheese
  • 1 cup shredded cheddar cheese
  • 1 cup celery, thinly sliced
  • ½ cup green onions, thinly sliced
  • 4 ounces cream cheese, softened to room temperature
  • 2 tablespoons mayonnaise
  • 1½ tablespoons Worcestershire sauce

Instructions

Preheat your oven to 350°F (175°C). Lightly grease a 9×9-inch baking dish or a 2-quart casserole dish with cooking spray or a small amount of butter.

Remove the imitation crab meat from its packaging and gently pat it dry with paper towels if there is excess moisture. Cut the crab into bite-sized pieces so it mixes evenly throughout the casserole.

In a large mixing bowl, combine the softened cream cheese, sour cream, and mayonnaise. Stir until smooth and creamy. Using softened cream cheese helps create a silky mixture without lumps.

Add the lemon juice, lemon zest, Worcestershire sauce, and garlic powder. Mix thoroughly until all the seasonings are evenly incorporated.

Fold in half of the shredded mozzarella and half of the shredded cheddar cheese, reserving the remaining cheese for the topping.

Add the chopped imitation crab, sliced celery, and green onions. Stir gently until every ingredient is coated in the creamy cheese mixture. Be careful not to overmix so the crab pieces stay intact.

Transfer the mixture into the prepared baking dish and spread it into an even layer using a spatula.

Sprinkle the remaining mozzarella and cheddar cheese evenly over the top of the casserole. This creates the golden, bubbly cheese layer that resembles the version served at many Chinese buffets.

Place the baking dish in the preheated oven and bake uncovered for 25 to 30 minutes. The casserole is ready when the cheese has melted completely and the edges are bubbling.

For a lightly browned top, switch the oven to the broil setting during the final 2 to 3 minutes. Watch carefully to prevent the cheese from burning.

Remove the casserole from the oven and let it rest for about 10 minutes before serving. This allows the filling to firm up slightly, making it easier to scoop.

Garnish with additional sliced green onions or a little extra lemon zest if desired. Serve warm alongside fried rice, lo mein, steamed vegetables, egg rolls, grilled chicken, or as part of a buffet-style meal.

2. Tips for Perfect Chinese Buffet Crab Casserole

Use block cheese and shred it yourself whenever possible. Freshly shredded cheese melts more smoothly and creates a creamier casserole than pre-shredded varieties.

Allow the cream cheese to soften fully before mixing. This makes it much easier to blend into a smooth filling without lumps.

Pat the imitation crab dry if it contains excess moisture. Too much liquid can make the casserole thinner than desired.

Slice the celery thinly so it softens during baking while still adding a pleasant crunch to the finished dish.

Reserve part of the cheese for the top instead of mixing it all into the filling. This creates the signature golden, bubbly crust found in many buffet-style casseroles.

If you enjoy a richer flavor, add a small pinch of smoked paprika or a dash of Old Bay seasoning to the filling without overpowering the crab.

Let the casserole rest for about 10 minutes after baking. The filling thickens slightly as it cools, making serving much easier.

Serve the casserole immediately while the cheese is still hot and stretchy for the best texture and flavor.

3. Frequently Asked Questions

Can I use real crab meat instead of imitation crab?

Yes. Lump crab meat or claw meat can be substituted for imitation crab if you prefer a more traditional seafood flavor. Handle it gently so the larger pieces remain intact.

Can I prepare this casserole ahead of time?

Absolutely. Assemble the casserole, cover it tightly, and refrigerate it for up to 24 hours before baking. You may need to add 5 to 10 minutes to the baking time if it’s cold from the refrigerator.

Can I freeze crab casserole?

Yes. Assemble the casserole without baking, wrap it tightly, and freeze for up to two months. Thaw overnight in the refrigerator before baking according to the recipe instructions.

What can I serve with crab casserole?

This casserole pairs wonderfully with fried rice, steamed jasmine rice, chow mein, roasted vegetables, garlic bread, side salads, or grilled chicken for a complete meal.

How do I store leftovers?

Store cooled leftovers in an airtight container in the refrigerator for up to three days. Reheat individual portions in the microwave or warm the entire casserole in a 325°F oven until heated through.

4. Nutrition Information

Nutrient Amount Per Serving
Calories 285
Protein 17 g
Total Fat 19 g
Saturated Fat 10 g
Carbohydrates 9 g
Fiber 1 g
Sugar 5 g
Sodium 820 mg
Cholesterol 55 mg
Calcium 250 mg

This Simple Chinese Buffet Crab Casserole Recipe is a comforting dish that’s easy enough for weeknight dinners yet impressive enough for holiday gatherings and potlucks. The combination of creamy cheeses, tender imitation crab, crisp celery, and flavorful seasonings creates a casserole that’s rich, satisfying, and full of classic buffet-inspired flavor.

After making this recipe once, you’ll find it easy to customize with your favorite cheeses, seasonings, or seafood. Serve it as a hearty side dish or a satisfying main course, and enjoy a homemade version of a popular Chinese buffet favorite whenever the craving strikes.

Chicken Chow Mein is one of the most popular Chinese noodle dishes, loved for its combination of chewy noodles, tender chicken, crisp vegetables, and rich savory sauce. This authentic homemade version captures the flavors commonly found in Chinese restaurants while using simple ingredients that are easy to prepare in your own kitchen.

The secret to great chow mein is cooking each ingredient quickly over high heat, allowing the noodles to develop a slight crispness while keeping the vegetables fresh and colorful. Once you learn a few simple techniques, you’ll be able to make restaurant-quality Chicken Chow Mein whenever you’re craving a delicious homemade meal.

1. Authentic Chinese Chicken Chow Mein Recipe (Yield: 4 Servings)

Ingredients

Main Ingredients

  • 18 ounces thick chow mein noodles
  • 2 ounces red onion, thinly sliced
  • 2 ounces carrot, julienned
  • 6 ounces cabbage, thinly sliced
  • 1 ounce green onion, cut into 2-inch pieces
  • 4 ounces bean sprouts
  • 12 ounces boneless, skinless chicken thighs, thinly sliced
  • 4 tablespoons corn oil

Chicken Marinade

  • 1 tablespoon oyster sauce
  • 3 teaspoons cornstarch
  • 3 tablespoons water
  • ¼ teaspoon white pepper

Sauce

  • 2 tablespoons oyster sauce
  • 2 tablespoons light soy sauce
  • 2 teaspoons dark soy sauce
  • 1 teaspoon sugar
  • 1 teaspoon chicken bouillon powder
  • 1 tablespoon sesame oil

Instructions

If you’re using fresh chow mein noodles, gently loosen them with your hands. If you’re using refrigerated noodles, blanch them in boiling water for about 30 seconds, drain thoroughly, and toss lightly with a little oil to prevent sticking. Set them aside.

Place the sliced chicken thighs into a medium bowl. Add the oyster sauce, cornstarch, water, and white pepper. Mix thoroughly until every piece of chicken is evenly coated. Let the chicken marinate for at least 20 minutes while preparing the remaining ingredients.

In a small bowl, combine the oyster sauce, light soy sauce, dark soy sauce, sugar, chicken bouillon powder, and sesame oil. Stir until the sugar dissolves completely. Set the sauce aside.

Prepare all of the vegetables before heating the wok. Thinly slice the red onion and cabbage, julienne the carrot, cut the green onions into 2-inch lengths, and rinse the bean sprouts thoroughly. Because stir-frying happens quickly, having everything ready beforehand is essential.

Heat a large wok or heavy skillet over high heat until it is very hot. Add 2 tablespoons of the corn oil and swirl to coat the surface.

Add the marinated chicken in a single layer. Stir-fry for about 3 to 4 minutes until the chicken is lightly browned and nearly cooked through. Remove the chicken from the wok and set it aside.

Add the remaining 2 tablespoons of corn oil to the wok. Add the red onion and carrots first, stir-frying for about 1 minute. Next, add the cabbage and continue cooking for another 2 minutes until the vegetables begin to soften while still remaining slightly crisp.

Add the chow mein noodles to the wok. Use tongs or chopsticks to gently separate the noodles while tossing them with the vegetables. Allow the noodles to sit undisturbed for about 30 seconds occasionally to develop slight browning and a lightly crispy texture.

Return the cooked chicken to the wok along with any accumulated juices.

Pour the prepared sauce evenly over the noodles. Toss everything together continuously until every strand of noodle is evenly coated and the sauce has been fully absorbed.

Finally, add the bean sprouts and green onions. Stir-fry for another 1 to 2 minutes. The bean sprouts should remain slightly crisp, and the green onions should stay bright green.

Taste the chow mein and adjust the seasoning if needed by adding a small splash of light soy sauce or a drizzle of sesame oil.

Serve immediately while hot. Garnish with additional sliced green onions or a sprinkle of toasted sesame seeds if desired.

2. Tips for Perfect Authentic Chinese Chicken Chow Mein

Use fresh chow mein noodles whenever possible. They provide the authentic chewy texture that makes restaurant-style chow mein so enjoyable.

Prepare every ingredient before heating the wok. Stir-frying moves quickly, leaving very little time for chopping or measuring once cooking begins.

Marinate the chicken for at least 20 minutes. The cornstarch helps create tender, juicy chicken while the oyster sauce adds rich flavor.

Cook over high heat throughout the stir-fry. High heat develops the characteristic smoky flavor known as “wok hei” while keeping the vegetables crisp.

Avoid overcrowding the wok. If necessary, cook the chicken in batches so it browns instead of steaming.

Allow the noodles to sit untouched for short periods during cooking. This develops lightly crispy edges that add wonderful texture to the finished dish.

Add bean sprouts and green onions near the end of cooking so they stay crisp and fresh instead of becoming soft.

Serve immediately after cooking. Chow mein tastes best while the noodles are hot and the vegetables still have a slight crunch.

3. Frequently Asked Questions

Can I use chicken breast instead of chicken thighs?

Yes. Chicken breast works well, although chicken thighs remain juicier during high-heat cooking. Slice the breast thinly across the grain for the most tender texture.

What is the difference between chow mein and lo mein?

Chow mein typically features stir-fried noodles that develop a slightly crispy texture, while lo mein noodles are usually tossed with sauce after boiling, resulting in a softer dish.

Can I add other vegetables?

Absolutely. Bell peppers, snow peas, mushrooms, broccoli, baby corn, bok choy, and snap peas all make excellent additions while keeping the dish colorful and nutritious.

How should I store leftovers?

Store leftover chow mein in an airtight container in the refrigerator for up to three days. Reheat quickly in a hot skillet or wok for the best texture.

Can I make this recipe ahead of time?

You can prepare the vegetables, marinate the chicken, and mix the sauce several hours in advance. Stir-fry everything just before serving for the freshest flavor and texture.

4. Nutrition Information

Nutrient Amount Per Serving
Calories 610
Protein 33 g
Total Fat 21 g
Saturated Fat 4 g
Carbohydrates 70 g
Fiber 4 g
Sugar 6 g
Sodium 980 mg
Cholesterol 105 mg
Calcium 70 mg

This Authentic Chinese Chicken Chow Mein Recipe brings together tender marinated chicken, chewy noodles, crisp vegetables, and a perfectly balanced savory sauce in one satisfying meal. By preparing the ingredients ahead of time and cooking everything over high heat, you can recreate the fresh flavors and textures found in your favorite Chinese restaurant.

Once you’ve mastered this classic recipe, you can easily customize it with additional vegetables or different proteins while keeping the same delicious homemade sauce. It’s a dependable recipe that’s perfect for weeknight dinners, family meals, or anytime you’re craving authentic Chinese comfort food.

Healthy Chicken Burrito Bowls are a colorful, satisfying meal packed with lean protein, fresh vegetables, hearty rice, and bold Tex-Mex flavors. They deliver everything you love about a burrito without the tortilla, making them a great option for meal prep, busy weeknight dinners, or a nutritious lunch that keeps you feeling full.

This homemade recipe features tender chipotle-marinated chicken served over fluffy cilantro lime rice with crisp romaine lettuce, black beans, corn, tomatoes, and creamy avocado. Every component is easy to prepare, and you can customize each bowl to suit your family’s tastes.

1. Healthy Chicken Burrito Bowls Recipe (Yield: 4 Servings)

Ingredients

For the Chicken

  • 2 tablespoons olive oil
  • 3 tablespoons fresh lime juice
  • 3 chipotle chiles in adobo sauce, finely chopped
  • 1½ tablespoons adobo sauce
  • 1½ teaspoons garlic powder
  • ¾ teaspoon salt
  • 1½ pounds chicken breast, cut into strips

For the Cilantro Lime Rice

  • 1 cup long-grain white rice, rinsed
  • 1½ cups water
  • ¼ teaspoon salt, plus more to taste
  • Zest of 1 lime
  • 2 tablespoons fresh lime juice
  • ¼ cup chopped fresh cilantro

To Assemble

  • 1 head romaine lettuce, chopped
  • 1 cup diced tomatoes
  • 1 cup frozen corn, thawed
  • 1 (15-ounce) can black beans, rinsed and drained
  • ½ small red onion, chopped
  • Guacamole or diced avocado

Instructions

Begin by preparing the chicken marinade. In a medium bowl, whisk together the olive oil, lime juice, chopped chipotle chiles, adobo sauce, garlic powder, and salt until well combined.

Add the chicken strips to the marinade and toss until every piece is evenly coated. Cover the bowl and refrigerate for at least 30 minutes. For deeper flavor, marinate the chicken for up to 4 hours.

While the chicken marinates, prepare the cilantro lime rice. Combine the rinsed rice, water, and salt in a medium saucepan. Bring the mixture to a boil over medium-high heat.

Reduce the heat to low, cover the saucepan with a lid, and simmer for about 15 to 18 minutes, or until the rice is tender and all of the water has been absorbed.

Remove the saucepan from the heat and let the rice rest, covered, for 10 minutes. Fluff the rice gently with a fork before stirring in the lime zest, fresh lime juice, chopped cilantro, and additional salt if needed.

Heat a large skillet or grill pan over medium-high heat. Once hot, add the marinated chicken in a single layer. Cook for about 4 to 5 minutes per side until the chicken is lightly charred and reaches an internal temperature of 165°F (74°C). Avoid overcrowding the pan by cooking in batches if necessary.

Transfer the cooked chicken to a cutting board and allow it to rest for 5 minutes. This helps the juices redistribute, keeping the meat tender and flavorful.

While the chicken rests, prepare the remaining ingredients. Chop the romaine lettuce, dice the tomatoes, thaw the corn if necessary, rinse and drain the black beans, and finely chop the red onion.

Slice the cooked chicken into bite-sized pieces if needed.

To assemble each burrito bowl, divide the cilantro lime rice evenly among four serving bowls. Arrange the chopped romaine lettuce beside the rice, followed by the tomatoes, corn, black beans, and red onion.

Top each bowl with the warm chipotle chicken and finish with a generous spoonful of guacamole or fresh diced avocado.

Serve immediately with extra lime wedges, chopped cilantro, your favorite salsa, or a dollop of Greek yogurt or sour cream if desired.

2. Tips for Perfect Chicken Burrito Bowls

Marinate the chicken for at least 30 minutes, but allowing it to rest for several hours develops even deeper chipotle and lime flavor.

Rinse the rice thoroughly before cooking to remove excess starch. This helps produce light, fluffy grains instead of sticky rice.

Cook the chicken over medium-high heat to create flavorful caramelization without drying out the meat.

Allow the cooked chicken to rest before slicing. Resting keeps the juices inside the meat instead of running onto the cutting board.

Taste the cilantro lime rice before serving and adjust with an extra squeeze of lime juice or a pinch of salt if needed. Small adjustments make a noticeable difference.

Drain and rinse the black beans well to remove excess sodium and improve their flavor.

Keep the lettuce separate from the warm rice if you’re preparing meal-prep bowls. This helps maintain its crisp texture until serving.

For extra freshness, add avocado or guacamole just before eating rather than storing it with the prepared bowls.

3. Frequently Asked Questions

Can I prepare these burrito bowls ahead of time?

Yes. Store the chicken, rice, and vegetables in separate airtight containers in the refrigerator for up to four days. Assemble the bowls just before serving for the freshest texture.

Can I use chicken thighs instead of chicken breasts?

Absolutely. Boneless, skinless chicken thighs are an excellent substitute and produce especially juicy, flavorful results.

Is this recipe good for meal prep?

Yes. These burrito bowls are ideal for meal prep because the chicken and rice reheat well, while the fresh vegetables can be added when you’re ready to eat.

What other toppings work well?

Try shredded cheese, pickled jalapeños, sliced olives, pico de gallo, roasted peppers, fresh salsa, tortilla strips, pumpkin seeds, or a drizzle of chipotle sauce.

Can I make these burrito bowls lower in carbohydrates?

Yes. Replace the cilantro lime rice with cauliflower rice or serve the chicken over extra lettuce and vegetables for a lighter option.

4. Nutrition Information

Nutrient Amount Per Serving
Calories 560
Protein 39 g
Total Fat 20 g
Saturated Fat 3.5 g
Carbohydrates 52 g
Fiber 10 g
Sugar 5 g
Sodium 640 mg
Potassium 980 mg
Calcium 75 mg

These Healthy Chicken Burrito Bowls are a delicious way to enjoy fresh ingredients, lean protein, and vibrant Tex-Mex flavors in one satisfying meal. The smoky chipotle chicken, bright cilantro lime rice, crisp vegetables, and creamy avocado create a balanced bowl that’s both nourishing and full of flavor.

Once you’ve mastered this recipe, it’s easy to customize with your favorite toppings, grains, or vegetables. It’s an excellent choice for meal prep, quick family dinners, or a healthy lunch that you’ll look forward to eating throughout the week.

Crispy onions are one of those simple toppings that instantly make a meal more exciting. They add irresistible crunch, savory flavor, and a beautiful golden color to burgers, salads, casseroles, soups, sandwiches, and even mashed potatoes. Making them in the air fryer gives you the same satisfying crispiness with much less oil than traditional deep frying.

This Air Fryer Crispy Onions Recipe is beginner-friendly and uses just a handful of pantry ingredients. The coating becomes wonderfully crunchy while the onions turn sweet and tender inside. With a few easy techniques and the right cooking time, you’ll have homemade crispy onions that taste fresh and are ready in less than 20 minutes.

1. Air Fryer Crispy Onions Recipe (Yield: 4 Servings)

Ingredients

  • 2 large yellow onions, thinly sliced
  • 1 tablespoon olive oil
  • ⅓ cup panko breadcrumbs (or regular breadcrumbs)
  • 1 tablespoon cornstarch
  • ½ teaspoon garlic powder
  • ½ teaspoon paprika
  • ½ teaspoon salt
  • ¼ teaspoon black pepper

Instructions

Start by peeling the onions and slicing them into thin, even rings or half-moons about ⅛ inch thick. Keeping the slices uniform helps them cook at the same rate and ensures consistent crispiness.

Separate the onion slices gently with your fingers and place them in a large mixing bowl. Drizzle the olive oil over the onions and toss thoroughly until every slice is lightly coated. The oil helps the seasonings stick while encouraging even browning in the air fryer.

In a separate bowl, combine the breadcrumbs, cornstarch, garlic powder, paprika, salt, and black pepper. Stir well so the seasonings are evenly distributed throughout the coating.

Sprinkle the breadcrumb mixture over the onions a little at a time while tossing continuously. Continue mixing until every onion slice has a light, even coating. If needed, use your hands to separate any onion pieces that stick together.

Preheat your air fryer to 375°F (190°C) for about 3 to 5 minutes. Preheating helps the onions begin crisping immediately once they enter the basket.

Arrange the coated onions in a single layer inside the air fryer basket. Avoid overcrowding, as overlapping onions trap steam and prevent proper browning. Cook in batches if necessary.

Air fry for 6 minutes, then open the basket and gently shake or flip the onions with silicone tongs. This promotes even cooking on all sides.

Continue cooking for another 5 to 8 minutes, checking every 2 minutes during the final stage. Depending on your air fryer model and the thickness of your onion slices, the total cooking time will typically be 11 to 14 minutes.

The onions are ready when they are golden brown, crisp around the edges, and the breadcrumb coating has developed a crunchy texture. Keep a close eye on them during the last few minutes because they can brown quickly.

Transfer the crispy onions immediately to a wire cooling rack. Avoid placing them on paper towels, as trapped steam can soften the coating. They will continue to crisp slightly as they cool.

Serve immediately over burgers, hot dogs, green bean casserole, baked potatoes, salads, soups, tacos, macaroni and cheese, or enjoy them as a crunchy snack with your favorite dipping sauce.

2. Tips for Perfect Air Fryer Crispy Onions

Slice the onions as evenly as possible using a sharp knife or mandoline slicer. Uniform slices cook more consistently and produce evenly crisp results.

Yellow onions offer the best balance of sweetness and savory flavor, but sweet onions such as Vidalia can also be used for a milder taste.

Pat the onion slices dry with paper towels if they release a lot of moisture after slicing. Removing excess moisture helps the coating adhere better.

Panko breadcrumbs create a lighter, crunchier coating than regular breadcrumbs. If available, they are the best choice for maximum crispiness.

Cornstarch plays an important role in creating a crisp exterior. Don’t skip it, as it helps absorb moisture and promotes better browning.

Always cook the onions in a single layer. Overcrowding the basket causes steaming instead of crisping and can leave some onions soft.

Shake the basket several times throughout cooking to expose all sides of the onions to the circulating hot air.

Let the onions cool for a few minutes before serving. As they cool, the coating becomes even crispier.

3. Frequently Asked Questions

Can I make these onions ahead of time?

Yes. They are at their crispiest shortly after cooking, but you can prepare them several hours in advance. Reheat them in the air fryer at 350°F for 2 to 3 minutes before serving.

What type of onions work best?

Yellow onions are ideal because they develop a rich, sweet flavor during cooking. Sweet onions and white onions also work well if you prefer a milder taste.

Can I make this recipe gluten-free?

Absolutely. Replace the regular breadcrumbs with gluten-free breadcrumbs or gluten-free panko. Also confirm that your cornstarch and seasonings are certified gluten-free if needed.

How should I store leftovers?

Store cooled crispy onions in an airtight container at room temperature for one day or refrigerate for up to three days. Reheat in the air fryer to restore their crunch.

What dishes can I use crispy onions on?

These onions are delicious on burgers, sandwiches, casseroles, creamy soups, chili, baked potatoes, mashed potatoes, tacos, grain bowls, salads, and even homemade pizzas.

4. Nutrition Information

Nutrient Amount Per Serving
Calories 120
Protein 2 g
Total Fat 4 g
Saturated Fat 0.5 g
Carbohydrates 20 g
Fiber 3 g
Sugar 6 g
Sodium 360 mg
Potassium 210 mg
Calcium 25 mg

Making crispy onions in the air fryer is a quick and simple way to enjoy a crunchy topping without the mess and extra oil of deep frying. With just a few everyday ingredients and a short cooking time, you can create golden, flavorful onions that elevate countless meals.

Once you’ve mastered this recipe, you’ll find yourself reaching for it again and again. From burgers and casseroles to salads and soups, these homemade crispy onions add the perfect finishing touch with every bite.

Pepperoni Pizza Sourdough Bread is the perfect combination of artisan sourdough and classic pizza flavors. With a chewy crust, soft interior, gooey cheese, and savory pepperoni tucked inside every slice, this homemade bread is a fun twist on two family favorites. It’s great for dinner, game day, lunch, or served alongside soup and salad.

This recipe walks you through every stage of making sourdough bread, from mixing and fermenting the dough to adding the pizza-inspired filling and baking it until beautifully golden. If you’re comfortable making basic sourdough, you’ll find this recipe easy to follow and incredibly rewarding.

1. Pepperoni Pizza Sourdough Bread Recipe (Yield: 8 Slices)

Ingredients

  • 4 cups plus 2 tablespoons bread flour
  • ⅓ cup active sourdough starter (100% hydration)
  • 1⅓ cups warm water
  • 1¾ teaspoons salt
  • 1 tablespoon olive oil
  • ½ cup pizza sauce
  • 1 cup shredded mozzarella cheese
  • ½ cup pepperoni slices (mini or regular, halved)
  • ¼ teaspoon dried oregano
  • ¼ teaspoon garlic powder
  • 2 tablespoons grated Parmesan cheese

Instructions

Begin by feeding your sourdough starter about 4 to 8 hours before mixing the dough. It should be bubbly, active, and able to pass the float test for the best rise.

In a large mixing bowl, combine the warm water and active sourdough starter. Stir until the starter is mostly dissolved. Add the bread flour and mix with a wooden spoon or your hands until a shaggy dough forms with no dry flour remaining. Cover the bowl with a clean towel and let the dough rest for 30 minutes. This autolyse period allows the flour to absorb the water and improves gluten development.

After the dough has rested, add the salt and olive oil. Knead by hand for about 8 to 10 minutes or use a stand mixer with a dough hook for 6 to 8 minutes until the dough becomes smooth, elastic, and slightly tacky.

Transfer the dough to a lightly oiled bowl and cover it. Let it ferment at room temperature for approximately 3 to 4 hours. During the first 2 hours, perform a set of stretch-and-folds every 30 minutes. To do this, gently lift one edge of the dough and fold it toward the center, rotating the bowl until all four sides have been folded. This strengthens the dough without aggressive kneading.

When the dough has increased in volume by about 50 percent and feels airy, lightly flour your work surface and gently turn the dough out. Press it into a rectangle approximately 12 x 16 inches while preserving as many air bubbles as possible.

Spread the pizza sauce evenly across the dough, leaving a 1-inch border around the edges. Sprinkle the mozzarella cheese over the sauce, followed by the pepperoni slices. Finish with the dried oregano and garlic powder for extra pizza flavor.

Starting with one long edge, carefully roll the dough into a tight log, just as you would roll cinnamon rolls. Pinch the seam closed and tuck both ends underneath to help keep the filling securely inside during baking.

Shape the dough into a round or oval loaf. Place it seam-side up into a well-floured proofing basket or a bowl lined with a generously floured kitchen towel.

Cover the dough and let it proof for 1½ to 2 hours at room temperature. For deeper sourdough flavor, refrigerate the dough overnight and bake it the following day.

About 45 minutes before baking, place a Dutch oven with its lid inside your oven and preheat to 450°F (230°C).

Carefully turn the dough onto a sheet of parchment paper. Score the top with a sharp bread lame or razor blade to allow controlled expansion during baking. Sprinkle the grated Parmesan cheese evenly over the top.

Using the parchment paper as a sling, carefully lower the dough into the hot Dutch oven. Cover with the lid and bake for 25 minutes. Remove the lid and continue baking for another 20 to 25 minutes until the crust is deeply golden brown and the internal temperature reaches 205–210°F.

Transfer the finished loaf to a cooling rack and allow it to cool for at least one hour before slicing. Although it’s tempting to cut into it immediately, cooling allows the crumb to finish setting and keeps the melted cheese from running out.

Slice into eight thick pieces and enjoy warm on its own or serve with marinara sauce for dipping.

2. Tips for Perfect Pepperoni Pizza Sourdough Bread

Use a recently fed, active sourdough starter that has doubled in volume before mixing the dough. A vigorous starter produces better fermentation and a lighter loaf.

Measure ingredients with a kitchen scale whenever possible. Accurate measurements help maintain the proper hydration level needed for strong gluten development.

Choose a thick-style pizza sauce instead of a thin marinara. Excess moisture can create soggy areas inside the loaf and make shaping more difficult.

Pat pepperoni slices dry with paper towels before adding them to the filling. Removing excess oil helps prevent greasy pockets inside the bread.

Resist the urge to overfill the dough. A moderate amount of filling makes the loaf easier to shape and helps prevent the cheese from leaking during baking.

Perform the stretch-and-folds gently rather than kneading aggressively during bulk fermentation. This strengthens the dough while preserving the open crumb structure.

Preheat the Dutch oven thoroughly before baking. A fully heated baking vessel creates strong oven spring and helps develop a crisp artisan crust.

Cool the loaf completely before slicing. This step is especially important for filled sourdough because the cheese needs time to set inside the bread.

3. Frequently Asked Questions

Can I use all-purpose flour instead of bread flour?

Yes. Bread flour provides more protein and creates a chewier loaf, but all-purpose flour works well if that’s what you have available. The finished bread will simply have a slightly softer texture.

Can I freeze Pepperoni Pizza Sourdough Bread?

Absolutely. Allow the bread to cool completely before wrapping it tightly. Freeze whole or sliced for up to three months. Reheat slices directly from frozen in the oven or toaster.

Can I add other pizza toppings to the filling?

Yes. Cooked Italian sausage, mushrooms, olives, roasted peppers, caramelized onions, spinach, or provolone cheese all make excellent additions. Avoid vegetables with high moisture unless they’re cooked first.

How should I store leftover bread?

Store the loaf at room temperature in a bread bag or wrapped loosely in foil for up to two days. Refrigerate for longer storage and warm slices before serving to refresh the texture.

Why did some cheese leak out during baking?

A small amount of cheese escaping is completely normal. Leaving a clean border around the edges, sealing the seam tightly, and avoiding overfilling will minimize leakage.

4. Nutrition Information

Nutrient Amount Per Slice
Calories 320
Protein 13 g
Total Fat 9 g
Saturated Fat 4 g
Carbohydrates 46 g
Fiber 2 g
Sugar 2 g
Sodium 560 mg
Cholesterol 18 mg
Calcium 150 mg

Pepperoni Pizza Sourdough Bread is a creative way to combine artisan bread baking with the comforting flavors of homemade pizza. Every slice offers a crisp crust, chewy sourdough crumb, melted cheese, savory pepperoni, and just the right touch of herbs, making it a recipe that’s as enjoyable to bake as it is to eat.

After you’ve mastered the basic technique, you can easily personalize the loaf with your favorite pizza ingredients, cheeses, or seasonings. It’s a wonderful recipe for sharing with family and friends and a delicious addition to everything from casual lunches to weekend gatherings.

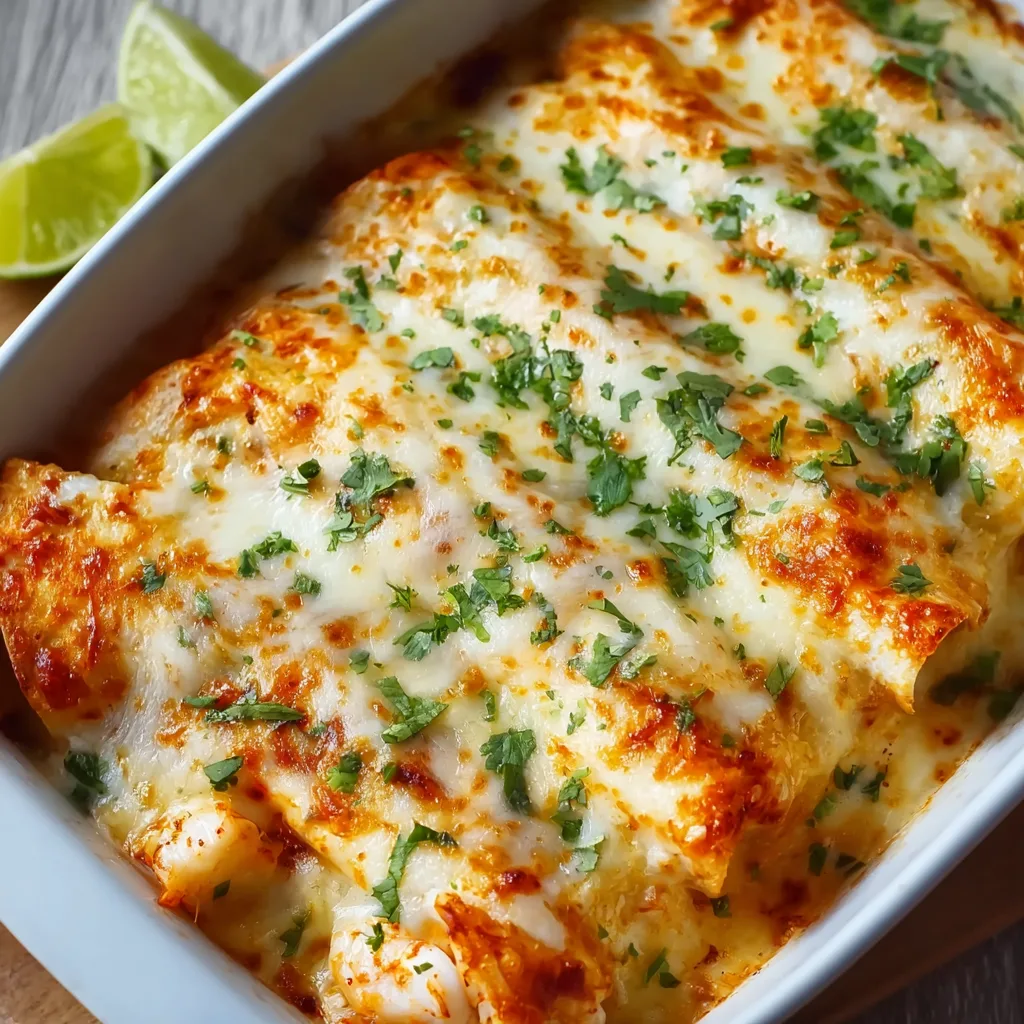
Seafood Enchiladas are a delicious way to bring restaurant-quality comfort food to your own kitchen. Filled with tender shrimp, sweet lump crab meat, and wrapped in soft flour tortillas, these enchiladas are topped with a creamy homemade sauce and plenty of melted cheese for a meal that’s perfect for family dinners or entertaining guests.

This easy Seafood Enchiladas Recipe walks you through every step, from preparing the flavorful seafood filling to making a rich cream sauce and baking everything until hot and bubbly. Even if you’ve never made enchiladas before, this recipe is simple enough to follow and delivers impressive results every time.

1. Seafood Enchiladas Recipe (Yield: 6 Servings)

Ingredients

For the Seafood Filling

  • 1 pound shrimp, peeled, deveined, and chopped
  • 8 ounces lump crab meat
  • 1 tablespoon olive oil
  • ½ medium onion, finely diced
  • 2 garlic cloves, minced
  • 1 teaspoon ground cumin
  • 1 teaspoon chili powder
  • ½ teaspoon salt
  • ¼ teaspoon black pepper
  • 2 tablespoons fresh cilantro, chopped
  • 1 tablespoon fresh lime juice

For the Creamy Sauce

  • 2 tablespoons butter
  • 2 tablespoons all-purpose flour
  • 1½ cups chicken broth or seafood broth
  • ½ cup sour cream
  • 4 ounces cream cheese, softened
  • 1 can (4 ounces) diced green chiles
  • ½ teaspoon garlic powder
  • ½ teaspoon salt
  • ¼ teaspoon black pepper

For Assembly

  • 8 small flour tortillas
  • 2 cups shredded Monterey Jack or Mexican-blend cheese
  • Extra chopped cilantro, for garnish

Instructions

Preheat your oven to 375°F (190°C). Lightly grease a 9×13-inch baking dish with cooking spray or a thin layer of butter.

Heat the olive oil in a large skillet over medium heat. Add the diced onion and cook for about 4 minutes until softened and translucent. Stir in the minced garlic and cook for another 30 seconds until fragrant.

Add the chopped shrimp to the skillet along with the ground cumin, chili powder, salt, and black pepper. Cook for about 2 to 3 minutes, stirring frequently, until the shrimp just begin turning pink. Avoid fully cooking them at this stage because they will continue cooking in the oven.

Gently fold the lump crab meat into the skillet, followed by the chopped cilantro and fresh lime juice. Stir carefully to keep the crab pieces intact. Remove the filling from the heat and set it aside while you prepare the sauce.

In a medium saucepan, melt the butter over medium heat. Sprinkle in the flour and whisk continuously for about 1 minute to create a smooth roux.

Slowly pour in the broth while whisking constantly until the mixture is smooth. Continue cooking for 3 to 5 minutes until the sauce begins to thicken slightly.

Reduce the heat to low. Add the softened cream cheese and stir until completely melted. Mix in the sour cream, diced green chiles, garlic powder, salt, and black pepper. Continue stirring until the sauce becomes smooth, creamy, and well combined.

Spread about ½ cup of the creamy sauce evenly across the bottom of the prepared baking dish.

Lay one tortilla flat on a clean work surface. Spoon an even portion of the seafood filling down the center and sprinkle with a small amount of shredded cheese. Roll the tortilla tightly and place it seam-side down in the baking dish. Repeat with the remaining tortillas and filling.

Pour the remaining creamy sauce evenly over the enchiladas, making sure each tortilla is well covered. Sprinkle the remaining shredded cheese across the top.

Cover the baking dish loosely with aluminum foil and bake for 20 minutes. Remove the foil and continue baking for another 10 to 15 minutes until the cheese is melted, lightly golden, and the sauce is bubbling around the edges.

Remove the enchiladas from the oven and allow them to rest for 5 to 10 minutes before serving. Garnish with fresh chopped cilantro and serve warm.

2. Tips for Perfect Seafood Enchiladas

Use fresh or properly thawed shrimp and pat them dry before cooking. Excess moisture can make the filling watery and dilute the flavor.

Choose high-quality lump crab meat for the best texture. Handle it gently when mixing so the large pieces remain intact.

Cook the shrimp only until they begin turning pink before assembling the enchiladas. This prevents them from becoming rubbery after baking.

Allow the cream cheese to soften at room temperature before making the sauce. Softened cream cheese blends more easily and creates a smoother consistency.

Warm the tortillas for a few seconds in the microwave or a dry skillet before filling them. This makes them flexible and less likely to crack while rolling.

Use freshly shredded cheese whenever possible. It melts more smoothly than pre-shredded cheese, which often contains anti-caking agents.

Cover the baking dish during the first part of baking to keep the enchiladas moist, then uncover them near the end to allow the cheese to brown beautifully.

Let the enchiladas rest for several minutes before serving. This gives the creamy sauce time to settle, making the enchiladas easier to slice and serve.

3. Frequently Asked Questions

Can I make seafood enchiladas ahead of time?

Yes. Assemble the enchiladas, cover the baking dish tightly, and refrigerate for up to 24 hours before baking. Add an extra 5 to 10 minutes to the baking time if starting from cold.

Can I freeze seafood enchiladas?

Yes. Assemble the enchiladas without baking, wrap the dish tightly, and freeze for up to two months. Thaw overnight in the refrigerator before baking.

What other seafood can I use?

Scallops, lobster, cooked crawfish, or firm white fish such as cod or halibut can be substituted for part of the shrimp or crab to create your own variation.

What side dishes go well with seafood enchiladas?

Spanish rice, cilantro lime rice, refried beans, black beans, grilled corn, avocado salad, fresh salsa, or roasted vegetables all pair wonderfully with this dish.

How do I reheat leftovers?

Cover the enchiladas with foil and warm them in a 350°F (175°C) oven for about 20 minutes, or microwave individual servings until heated through.

4. Nutrition Information

Nutrient Amount Per Serving
Calories 510
Protein 30 g
Total Fat 26 g
Saturated Fat 13 g
Carbohydrates 38 g
Fiber 2 g
Sugar 3 g
Sodium 770 mg
Cholesterol 170 mg
Calcium 290 mg

This easy Seafood Enchiladas Recipe is a wonderful combination of tender seafood, creamy homemade sauce, melted cheese, and soft tortillas. It’s comforting enough for family dinners while also being elegant enough to serve when entertaining guests.

Once you’ve made this recipe, you’ll find it easy to customize with your favorite seafood, cheeses, or toppings. Pair it with classic Mexican-inspired side dishes for a complete meal that’s rich, satisfying, and sure to become a favorite at your table.

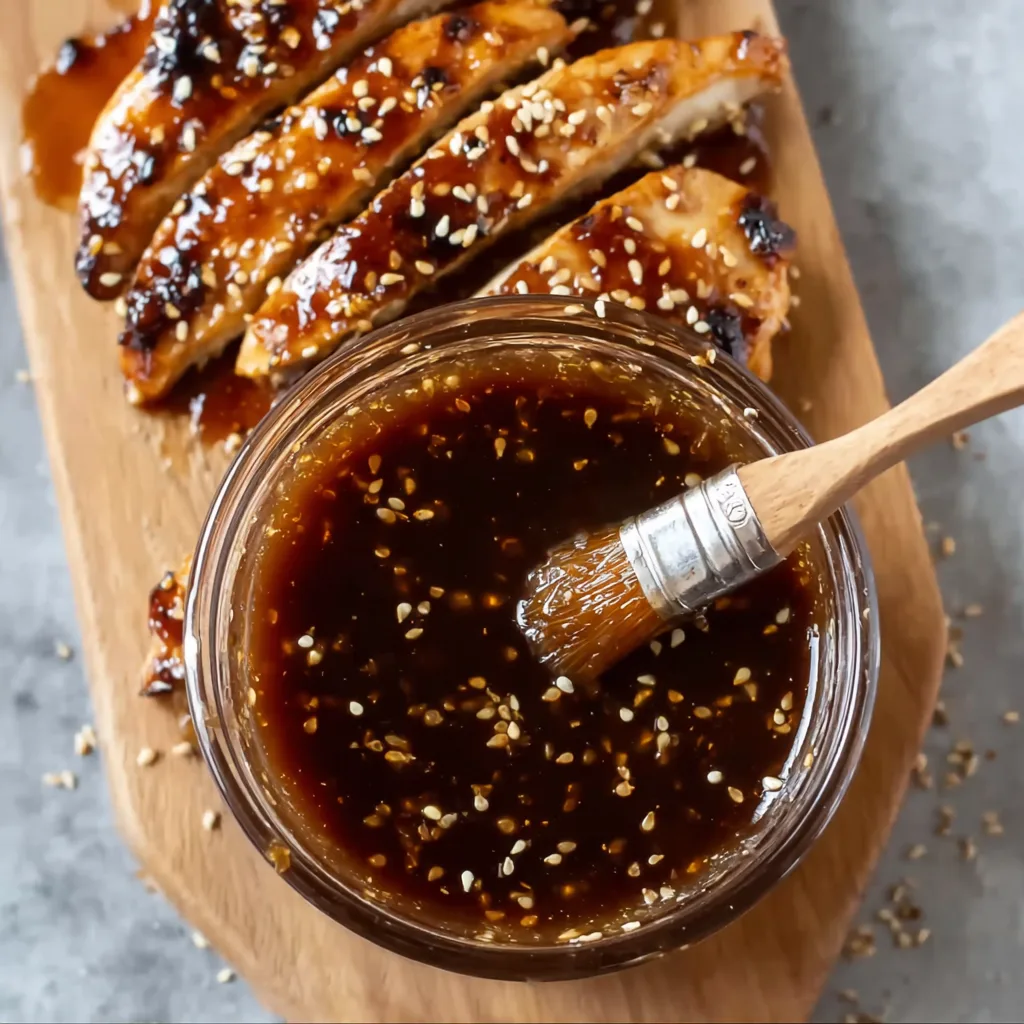
Homemade Teriyaki Sauce is a simple kitchen staple that comes together in just minutes using everyday pantry ingredients. Instead of relying on store-bought bottles, you can easily make a fresh batch at home and adjust the sweetness or consistency to suit your favorite recipes.

This easy sauce is incredibly versatile and works as a glaze, marinade, stir-fry sauce, or dipping sauce. With a rich, glossy finish and balanced flavor, it’s perfect for chicken, beef, pork, seafood, vegetables, noodles, and rice dishes.

1. Homemade Teriyaki Sauce (Yield: 1 Cup)

Ingredients

  • 1/2 cup low-sodium soy sauce
  • 1/2 cup water
  • 1/4 cup packed brown sugar
  • 2 tablespoons honey
  • 2 cloves garlic, minced
  • 1 teaspoon fresh ginger, minced
  • 1 tablespoon cornstarch

Instructions

Gather and measure all of your ingredients before you begin. Having everything ready makes the cooking process quick and ensures the sauce thickens evenly.

In a small bowl, combine the cornstarch with 2 tablespoons of the water from the recipe. Stir until completely smooth to create a slurry. This prevents lumps from forming when the sauce thickens later.

Pour the remaining water into a small saucepan. Add the low-sodium soy sauce, brown sugar, honey, minced garlic, and fresh ginger. Stir well to dissolve the brown sugar.

Place the saucepan over medium heat. Stir frequently as the mixture warms, allowing the sugar to fully dissolve and the garlic and ginger to infuse the sauce with flavor. Bring the mixture to a gentle simmer but avoid a vigorous boil.

Once the sauce begins to simmer, give the cornstarch slurry another quick stir because the starch settles quickly. Slowly pour the slurry into the saucepan while whisking constantly.

Continue cooking over medium heat for 2 to 4 minutes, stirring continuously. The sauce will gradually become glossy and thick enough to lightly coat the back of a spoon.

If you’d like a thicker glaze for brushing onto grilled meats, simmer the sauce for another minute or two. For a thinner sauce that’s perfect for stir-fries or rice bowls, remove it from the heat as soon as it reaches your preferred consistency.

Taste the sauce and adjust it if desired. Add a little extra honey for a sweeter finish, a splash of water to thin it, or a small amount of soy sauce for a bolder savory flavor.

Remove the saucepan from the heat and allow the teriyaki sauce to cool for several minutes. It will continue to thicken slightly as it cools.

For an extra-smooth sauce, strain it through a fine-mesh sieve to remove the minced garlic and ginger. This step is optional but creates a silky texture that’s especially nice for glazing.

Transfer the cooled sauce to a clean glass jar or airtight container. Store it in the refrigerator until ready to use. Stir well before each use if any natural separation occurs.

2. Tips for Perfect Homemade Teriyaki Sauce

Use low-sodium soy sauce as the base to give you better control over the final seasoning. If you prefer a saltier sauce, it’s easier to add more soy sauce later than to reduce excess salt.

Fresh ginger and freshly minced garlic provide a brighter, more authentic flavor than dried or powdered alternatives. A microplane grater works especially well for creating a smooth texture.

Always mix the cornstarch with cold water before adding it to the hot sauce. This simple step prevents lumps and creates a smooth, glossy consistency.

Whisk constantly while pouring in the cornstarch slurry. Continuous stirring helps the sauce thicken evenly without forming clumps.

Cook the sauce only until it reaches the desired consistency. Overcooking can make it thicker than intended, especially after it cools.

If the sauce becomes too thick after refrigeration, stir in a teaspoon or two of warm water until it returns to the consistency you prefer.

For a richer glaze, brush the sauce onto grilled or roasted meats during the last few minutes of cooking. This allows the sugars to caramelize without burning.

Double the recipe if you enjoy meal prepping. Homemade teriyaki sauce keeps well in the refrigerator and is handy to have ready for quick weeknight meals.

3. Frequently Asked Questions

How long does homemade teriyaki sauce last?

Stored in an airtight container in the refrigerator, homemade teriyaki sauce stays fresh for up to two weeks. Stir or shake it before using if any separation occurs.

Can I freeze teriyaki sauce?

Yes. Pour the cooled sauce into a freezer-safe container or ice cube tray and freeze for up to three months. Thaw overnight in the refrigerator before using.

What foods pair well with teriyaki sauce?

Teriyaki sauce is delicious with chicken, beef, pork, salmon, shrimp, tofu, roasted vegetables, stir-fried noodles, fried rice, steamed rice, and grilled skewers.

Can I make this sauce gluten-free?

Absolutely. Simply replace the regular soy sauce with a certified gluten-free tamari or gluten-free soy sauce while keeping the remaining ingredients the same.

Why did my sauce become thicker after cooling?

This is completely normal. Cornstarch continues to set as the sauce cools, creating a thicker consistency. Simply stir in a small amount of warm water if you’d like to thin it before serving.

4. Nutrition Information

Nutrient Amount Per 2 Tablespoons
Calories 55
Protein 1 g
Total Fat 0 g
Saturated Fat 0 g
Carbohydrates 13 g
Sugar 11 g
Fiber 0 g
Sodium 340 mg
Potassium 45 mg
Calcium 8 mg

Homemade Teriyaki Sauce is a versatile recipe that’s quick to prepare and far more customizable than most store-bought versions. With just a few pantry ingredients, you can create a flavorful sauce that works beautifully as a glaze, marinade, dipping sauce, or stir-fry sauce for countless meals.

Once you’ve made this recipe, you’ll always have a dependable homemade condiment ready to elevate your favorite dishes. Keep a jar in the refrigerator, and you’ll be just minutes away from adding delicious teriyaki flavor to weeknight dinners, meal prep, and family favorites.

Making homemade pizza doesn’t have to involve hours of rising time or complicated techniques. Greek Yogurt Pizza Dough is a quick and beginner-friendly recipe that comes together with just a few simple ingredients, making it perfect for busy weeknights, family pizza nights, or anytime you’re craving fresh homemade pizza.

This easy dough requires no yeast and no lengthy proofing, so you can have homemade pizza on the table in under an hour. Follow the step-by-step instructions below to create a soft, easy-to-work dough that’s ready for your favorite sauces, cheeses, and toppings.

1. Greek Yogurt Pizza Dough (Yield: 2 Pizzas)

Ingredients

  • 1 cup plain, unsweetened Greek yogurt
  • 1½ cups self-rising flour
    Or substitute with:

    • 1½ cups all-purpose flour
    • 2 teaspoons baking powder
    • ½ teaspoon salt
  • 1 tablespoon olive oil (optional, for added elasticity and flavor)
  • ¼ teaspoon garlic powder (optional, for extra flavor)
  • Pinch of salt (if using unsalted Greek yogurt)
  • Extra flour, for dusting and kneading

Instructions

Preheat your oven to 450°F (230°C). If using a pizza stone, place it in the oven while it preheats. A thoroughly heated pizza stone helps produce a crispier crust.

In a large mixing bowl, combine the self-rising flour with the garlic powder if using. If you are making your own self-rising flour, whisk together the all-purpose flour, baking powder, and salt until evenly combined.

Add the Greek yogurt, olive oil if using, and the pinch of salt if needed. Stir everything together with a wooden spoon or silicone spatula until a shaggy dough begins to form. Continue mixing until most of the flour has been incorporated.

Lightly flour a clean work surface and transfer the dough onto it. Knead gently for about 3 to 5 minutes until the dough becomes smooth, soft, and only slightly tacky. If the dough sticks to your hands, sprinkle in a little additional flour, one tablespoon at a time. Avoid adding too much flour, as this can make the crust dry.

Divide the dough evenly into two portions. Shape each portion into a smooth ball and let them rest for 10 minutes at room temperature. This short resting period relaxes the gluten, making the dough much easier to roll.

Roll each dough ball into a circle or rectangle about ¼ inch thick using a rolling pin or gently stretch it by hand. Transfer the dough to a parchment-lined baking sheet or a lightly floured pizza peel if using a pizza stone.

If you enjoy a crispier crust, use a fork to lightly prick the center of each crust several times, leaving about a 1-inch border around the edges.

Bake the plain crust for 5 to 6 minutes. This quick pre-bake helps prevent the dough from becoming soggy once the toppings are added.

Remove the crusts from the oven and spread your favorite pizza sauce evenly over each one, leaving a small border around the edge. Add shredded mozzarella cheese and your favorite toppings such as pepperoni, mushrooms, bell peppers, onions, olives, sausage, grilled chicken, spinach, or fresh basil.

Return the pizzas to the oven and bake for another 10 to 14 minutes, or until the cheese is melted and bubbly and the crust is lightly golden around the edges.

Remove the pizzas from the oven and allow them to cool for 3 to 5 minutes before slicing. Serve warm and enjoy with a simple salad, garlic bread, or your favorite dipping sauce.

2. Tips for Perfect Greek Yogurt Pizza Dough

Choose thick Greek yogurt rather than regular yogurt. Greek yogurt contains less moisture, making the dough easier to handle and helping it bake into a sturdier crust.

Measure the flour accurately by spooning it into the measuring cup and leveling it with a knife. Too much flour can result in a dense, dry crust.

If the dough feels sticky after mixing, let it sit for 5 minutes before adding more flour. The flour will continue absorbing moisture, often making the dough easier to knead.

A small amount of olive oil improves the dough’s elasticity and adds a subtle richness, making it easier to stretch without tearing.

Pre-baking the crust before adding toppings is especially helpful if you’re using vegetables or other ingredients with high moisture content. It helps keep the center of the pizza crisp.

Avoid overloading the pizza with sauce and toppings. Too many toppings can make the crust heavy and prevent it from baking evenly.

Bake the pizza on a preheated pizza stone or steel whenever possible. The intense heat creates a crispier bottom crust and a more evenly baked pizza.

For an extra golden finish, lightly brush the edges of the crust with olive oil before baking the topped pizza.

3. Frequently Asked Questions

Can I make the dough ahead of time?

Yes. Wrap the prepared dough tightly in plastic wrap or place it in an airtight container and refrigerate it for up to 24 hours. Let it sit at room temperature for about 20 to 30 minutes before rolling it out.

Can I freeze Greek yogurt pizza dough?

Absolutely. Wrap each dough ball tightly in plastic wrap and place it in a freezer-safe bag. Freeze for up to three months. Thaw overnight in the refrigerator before using.

What type of Greek yogurt works best?

Plain, full-fat Greek yogurt produces the richest flavor and easiest-to-handle dough, but low-fat Greek yogurt also works well. Avoid flavored or sweetened varieties.

Can I use this dough for recipes other than pizza?

Yes. This versatile dough can be used to make flatbreads, breadsticks, calzones, mini pizzas, or even garlic knots with only slight adjustments to the baking time.

Why didn’t my crust brown very much?

Greek yogurt dough naturally browns less than traditional yeast dough. Baking at a high temperature, using a pizza stone, and brushing the crust with a little olive oil can help create a more golden finish.

4. Nutrition Information

Nutrient Amount Per Serving*
Calories 340
Protein 16 g
Total Fat 7 g
Saturated Fat 2 g
Carbohydrates 53 g
Fiber 2 g
Sugar 4 g
Sodium 540 mg
Calcium 170 mg
Iron 3 mg

*Nutrition is calculated for one plain pizza crust (half of the recipe) before adding sauce, cheese, or toppings.

Greek Yogurt Pizza Dough is proof that homemade pizza can be both simple and satisfying. With no yeast, no rising time, and just a few pantry staples, it’s an excellent recipe for busy days when you want fresh pizza without the extra work.

Once you’ve mastered this easy dough, you can customize it with countless sauces, cheeses, and toppings to suit any occasion. From classic cheese pizza to creative gourmet combinations, this versatile recipe is one you’ll find yourself making again and again.

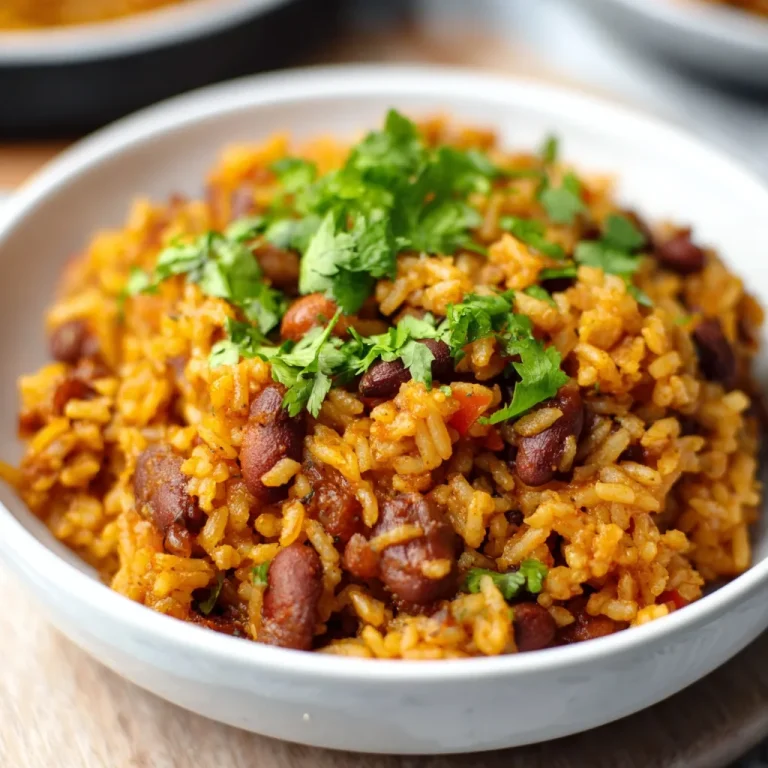
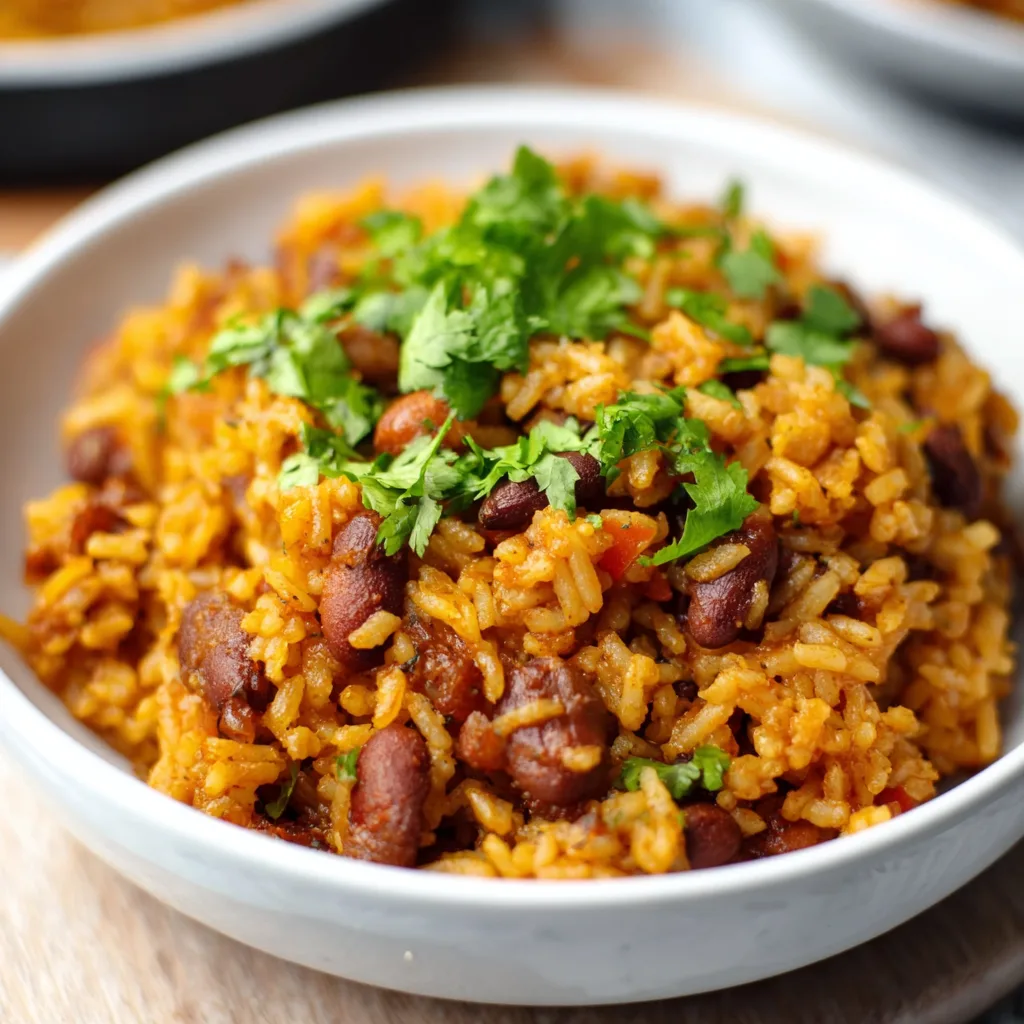
Mom’s Authentic Puerto Rican Rice & Beans is a comforting meal that has been passed down through generations of Puerto Rican families. This classic dish is simple enough for a weeknight dinner yet flavorful enough to serve during family gatherings and celebrations. With homemade rice and seasoned beans prepared separately, every bite delivers the traditional taste that has made this recipe a beloved staple.

This step-by-step recipe is designed to help home cooks recreate authentic Puerto Rican rice and beans with confidence. By following a few simple techniques, you’ll end up with fluffy, well-seasoned rice and tender, flavorful beans that pair perfectly together for a satisfying homemade meal.

1. Mom’s Authentic Puerto Rican Rice & Beans (Yield: 6 Servings)

Ingredients

For the Rice

  • 2 cups long-grain white rice (preferably Canilla or Carolina brand)
  • 2 tablespoons olive oil
  • 1 tablespoon sofrito
  • 1 packet sazon with culantro y achiote
  • 1 teaspoon adobo seasoning
  • 3 tablespoons tomato sauce
  • 1 teaspoon salt (adjust to taste)
  • 3 cups water
  • 1 bay leaf

For the Beans

  • 1 can (15 oz) pink beans (or red kidney beans), rinsed and drained
  • 2 tablespoons olive oil
  • 2 tablespoons sofrito
  • 2 tablespoons tomato sauce
  • 1 packet sazon with culantro y achiote
  • 1 teaspoon adobo seasoning
  • 1 teaspoon oregano
  • 2 garlic cloves, minced
  • ½ small onion, finely diced
  • ¼ green pepper, finely diced
  • 1½ cups water or broth
  • 1 bay leaf
  • Salt and black pepper, to taste
  • Fresh cilantro, chopped, for garnish

Instructions

Begin by rinsing the rice under cold running water until the water runs mostly clear. Drain well and set aside. Rinsing removes excess surface starch and helps produce fluffy rice with separate grains.

Heat the olive oil in a medium saucepan over medium heat. Stir in the sofrito and cook for about 2 minutes until fragrant. Add the sazon packet, adobo seasoning, tomato sauce, and salt. Stir continuously for another minute so the seasonings blend with the sofrito.

Add the rinsed rice to the saucepan and stir well, coating every grain with the seasoned mixture. Toast the rice gently for about 2 minutes, stirring often to prevent sticking.

Pour in the water and add the bay leaf. Increase the heat until the mixture reaches a gentle boil. Stir once, then reduce the heat to low and cover the pot with a tight-fitting lid. Allow the rice to cook undisturbed for 20 to 25 minutes until the liquid has been absorbed.

Once the rice is fully cooked, remove the saucepan from the heat and let it rest, still covered, for 10 minutes. Discard the bay leaf and fluff the rice gently with a fork before serving.

While the rice cooks, prepare the beans. Heat the olive oil in a separate saucepan over medium heat. Add the diced onion and green pepper and cook for about 4 to 5 minutes until softened. Stir in the minced garlic and cook for another 30 seconds until fragrant.

Add the sofrito, tomato sauce, sazon, adobo seasoning, oregano, and stir everything together until well combined.

Pour in the water or broth and add the bay leaf. Bring the mixture to a gentle simmer before adding the rinsed pink beans. Stir gently to avoid breaking the beans.

Reduce the heat to low and simmer uncovered for about 20 minutes, stirring occasionally. As the liquid reduces, the flavors will become richer and the sauce will thicken slightly.

Taste the beans and season with additional salt and black pepper if needed. Remove the bay leaf before serving.

Transfer the fluffy rice to serving plates or a large serving platter. Spoon the seasoned beans generously over or alongside the rice and garnish with freshly chopped cilantro. Serve immediately with roasted pork, chicken, fried plantains, avocado slices, or a fresh salad for a complete Puerto Rican-inspired meal.

2. Tips for Perfect Mom’s Authentic Puerto Rican Rice & Beans

Use long-grain rice for the best texture. It cooks into fluffy, separate grains that are characteristic of traditional Puerto Rican rice.

Rinse the rice thoroughly before cooking to remove excess starch and prevent the finished rice from becoming sticky.

Cook the rice with a tightly fitting lid and avoid lifting it during cooking. Trapped steam is essential for evenly cooked rice.

Toast the rice briefly in the seasoned oil before adding the water. This simple step enhances the flavor and helps the grains stay separate.

If available, use homemade sofrito. Fresh sofrito provides a brighter, more authentic flavor than many store-bought varieties.

Choose broth instead of water for the beans if you’d like a richer, deeper flavor while still maintaining the traditional character of the dish.

Simmer the beans gently instead of boiling rapidly. Slow cooking allows the sauce to develop while keeping the beans intact.

Allow both the rice and beans to rest for a few minutes before serving. This helps the flavors settle and improves the overall texture.

3. Frequently Asked Questions

Can I use dried beans instead of canned beans?

Yes. Soak dried beans overnight and cook them until tender before preparing the seasoned bean sauce. This method creates an even more traditional homemade dish.

What is sofrito, and can I make it at home?

Sofrito is a flavorful blend of vegetables and herbs commonly used as the base for many Puerto Rican recipes. Homemade sofrito typically includes peppers, onions, garlic, cilantro, and culantro blended together.

Can I freeze Puerto Rican rice and beans?

Yes. Store the rice and beans separately in airtight freezer-safe containers for up to three months. Thaw overnight in the refrigerator before reheating.

What proteins pair well with this dish?

Puerto Rican rice and beans are commonly served with roasted pork, pernil, grilled chicken, baked fish, beef stew, or fried pork chops.

Can I make this recipe vegetarian?

Absolutely. Use vegetable broth instead of chicken broth and ensure your adobo seasoning and sazon contain only plant-based ingredients for a delicious vegetarian version.

4. Nutrition Information

Nutrient Amount Per Serving
Calories 455
Protein 11 g
Total Fat 10 g
Saturated Fat 1.5 g
Carbohydrates 78 g
Fiber 6 g
Sugar 3 g
Sodium 760 mg
Potassium 470 mg
Iron 3 mg

Mom’s Authentic Puerto Rican Rice & Beans is a comforting recipe that celebrates simple ingredients and traditional cooking techniques. Preparing the rice and beans separately allows each component to develop its own rich flavor while coming together as a complete and satisfying meal.

Once you’ve mastered this classic recipe, it can become a dependable favorite for family dinners, meal prep, or festive occasions. Serve it with your favorite Puerto Rican-inspired main dishes, and you’ll have a homemade meal that brings warmth and tradition to the table every time.