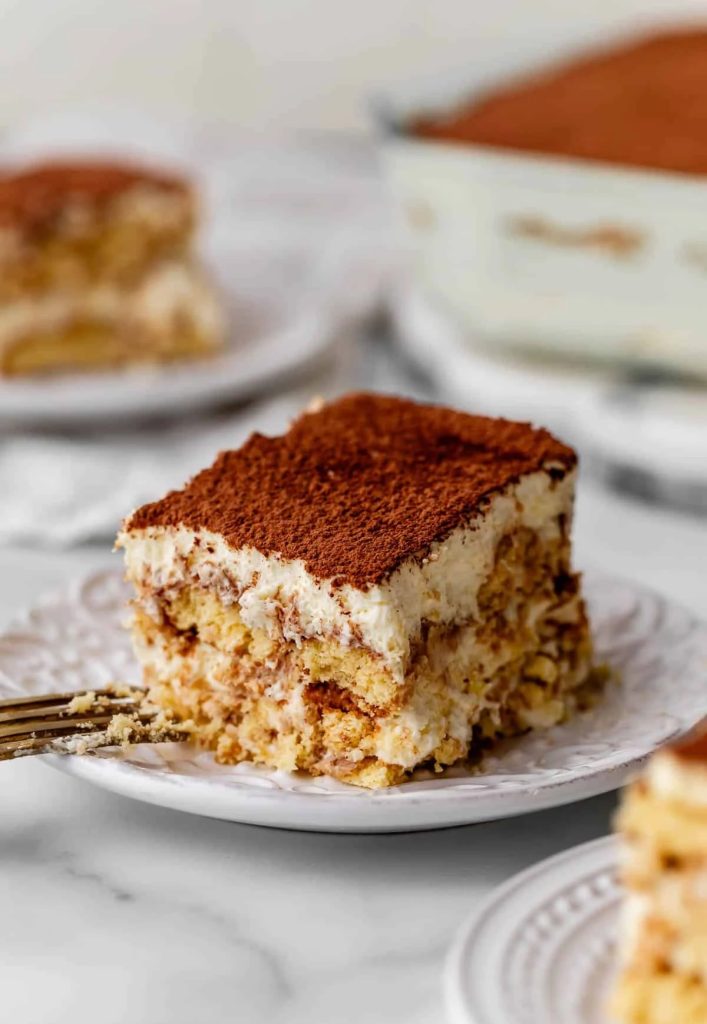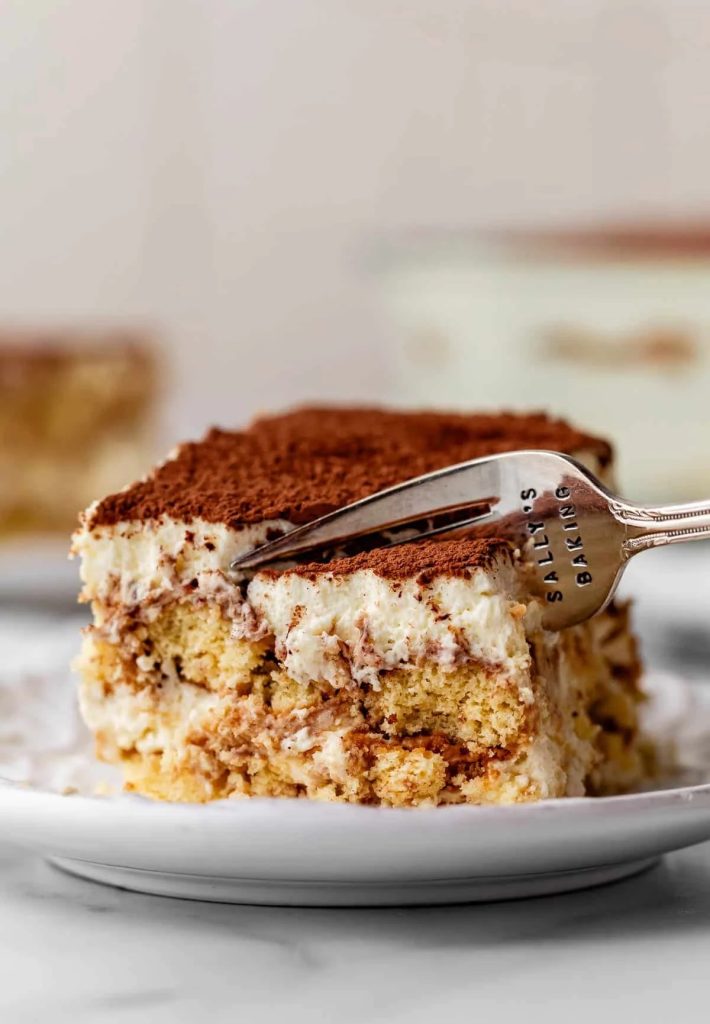
Author

Clifford A. Wright

Browsing

Mexican Street Corn Salad is a simple side dish that brings together sweet corn, a creamy dressing, tangy lime, and plenty of savory toppings. Inspired by the flavors of classic Mexican street corn, this easy salad is perfect for family dinners, cookouts, potlucks, and casual gatherings.

The best part is how quickly it comes together. You can use fresh, frozen, or canned corn, making it a convenient recipe to enjoy all year long. Every bite is packed with creamy, smoky, and zesty flavors that pair well with grilled meats, tacos, burgers, and so much more.

1. Mexican Street Corn Salad Recipe (Yield: 6 Servings)

Ingredients

  • 4 cups corn kernels (fresh, canned, or frozen)
  • 2 tablespoons butter (for charring the corn)
  • 1/3 cup mayonnaise
  • 1/3 cup sour cream (or Mexican crema)
  • 2 tablespoons lime juice
  • 1 teaspoon chili powder
  • 1/2 teaspoon smoked paprika
  • 1 clove garlic, minced
  • 1/2 cup cotija cheese, crumbled
  • 1/4 cup chopped fresh cilantro
  • 3 green onions, sliced
  • Salt, to taste
  • Black pepper, to taste
  • Lime wedges, for serving

Instructions

If using frozen corn, thaw it completely and pat it dry with paper towels. For canned corn, drain it well and remove as much moisture as possible. Fresh corn should be removed from the cob before cooking.

Heat a large skillet or cast-iron pan over medium-high heat. Add the butter and allow it to melt completely. Once the butter begins to foam, add the corn in a single layer. Let the corn cook without stirring for several minutes so it develops golden brown spots. Stir occasionally and continue cooking for 8 to 10 minutes until much of the corn is lightly charred. This step creates the signature roasted flavor found in traditional Mexican street corn.

Transfer the cooked corn to a large mixing bowl and allow it to cool for about 5 minutes. Cooling the corn slightly prevents the dressing from becoming too thin.

In a separate bowl, whisk together the mayonnaise, sour cream, lime juice, minced garlic, chili powder, and smoked paprika until the mixture is smooth and creamy. Taste the dressing and season lightly with salt and black pepper.

Pour the dressing over the warm corn and stir until every kernel is evenly coated.

Add the crumbled cotija cheese, chopped cilantro, and sliced green onions. Gently fold everything together so the cheese remains slightly chunky while being evenly distributed throughout the salad.

Taste the salad once more and adjust the seasoning with additional salt, black pepper, lime juice, or chili powder if desired.

Transfer the salad to a serving bowl and garnish with extra cotija cheese, cilantro, green onions, and a light sprinkle of chili powder. Serve with fresh lime wedges for squeezing over individual portions.

This salad can be served immediately while slightly warm or chilled in the refrigerator for about an hour before serving. Both options are equally delicious and make an excellent accompaniment to grilled chicken, steak, shrimp, tacos, fajitas, burgers, or barbecue dishes.

2. Tips for Perfect Mexican Street Corn Salad

For the richest flavor, char the corn well before mixing it with the dressing. The browned edges add a smoky sweetness that makes the salad taste closer to authentic Mexican street corn.

Avoid overcrowding the skillet while cooking. If necessary, cook the corn in two batches so the kernels roast instead of steaming.

Pat canned or thawed frozen corn dry before cooking. Excess moisture prevents the corn from browning properly.

Mix the dressing separately before adding it to the corn. This helps distribute the seasonings evenly throughout the salad.

Allow the corn to cool for a few minutes before stirring in the creamy dressing. This keeps the mayonnaise and sour cream from separating.

Fresh lime juice provides the brightest flavor. Bottled juice can be used in a pinch, but freshly squeezed juice makes a noticeable difference.

Reserve some cotija cheese and cilantro for garnishing. A generous topping gives the finished salad a fresh and colorful appearance.

If you enjoy extra heat, add a pinch of cayenne pepper, diced jalapeño, or a drizzle of your favorite hot sauce just before serving.

The flavors continue to develop as the salad rests. Preparing it 30 to 60 minutes ahead of time allows the ingredients to blend together beautifully.

3. Frequently Asked Questions

Can I make Mexican Street Corn Salad ahead of time?

Yes. The salad can be prepared up to one day in advance. Store it in an airtight container in the refrigerator and stir it well before serving. Add a little extra cheese and cilantro just before serving for the freshest presentation.

What can I use instead of cotija cheese?

If cotija cheese is unavailable, feta cheese is the closest substitute because of its crumbly texture and salty flavor. Parmesan can also work, although it has a firmer texture and a different taste.

Is this salad served hot or cold?

It is delicious both ways. Many people enjoy it slightly warm shortly after mixing, while others prefer it chilled after spending some time in the refrigerator. The choice depends on personal preference and the meal you’re serving.

How long does Mexican Street Corn Salad last in the refrigerator?

Stored in an airtight container, the salad stays fresh for up to 3 days. Stir before serving, as some liquid may separate naturally during storage.

What dishes pair well with Mexican Street Corn Salad?

This salad pairs wonderfully with grilled chicken, steak, pork chops, shrimp, tacos, burritos, enchiladas, burgers, barbecue ribs, pulled pork sandwiches, or even simple grilled vegetables. It also makes an excellent addition to picnic and potluck menus.

4. Nutrition Information

Nutrient Amount Per Serving
Calories 235
Protein 5 g
Carbohydrates 18 g
Fat 17 g
Saturated Fat 7 g
Cholesterol 28 mg
Fiber 2 g
Sugar 5 g
Sodium 290 mg
Potassium 275 mg
Calcium 95 mg
Iron 1 mg

Mexican Street Corn Salad is an easy recipe that delivers bold flavor with very little effort. Simple ingredients come together to create a creamy, colorful side dish that fits everything from weeknight dinners to festive celebrations.

Keep this recipe on hand anytime you need a crowd-pleasing salad that’s quick to prepare and full of fresh, vibrant flavors. It’s a dependable favorite that everyone will be happy to see on the table.
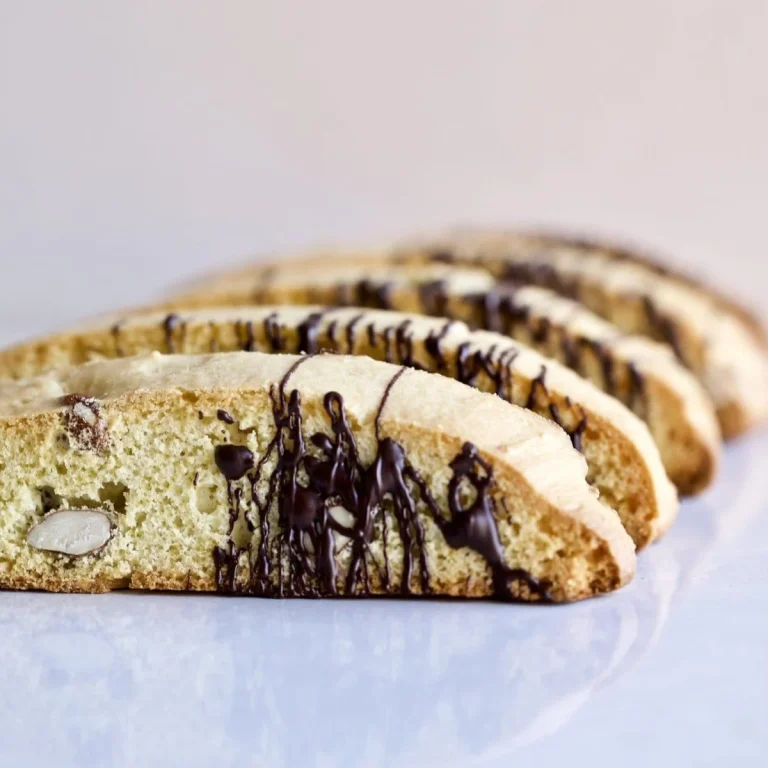
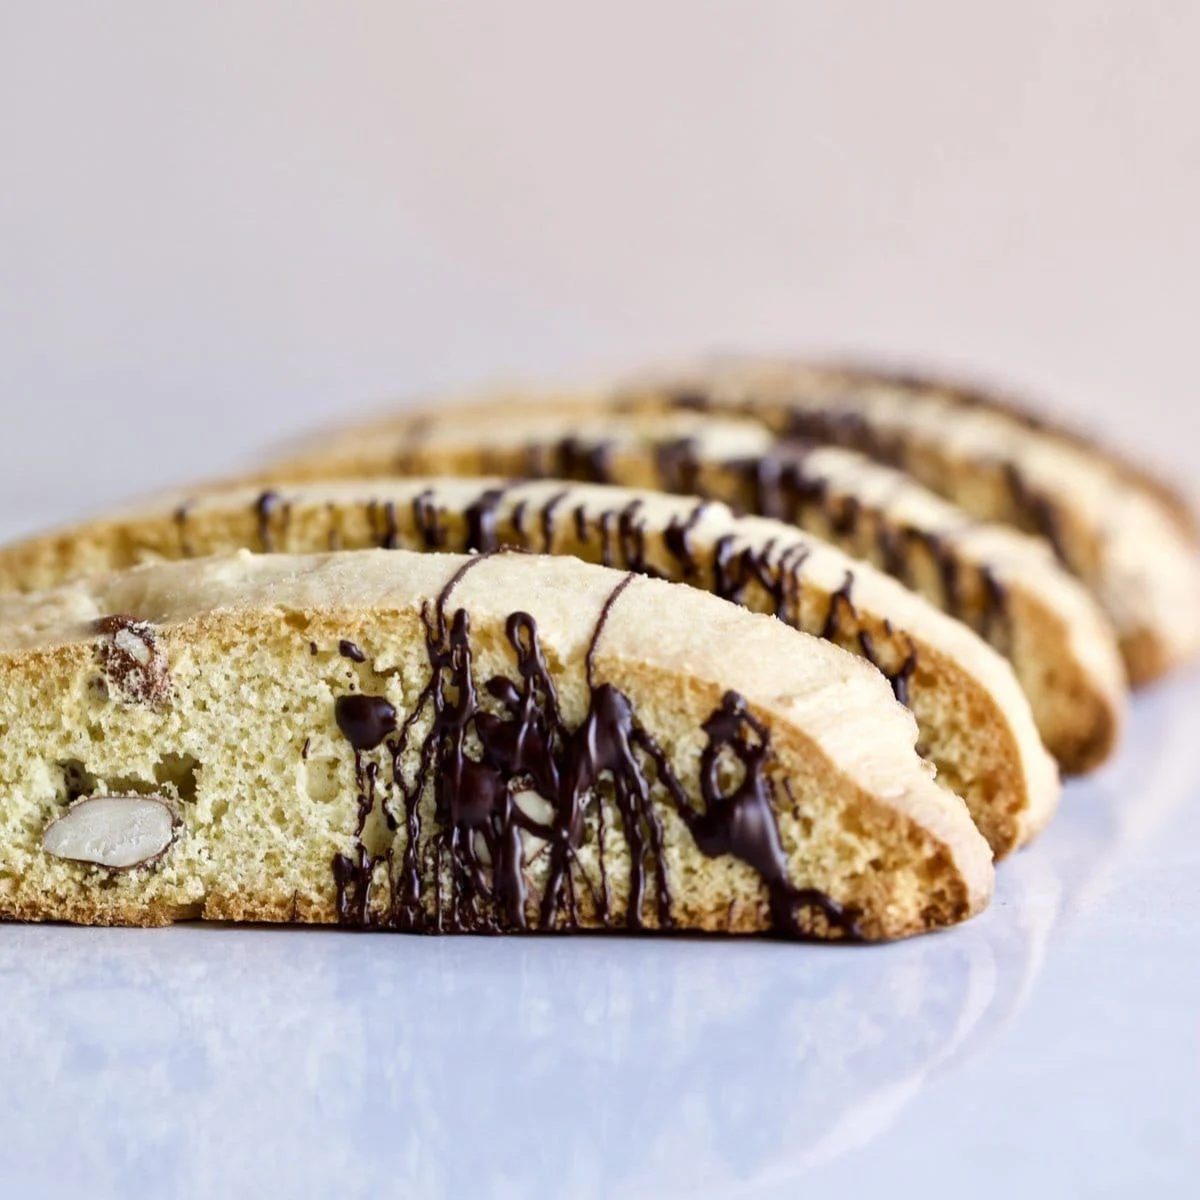
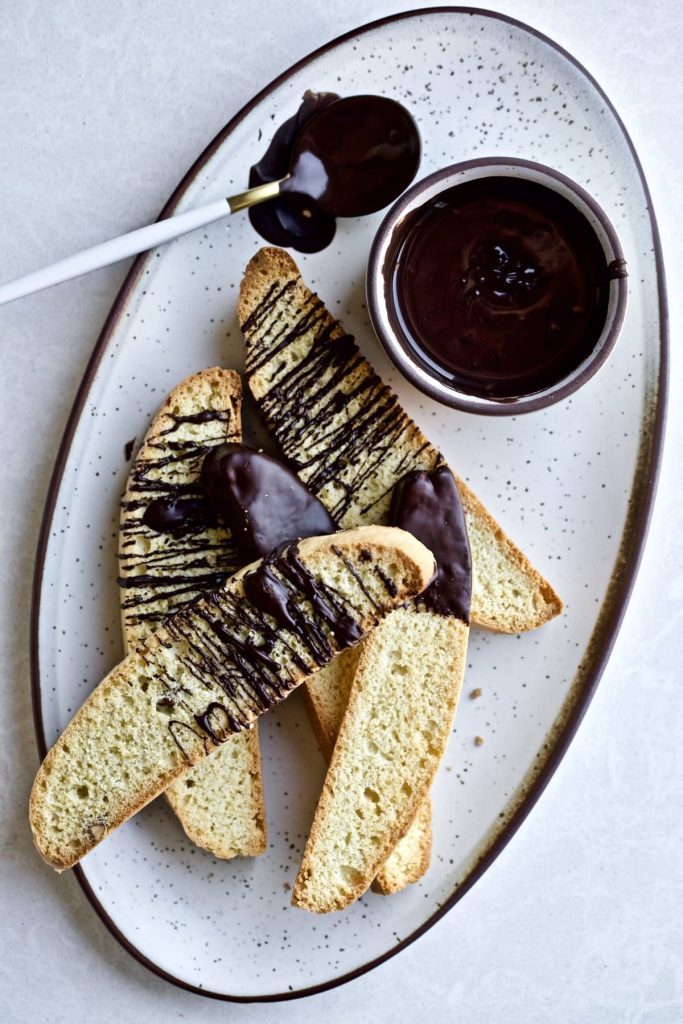
Italian almond biscotti are a classic twice-baked cookie known for their crisp texture and delicate almond flavor. Perfect for dipping into coffee, tea, or hot chocolate, these traditional cookies have been enjoyed in Italy for generations. Their crunchy bite and long shelf life also make them an excellent homemade gift during the holidays or any time of year.

This easy recipe uses simple pantry ingredients and includes optional add-ins so you can customize each batch to your taste. Follow the step-by-step instructions below to make authentic Italian almond biscotti with the perfect crisp texture every time.

1. Authentic Italian Almond Biscotti Recipe (Yield: 24 Servings)

Ingredients

  • 3 cups all-purpose flour
  • 2 teaspoons baking powder
  • 1 pinch salt
  • 4 large eggs, room temperature
  • ¾ cup granulated sugar
  • ½ cup butter, room temperature
  • 1 teaspoon vanilla extract
  • 1 teaspoon almond extract

Optional Add-Ins

Choose up to ½ cup total of your favorite mix-ins:

  • Dried cranberries
  • Pistachios
  • Raisins
  • Sliced almonds
  • Chocolate chips
  • White chocolate chunks

You may also add:

  • 1 teaspoon lemon zest or orange zest
  • 1 teaspoon anise seeds

Instructions

Preheat your oven to 350°F (175°C). Line a large baking sheet with parchment paper or a silicone baking mat to prevent sticking and make cleanup easier.

In a medium bowl, whisk together the flour, baking powder, and salt until evenly combined. Set the dry ingredients aside.

In a large mixing bowl, beat the room-temperature butter and granulated sugar together until the mixture becomes light, creamy, and fluffy. This usually takes about 2 to 3 minutes with an electric mixer.

Add the eggs one at a time, beating well after each addition. Mix in the vanilla extract and almond extract until everything is fully incorporated.

Gradually add the dry ingredients to the wet ingredients, mixing on low speed just until a soft dough forms. Avoid overmixing, as this can make the biscotti tougher after baking.

If using optional add-ins, gently fold them into the dough with a spatula until evenly distributed. Keep the total amount of mix-ins to no more than ½ cup to maintain the proper dough consistency.

Transfer the dough onto a lightly floured work surface. Divide it into two equal portions. Shape each portion into a log about 12 inches long and 2½ inches wide.

Place both logs on the prepared baking sheet, leaving several inches of space between them since they will expand during baking.

Bake for 25 to 30 minutes, or until the logs are lightly golden and firm to the touch. Remove them from the oven and allow them to cool for about 15 minutes. This short cooling period makes slicing much easier.

Reduce the oven temperature to 325°F (163°C).

Using a sharp serrated knife, slice each log diagonally into cookies about ½ inch thick. Arrange the slices cut-side down on the baking sheet.

Return the biscotti to the oven and bake for 10 to 12 minutes. Carefully flip each cookie over and bake for another 10 to 12 minutes until both sides are lightly golden and crisp.

Remove the biscotti from the oven and transfer them to a wire rack to cool completely. They will continue to crisp as they cool.

Serve with coffee, espresso, cappuccino, tea, or hot chocolate. Store completely cooled biscotti in an airtight container at room temperature for up to two weeks.

2. Tips for Perfect Italian Almond Biscotti

Use room-temperature eggs and butter for a smoother dough that mixes more evenly and bakes with a consistent texture.

If the dough feels slightly sticky while shaping the logs, lightly flour your hands instead of adding extra flour to the dough. Too much additional flour can make the biscotti dry.

A serrated bread knife creates cleaner slices than a straight-edged knife and helps prevent the baked logs from crumbling during slicing.

For extra crunch, leave the biscotti in the turned-off oven for 10 to 15 minutes after the second bake with the oven door slightly open. This allows any remaining moisture to evaporate.

Once completely cooled, store biscotti in an airtight container instead of the refrigerator. This helps preserve their signature crisp texture for a longer period.

For a decorative finish, drizzle cooled biscotti with melted dark, milk, or white chocolate before serving or gifting.

4. Frequently Asked Questions

Why are biscotti baked twice?

The second bake removes additional moisture from the cookies, giving biscotti their signature crunchy texture and long shelf life.

Can I freeze homemade biscotti?

Yes. Once completely cooled, place the biscotti in freezer-safe containers or bags and freeze them for up to 3 months. Thaw at room temperature before serving.

Do I have to use almond extract?

Almond extract provides the classic flavor found in traditional almond biscotti. If you prefer a milder taste, you can reduce the amount or replace it with additional vanilla extract.

What drinks pair well with biscotti?

Biscotti are traditionally served with espresso, cappuccino, coffee, tea, or hot chocolate. They are also delicious alongside dessert wines like Vin Santo for an authentic Italian experience.

Can I package biscotti as gifts?

Absolutely. Because biscotti stay fresh for a long time, they make wonderful homemade gifts. Package them in decorative tins, jars, or cellophane bags tied with ribbon for holidays, birthdays, or special occasions.

4. Nutrition Information

Approximate nutrition per serving (1 biscotti).

Nutrient Amount
Calories 135
Protein 3 g
Carbohydrates 19 g
Dietary Fiber 0.5 g
Total Sugar 7 g
Total Fat 5 g
Saturated Fat 3 g
Cholesterol 38 mg
Sodium 55 mg
Potassium 40 mg
Calcium 28 mg
Iron 0.8 mg

This authentic Italian almond biscotti recipe is a wonderful way to bring the flavors of a traditional Italian bakery into your own kitchen. The twice-baked method creates cookies that are delightfully crisp, full of almond flavor, and perfect for enjoying with your favorite hot beverage.

Keep this recipe in your baking collection for holidays, afternoon coffee breaks, or homemade gifts. With simple ingredients and endless possibilities for customizing the add-ins, these classic Italian biscotti are sure to become a favorite you’ll bake again and again.

Zeppole are light, fluffy Italian doughnuts with a crisp golden exterior and a soft, airy center. Traditionally served at festivals, holidays, and family celebrations, these sweet treats are surprisingly easy to make at home using simple pantry ingredients. A generous dusting of powdered sugar makes them even more irresistible while allowing their delicate flavor to shine.

This homemade zeppole recipe is perfect for beginners and anyone who loves fresh, warm doughnuts. Follow the step-by-step instructions below to make authentic Italian-style zeppole that are delicious served for dessert, brunch, or a special weekend treat.

1. Zeppole Recipe (Yield: About 24 Zeppole)

Ingredients

  • 1¼ cups warm whole milk (112°F to 115°F)
  • 2 tablespoons granulated sugar
  • 1 teaspoon active dry yeast
  • 2¼ cups 00 flour or bread flour
  • ½ teaspoon coarse sea salt
  • Zest of ½ lemon (optional)
  • 2 large eggs, whisked
  • Neutral oil, for frying
  • Powdered sugar, for garnish

Instructions

Pour the warm whole milk into a large mixing bowl. The milk should be between 112°F and 115°F so it activates the yeast without overheating it. Stir in the granulated sugar until dissolved, then sprinkle the active dry yeast over the surface. Let the mixture stand for about 5 to 10 minutes until it becomes foamy. This indicates that the yeast is active.

Add the flour, coarse sea salt, and the optional lemon zest to the bowl. Pour in the whisked eggs and begin mixing with a wooden spoon or sturdy spatula until a thick, sticky dough forms. Continue stirring for several minutes until the dough becomes smooth and well combined. The dough will be softer and stickier than traditional bread dough, which is exactly what you want for light and airy zeppole.

Cover the bowl with plastic wrap or a clean kitchen towel. Place it in a warm, draft-free location and allow the dough to rise for about 1½ to 2 hours, or until it has doubled in size and appears light and bubbly.

Once the dough has finished rising, gently stir it down just enough to release some of the trapped air. Avoid overmixing, as you want to preserve some of the air bubbles that help create a fluffy texture.

Pour about 2 to 3 inches of neutral frying oil into a heavy-bottomed pot or Dutch oven. Heat the oil to 350°F (175°C). Maintaining a steady oil temperature is important for evenly cooked zeppole.

Prepare a small spoon or cookie scoop by lightly coating it with oil. This helps release the sticky dough more easily.

Working in small batches, scoop portions of dough and carefully drop them into the hot oil. Leave enough space between each piece because the zeppole will expand as they cook.

Fry the zeppole for about 3 to 5 minutes, turning them occasionally so they brown evenly on all sides. They should become beautifully golden with crisp exteriors while remaining soft and airy inside.

Use a slotted spoon to transfer the cooked zeppole to a wire rack or paper towel-lined plate to drain any excess oil. Allow the oil to return to 350°F before frying the next batch.

Once all the zeppole have been fried, generously dust them with powdered sugar while they are still slightly warm. The sugar will cling beautifully to the surface.

Serve immediately for the best flavor and texture. Fresh zeppole are delicious on their own or paired with chocolate sauce, fruit preserves, whipped cream, pastry cream, or a drizzle of honey.

2. Tips for Perfect Homemade Zeppole

Use fresh yeast that is well within its expiration date. Active yeast helps create the light, airy texture that makes homemade zeppole so enjoyable.

If your kitchen is cool, place the covered dough inside an unheated oven with the oven light turned on. The gentle warmth creates an ideal environment for the dough to rise.

Use a deep, heavy-bottomed pot for frying. It helps maintain a more consistent oil temperature, which results in evenly cooked zeppole with a crisp exterior.

For uniform zeppole, use a small cookie scoop or two lightly oiled spoons to portion the dough. Even-sized pieces cook at the same rate and create a more attractive presentation.

Zeppole are best enjoyed shortly after frying, while the outside is crisp and the inside is still warm and fluffy. If serving guests, fry them just before bringing them to the table.

Try different toppings for variety. In addition to powdered sugar, you can drizzle the zeppole with warm chocolate, caramel sauce, honey, or fill them with pastry cream, ricotta cream, or fruit preserves for an extra-special dessert.

3. Frequently Asked Questions

Can I make the dough ahead of time?

Yes. After the first rise, cover the bowl tightly and refrigerate the dough overnight. Let it sit at room temperature for about 30 minutes before frying the next day.

How should I store leftover zeppole?

Store cooled zeppole in an airtight container at room temperature for up to 2 days. They are best enjoyed fresh, but you can warm them briefly in the oven to restore some of their crispness.

Can I freeze zeppole?

Yes. Allow them to cool completely before freezing in a freezer-safe container for up to 2 months. Reheat them in a 325°F oven until warmed through, then dust with fresh powdered sugar before serving.

Can I use all-purpose flour instead of 00 or bread flour?

Yes. All-purpose flour works well if needed, although 00 flour or bread flour generally produces a slightly lighter and chewier texture.

What can I serve with homemade zeppole?

Zeppole pair beautifully with espresso, cappuccino, hot chocolate, fresh berries, vanilla ice cream, chocolate dipping sauce, fruit compote, or sweet dessert wines for a classic Italian-inspired treat.

4. Nutrition Information

Approximate nutrition per serving (about 4 zeppole).

Nutrient Amount
Calories 235
Protein 6 g
Carbohydrates 28 g
Dietary Fiber 1 g
Total Sugar 5 g
Total Fat 10 g
Saturated Fat 2 g
Cholesterol 35 mg
Sodium 145 mg
Potassium 85 mg
Calcium 55 mg
Iron 1.5 mg

Nutrition values are approximate and will vary depending on the amount of oil absorbed during frying and the amount of powdered sugar used for garnish.

Making homemade zeppole from scratch is a fun and rewarding way to enjoy a classic Italian dessert. With their crisp golden exterior, soft and airy center, and sweet dusting of powdered sugar, these Italian doughnuts are sure to impress family and friends.

This easy recipe is perfect for holidays, celebrations, or simply treating yourself to something special. Once you master the simple dough and frying technique, you’ll have a delicious homemade dessert that’s guaranteed to disappear quickly.

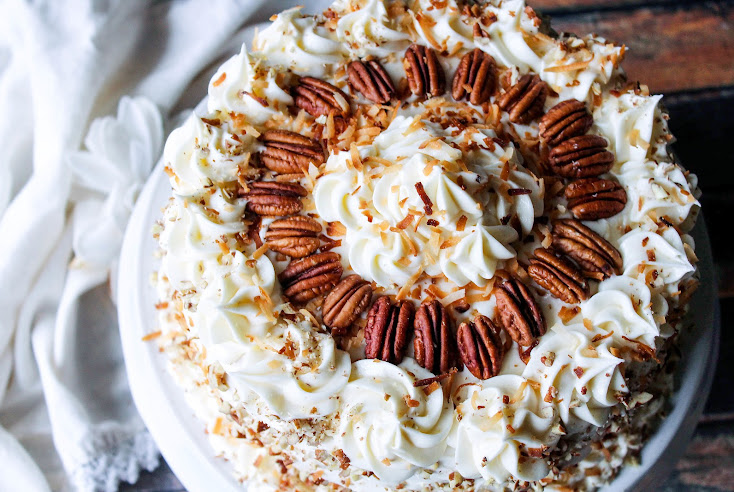
Italian Cream Cake is a timeless dessert known for its incredibly moist texture, rich cream cheese frosting, and delicious combination of toasted pecans and shredded coconut. This version starts with a boxed white cake mix, making it much easier to prepare while still delivering the homemade flavor and beautiful presentation everyone expects from this classic cake.

The cake is perfect for birthdays, holidays, family dinners, and special celebrations. Toasted pecans add a wonderful crunch, coconut brings a subtle sweetness, and the smooth cream cheese frosting ties every layer together. Since the cake tastes even better after a few hours in the refrigerator, it’s an excellent make-ahead dessert for entertaining guests.

1. Italian Cream Cake Recipe With Pecans (Yield: 12 Servings)

Ingredients

For the Cake

  • 1 box white cake mix with pudding
  • 3 large eggs
  • 1/4 cup oil
  • 1 teaspoon vanilla extract
  • 1 1/4 cups buttermilk
  • 3 1/2 ounces shredded coconut (about 1 1/2 cups; 1/2 of a 7-ounce bag)
  • 2/3 cup chopped pecans, toasted

For the Cream Cheese Frosting

  • 16 ounces cream cheese, room temperature
  • 1 cup butter, room temperature
  • 32 ounces confectioners’ sugar
  • 2 1/2 teaspoons vanilla extract

Instructions

Preheat your oven to 350°F (175°C). Grease and flour two 9-inch round cake pans, making sure the bottoms and sides are completely coated. You can also line the bottoms with parchment paper for easier cake removal.

Begin by toasting the chopped pecans. Spread them in a single layer on a baking sheet and bake for about 6 to 8 minutes, stirring once halfway through. Remove them from the oven and allow them to cool completely before adding them to the batter. Toasting enhances their flavor and gives the cake extra richness.

In a large mixing bowl, combine the white cake mix, eggs, vegetable oil, vanilla extract, and buttermilk. Beat with an electric mixer on medium speed for about 2 minutes until the batter becomes smooth and creamy. Scrape down the sides of the bowl as needed to ensure everything is evenly incorporated.

Add the shredded coconut and the cooled toasted pecans to the batter. Fold them in gently using a rubber spatula until they are evenly distributed throughout the mixture.

Divide the batter evenly between the prepared cake pans. Smooth the tops with an offset spatula so the cakes bake evenly.

Place the pans in the preheated oven and bake for 28 to 33 minutes, or until a toothpick inserted into the center comes out clean or with just a few moist crumbs attached.

Remove the cakes from the oven and allow them to cool in the pans for about 10 minutes. Carefully run a knife around the edges before turning the cakes onto wire racks. Let them cool completely before frosting.

While the cakes cool, prepare the cream cheese frosting. In a large bowl, beat the softened cream cheese and butter together until light, smooth, and fluffy. This usually takes about 3 to 4 minutes.

Gradually add the confectioners’ sugar, about one cup at a time, mixing on low speed after each addition. Once all the sugar has been incorporated, add the vanilla extract and increase the mixer speed to medium. Beat for another 2 minutes until the frosting is silky and easy to spread.

Place one cake layer onto a serving plate or cake stand. Spread a generous layer of cream cheese frosting evenly across the top using an offset spatula.

Carefully place the second cake layer on top. Frost the top and sides of the cake with the remaining frosting, smoothing it as desired.

If you’d like a decorative finish, gently press additional toasted chopped pecans around the sides of the cake or sprinkle some over the top. A small amount of shredded coconut also makes an attractive garnish.

Refrigerate the finished cake for about 30 to 60 minutes before slicing. This allows the frosting to firm up slightly, making the cake easier to cut into clean slices.

Store leftover cake covered in the refrigerator for up to 5 days. For the best flavor, let each slice sit at room temperature for about 15 to 20 minutes before serving.

2. Tips for Perfect Italian Cream Cake With Pecans

Toast the pecans before mixing them into the batter. This simple step deepens their flavor and adds a richer nutty taste to every bite.

Use room-temperature eggs, buttermilk, cream cheese, and butter. Ingredients that are closer in temperature blend together more smoothly and create a lighter cake and frosting.

Measure the shredded coconut loosely instead of packing it tightly into the measuring cup. This keeps the cake moist without making it overly dense.

Rotate the cake pans halfway through baking if your oven has hot spots. This helps both layers bake evenly and prevents uneven browning.

Allow the cake layers to cool completely before frosting. Even slight warmth can soften the frosting and make it difficult to create smooth layers.

Refrigerate the frosted cake briefly before serving. Chilling helps the frosting set and makes slicing much cleaner.

Use a long serrated knife to level the cake layers if they develop domed tops during baking. Flat layers stack more securely and create a professional-looking finish.

3. Frequently Asked Questions

Can I make this cake one day before serving?

Yes. Italian Cream Cake is actually an excellent make-ahead dessert. The flavors continue to develop as the cake rests in the refrigerator, making it even more delicious the next day.

Can I use walnuts instead of pecans?

Yes. Chopped toasted walnuts can be substituted if you prefer their flavor or already have them on hand. They provide a similar crunchy texture.

Can I make this cake as cupcakes?

Absolutely. Divide the batter evenly among lined cupcake pans and bake for approximately 18 to 22 minutes, or until a toothpick inserted into the center comes out clean.

Why is buttermilk used in this recipe?

Buttermilk helps create a softer crumb and adds a subtle tang that complements the sweetness of the cake and cream cheese frosting.

Can I decorate the cake for special occasions?

Yes. This cake is easy to customize with extra pecans, toasted coconut, white chocolate curls, fresh flowers, or seasonal decorations for birthdays, holidays, and celebrations.

4. Nutrition Information

Nutrient Amount Per Serving
Calories 710 kcal
Protein 7 g
Carbohydrates 82 g
Sugars 64 g
Fat 40 g
Saturated Fat 21 g
Cholesterol 115 mg
Sodium 430 mg
Fiber 2 g
Calcium 120 mg
Iron 1.8 mg
Potassium 180 mg

This Italian Cream Cake with Pecans is an easy way to enjoy a bakery-style dessert without spending hours in the kitchen. Starting with a boxed cake mix simplifies the preparation while still producing soft, moist cake layers filled with toasted pecans and coconut, all finished with a rich homemade cream cheese frosting.

Serve this cake at birthdays, holidays, family gatherings, or simply as a weekend treat. With its beautiful layers, creamy frosting, and classic flavor, it’s a dessert that’s sure to impress guests and become a favorite recipe you’ll return to again and again.

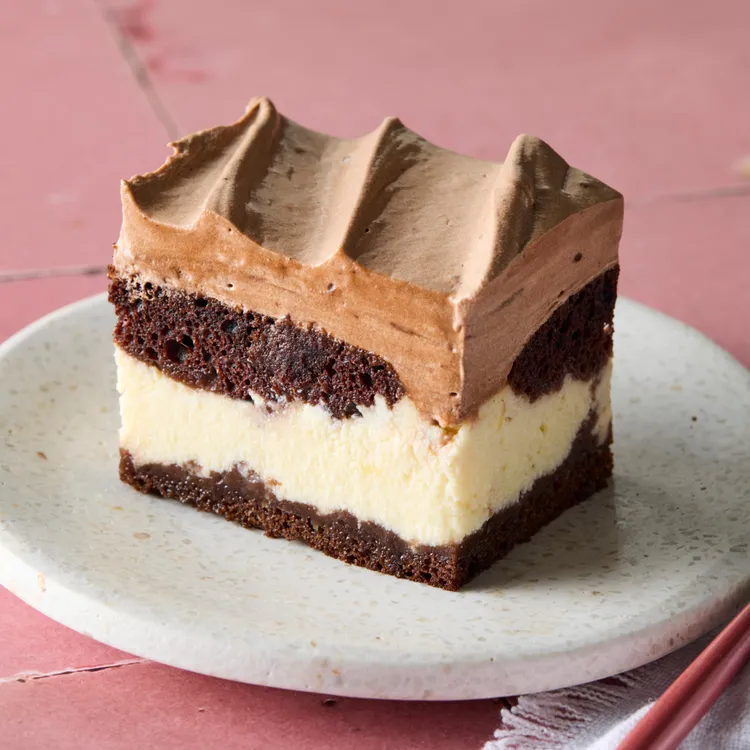
Italian Love Cake is a classic dessert that combines rich chocolate cake with a creamy ricotta layer and a light chocolate pudding topping. Using a boxed cake mix keeps the recipe simple while still delivering impressive results. As the cake bakes, the layers magically switch places, creating a beautiful dessert with very little extra work.

This cake is perfect for birthdays, family gatherings, holidays, and potlucks because it can be made ahead of time and served chilled. The combination of moist chocolate cake, smooth ricotta filling, creamy pudding, and fluffy whipped topping creates a dessert that looks elegant and tastes even better after a few hours in the refrigerator.

1. Italian Love Cake Recipe (Yield: 12 Servings)

Ingredients

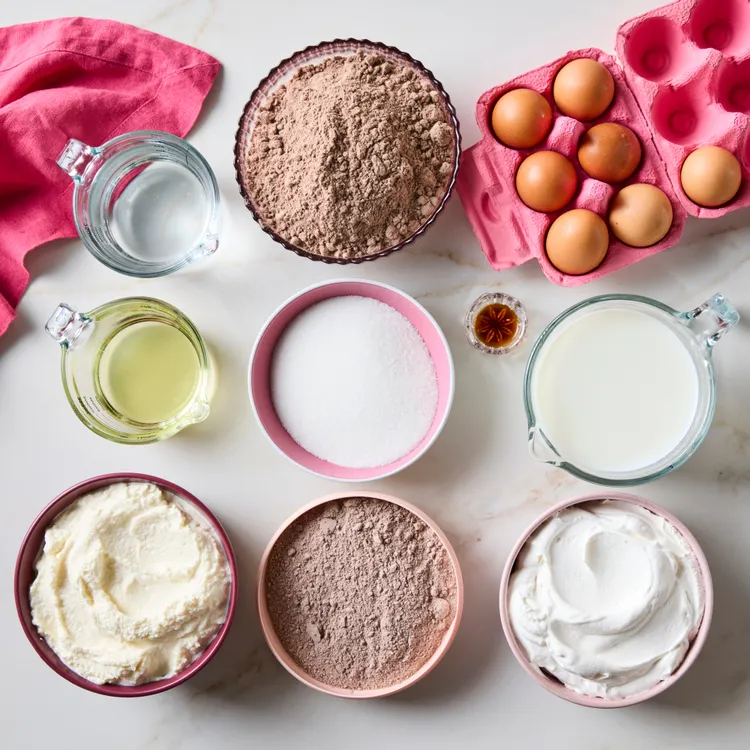
  • 2 (15-ounce) containers whole-milk ricotta cheese
  • 1 cup sugar
  • 1 teaspoon vanilla extract
  • 7 large eggs, divided
  • 1 (13.25-ounce) box devil’s food chocolate cake mix
  • 1 cup water
  • ½ cup vegetable oil
  • 1 (5-ounce) box instant chocolate pudding
  • 2 cups reduced-fat milk
  • 1 (8-ounce) container whipped topping

Instructions

Preheat your oven to 350°F (175°C). Grease a 9×13-inch baking dish with butter or nonstick cooking spray, making sure the bottom and sides are evenly coated.

In a large mixing bowl, combine the ricotta cheese, sugar, vanilla extract, and 4 of the eggs. Mix until smooth and creamy. The filling should be well blended with no large lumps of ricotta remaining. Set the bowl aside while you prepare the cake batter.

In a separate large bowl, prepare the devil’s food cake mix according to the ingredient amounts listed above. Add the cake mix, water, vegetable oil, and the remaining 3 eggs. Beat with an electric mixer for about 2 minutes until the batter becomes smooth and fully combined.

Pour the chocolate cake batter evenly into the prepared baking dish. Use a spatula to spread it into the corners so the layer is even.

Carefully spoon the ricotta mixture over the chocolate cake batter. Spread it gently into an even layer. The ricotta mixture will sit on top before baking, but don’t worry if it seems unusual. During baking, the cake and cheese layers naturally switch places.

Place the baking dish in the preheated oven and bake for 60 to 70 minutes, or until the cake is fully baked. Insert a toothpick into the cake portion near the edge of the pan. If it comes out mostly clean with a few moist crumbs, the cake is done.

Remove the cake from the oven and place it on a wire rack. Allow it to cool completely to room temperature before adding the topping. This may take about 1½ to 2 hours.

While the cake cools, prepare the chocolate pudding. In a medium bowl, whisk together the instant chocolate pudding mix and the reduced-fat milk for about 2 minutes until it begins to thicken. Let it stand for another 5 minutes.

Fold the whipped topping into the prepared pudding using a rubber spatula. Mix gently until the topping becomes smooth, light, and evenly combined.

Spread the chocolate pudding mixture evenly over the completely cooled cake. Smooth the top with an offset spatula to create an even finish.

Cover the cake tightly with plastic wrap or a lid and refrigerate for at least 6 hours. For the best flavor and texture, chill overnight before serving.

Slice the cake into squares using a sharp knife, wiping the blade clean between cuts for neat slices. Serve chilled directly from the refrigerator.

Store leftover Italian Love Cake covered in the refrigerator for up to 4 days.

2. Tips for Perfect Homemade Italian Love Cake

Use whole-milk ricotta cheese for the richest flavor and the creamiest texture. Lower-fat versions tend to release more moisture and may create a softer filling.

Allow the ricotta to drain for about 20 to 30 minutes if it seems especially wet. Removing excess liquid helps the cheese layer bake evenly.

Mix the ricotta filling just until smooth. Overmixing can introduce too much air, which may affect the texture after baking.

Spread both the cake batter and ricotta mixture evenly across the pan. Uniform layers help the cake bake consistently and create attractive slices.

Let the cake cool completely before adding the pudding topping. A warm cake can cause the topping to melt and become runny.

Refrigerate the assembled cake overnight whenever possible. The extra chilling time allows the layers to firm up and the flavors to blend beautifully.

Use a long sharp knife for slicing and wipe it clean after each cut to keep each serving looking neat.

Serve the cake cold for the best texture. The chilled layers hold together well and make each bite creamy and refreshing.

3. Frequently Asked Questions

Can I use a different cake mix flavor?

Yes. Chocolate cake is the traditional choice, but you can also use dark chocolate, fudge cake, or even yellow cake mix if you’d like a different flavor combination.

Can I prepare Italian Love Cake two days in advance?

Yes. This dessert holds up very well in the refrigerator for up to two days before serving, making it an excellent choice for entertaining or holiday meals.

Why does the ricotta layer move during baking?

The different densities of the cake batter and ricotta mixture naturally cause the layers to switch places as the cake bakes. This unique feature is part of what makes Italian Love Cake so special.

Can I decorate the top before serving?

Absolutely. Chocolate curls, grated chocolate, mini chocolate chips, cocoa powder, or fresh berries all make beautiful finishing touches without changing the flavor significantly.

Can leftovers be frozen?

Yes. Slice the cake into individual portions, wrap them tightly, and freeze for up to one month. Thaw overnight in the refrigerator before serving for the best texture.

4. Nutrition Information

Nutrient Amount Per Serving
Calories 510 kcal
Protein 16 g
Carbohydrates 44 g
Sugars 31 g
Fat 31 g
Saturated Fat 13 g
Cholesterol 175 mg
Sodium 470 mg
Fiber 2 g
Calcium 260 mg
Iron 2.5 mg
Potassium 300 mg

Italian Love Cake is a wonderful dessert that delivers impressive results with simple ingredients and the convenience of a boxed cake mix. The combination of moist chocolate cake, creamy ricotta filling, and fluffy chocolate topping creates a dessert that feels special enough for celebrations while remaining easy enough for everyday baking.

After a good chill in the refrigerator, each slice becomes beautifully layered, rich, and creamy. Make it ahead of time, serve it cold, and enjoy a classic dessert that family and friends will happily request again and again.

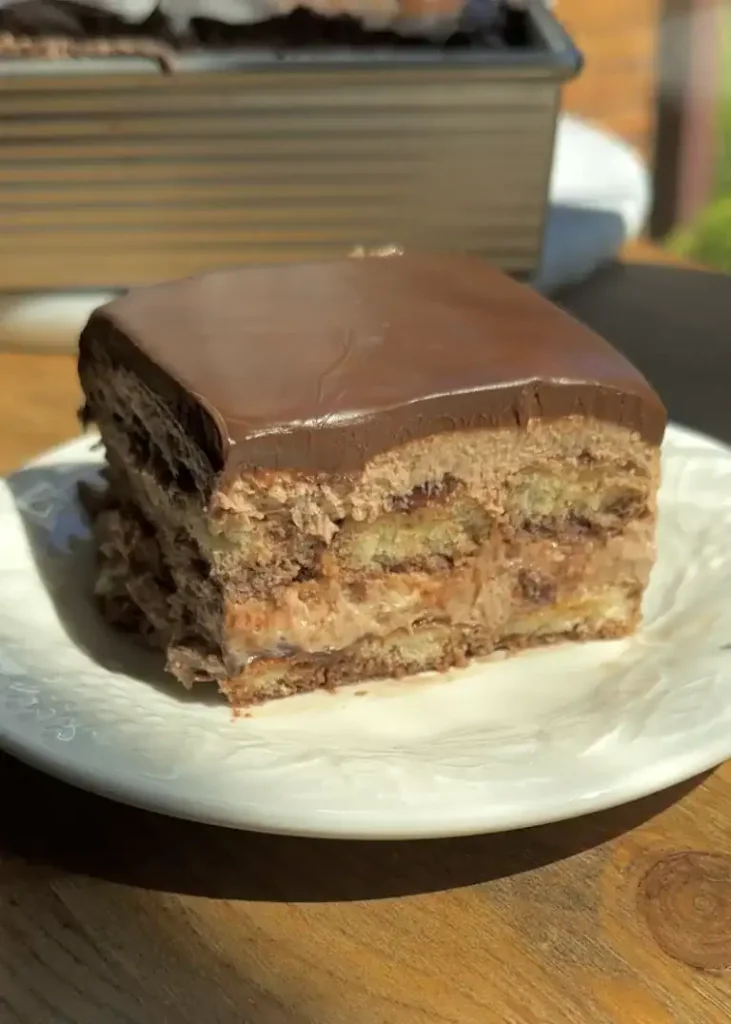
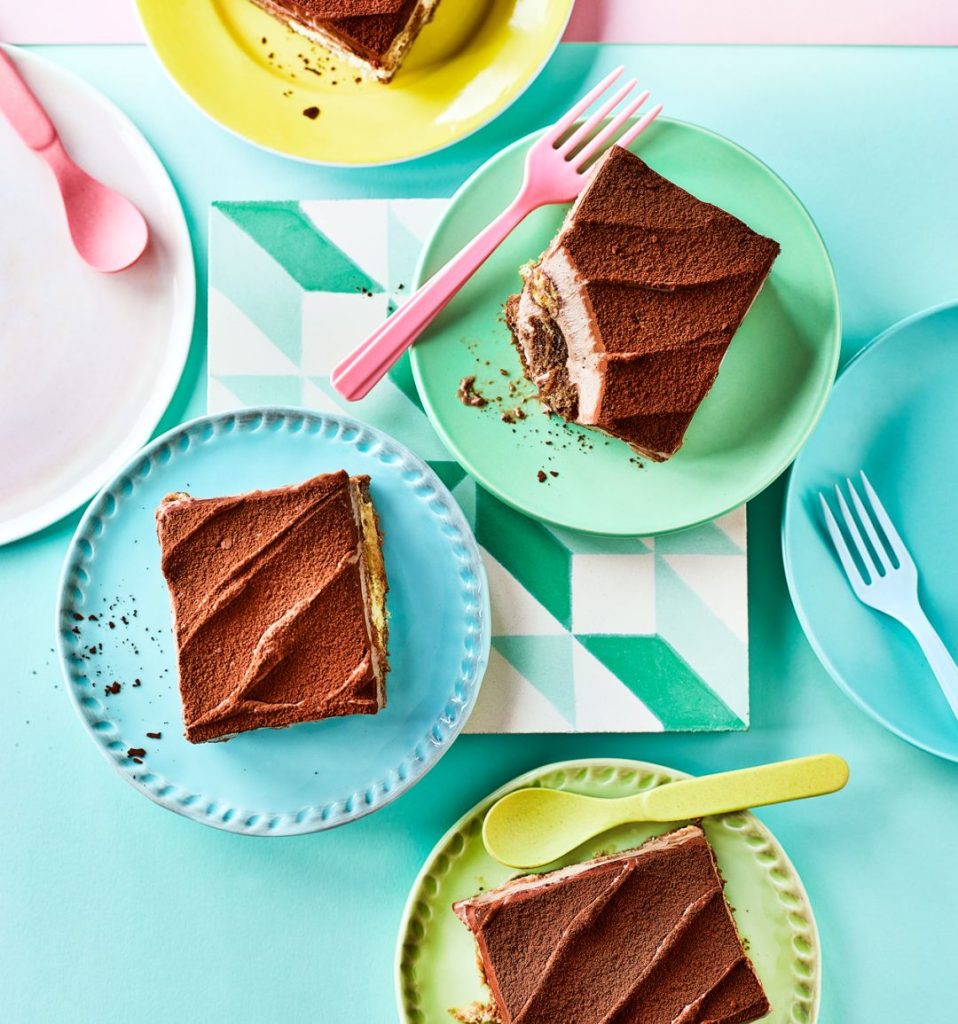
This no bake Nutella tiramisu is a simple dessert that combines classic tiramisu with the rich chocolate-hazelnut flavor of Nutella. Creamy mascarpone filling, coffee-soaked sponge biscuits, and layers of chocolate create a dessert that looks impressive but comes together with very little effort. Since there’s no baking involved, it’s an excellent make-ahead treat for family dinners, celebrations, or whenever you’re craving a chilled dessert.

The combination of coffee, Nutella, and mascarpone creates a balanced flavor that is smooth, creamy, and lightly sweet. After chilling in the refrigerator, the layers become perfectly soft while still holding their shape, making every slice delicious and satisfying.

1. No Bake Nutella Tiramisu Recipe (Yield: 8 Servings)

Ingredients

For the filling:

  • 1 x 250g tub mascarpone
  • 100g Nutella
  • 200ml double cream
  • 1 tbsp coffee liqueur, such as Kahlúa or Tia Maria
  • 3 tbsp icing sugar

For the layers:

  • 150g Savoiardi sponge biscuits
  • Cocoa powder, for dusting

For the soaking liquid:

  • 1 tbsp cocoa powder
  • 1 tbsp sugar (any kind)
  • 250ml hot, strong coffee made with 2 tbsp instant coffee granules (or freshly brewed filter/cafetière coffee)
  • 4 tbsp coffee liqueur, such as Kahlúa or Tia Maria

Instructions

Start by preparing the coffee soaking mixture. Stir the cocoa powder and sugar into the hot coffee until completely dissolved. Add the coffee liqueur and mix well. Transfer the mixture to a shallow dish and leave it to cool to room temperature before using. The liquid should be cool so it doesn’t make the biscuits fall apart too quickly.

In a large mixing bowl, add the mascarpone, Nutella, icing sugar, and 1 tablespoon of coffee liqueur. Mix gently with a spatula or hand mixer on low speed until the mixture becomes smooth and evenly blended. Avoid overmixing because mascarpone can become grainy if beaten too much.

In another chilled bowl, whip the double cream until soft peaks form. The cream should hold its shape while still looking smooth and creamy. Carefully fold the whipped cream into the Nutella and mascarpone mixture using a spatula. Fold slowly until everything is fully combined and no white streaks remain. This creates a light and airy filling.

Choose an 8-inch square dish or a similar-sized serving dish. Dip each Savoiardi biscuit into the cooled coffee mixture for about one second per side. The biscuits should absorb some liquid but remain firm enough to hold their shape. Arrange a single layer of soaked biscuits across the bottom of the dish.

Spread half of the Nutella mascarpone filling evenly over the biscuits. Use an offset spatula or the back of a spoon to smooth the surface into an even layer.

Repeat the process by dipping another layer of biscuits into the coffee mixture and placing them over the cream layer. Cover with the remaining Nutella filling and smooth the top until level.

Cover the dish tightly with plastic wrap or a lid and refrigerate for at least 6 hours. For the best texture and flavor, chill overnight. The resting time allows the biscuits to soften and the flavors to blend together beautifully.

Just before serving, remove the tiramisu from the refrigerator and dust the top generously with cocoa powder using a fine sieve. Slice into portions and serve chilled.

Leftover tiramisu can be stored covered in the refrigerator for up to 3 days. The flavors often become even better after the first day.

2. Tips for Perfect No Bake Nutella Tiramisu

Use mascarpone straight from the refrigerator so it stays thick and blends smoothly with the Nutella. If it becomes too warm, the filling may lose some of its structure.

Chill the mixing bowl and beaters before whipping the cream. Cold equipment helps the cream whip faster and creates a more stable filling.

Dip each sponge biscuit quickly into the coffee mixture instead of soaking it for several seconds. The biscuits continue absorbing moisture as the dessert chills, so a quick dip prevents them from becoming mushy.

Allow the coffee mixture to cool completely before dipping the biscuits. Warm coffee softens the biscuits too quickly and can make the layers uneven.

Fold the whipped cream gently into the mascarpone mixture instead of stirring vigorously. Gentle folding keeps the filling light and fluffy.

Smooth each cream layer evenly before adding the next biscuit layer. Even layers help the finished tiramisu slice neatly.

Refrigerate the dessert overnight if possible. Extra chilling time improves the texture, making the layers firm enough for clean slices while allowing the flavors to fully develop.

Dust the cocoa powder immediately before serving instead of during refrigeration. This keeps the cocoa looking fresh and prevents moisture from darkening the surface.

3. Frequently Asked Questions

Can I make this dessert a day ahead?

Yes. In fact, preparing it a day in advance is recommended. The extra chilling time allows the biscuits to soften evenly and helps the filling become firm, resulting in cleaner slices and richer flavor.

Can I make this recipe without coffee liqueur?

Absolutely. Replace the coffee liqueur with additional brewed coffee or a splash of vanilla extract. You’ll still enjoy a delicious dessert with plenty of coffee flavor.

Can I freeze Nutella tiramisu?

Yes. Wrap the dish tightly with plastic wrap followed by aluminum foil and freeze for up to one month. Thaw overnight in the refrigerator before serving. Dust with fresh cocoa powder after thawing for the best presentation.

Why is my filling too soft?

A soft filling usually happens if the cream was under-whipped, the mascarpone was overmixed, or the dessert wasn’t chilled long enough. Using cold ingredients and allowing enough refrigeration time helps create a firmer texture.

Can I serve this in individual dessert glasses?

Yes. Individual glasses are an attractive option for parties or special occasions. Simply layer the soaked biscuits and cream mixture in small serving glasses and chill as directed before serving.

4. Nutrition Information

Nutrient Amount Per Serving
Calories 485 kcal
Protein 7 g
Carbohydrates 36 g
Sugars 23 g
Fat 35 g
Saturated Fat 21 g
Cholesterol 95 mg
Sodium 105 mg
Fiber 2 g
Calcium 105 mg
Iron 2 mg
Potassium 210 mg

No bake Nutella tiramisu is a wonderful dessert that delivers rich flavor with surprisingly little effort. Simple ingredients come together in beautiful layers that are creamy, smooth, and full of chocolate and coffee goodness, making it an excellent choice for both casual gatherings and special occasions.

Prepare it ahead of time, let it chill until perfectly set, and enjoy a dessert that slices beautifully and tastes even better after resting in the refrigerator. It’s a recipe you’ll enjoy making again for birthdays, holidays, and everyday treats.

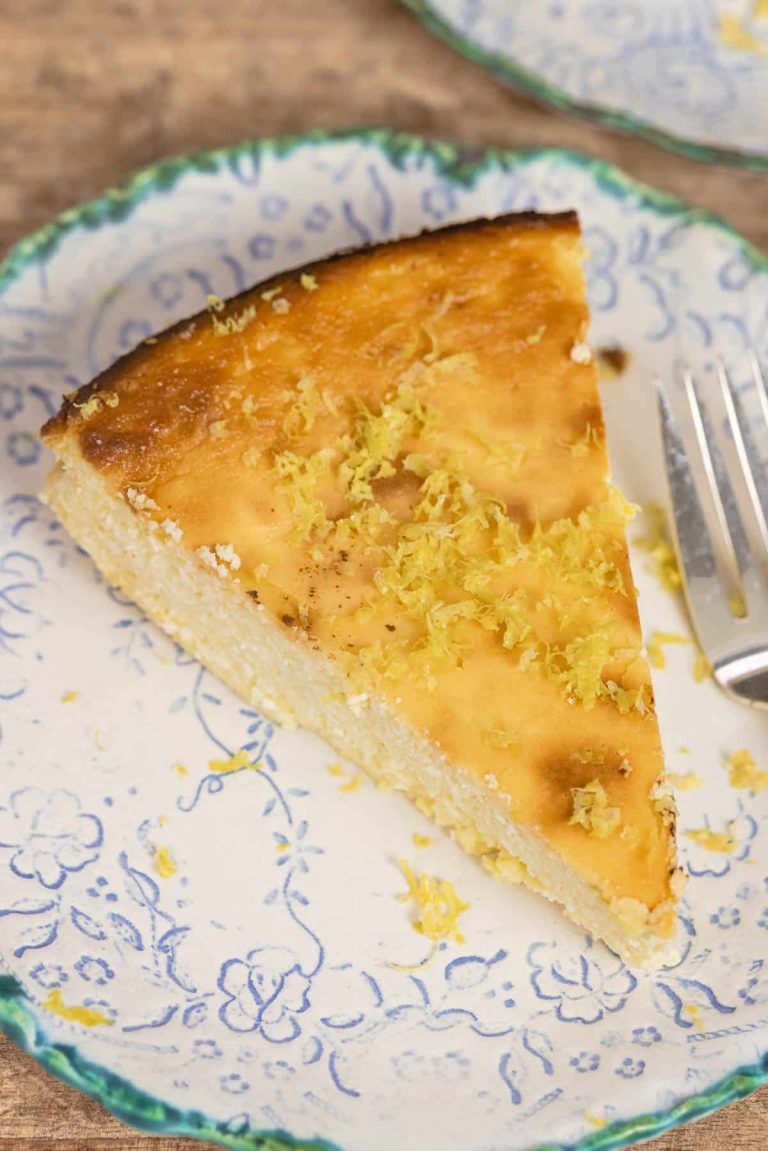
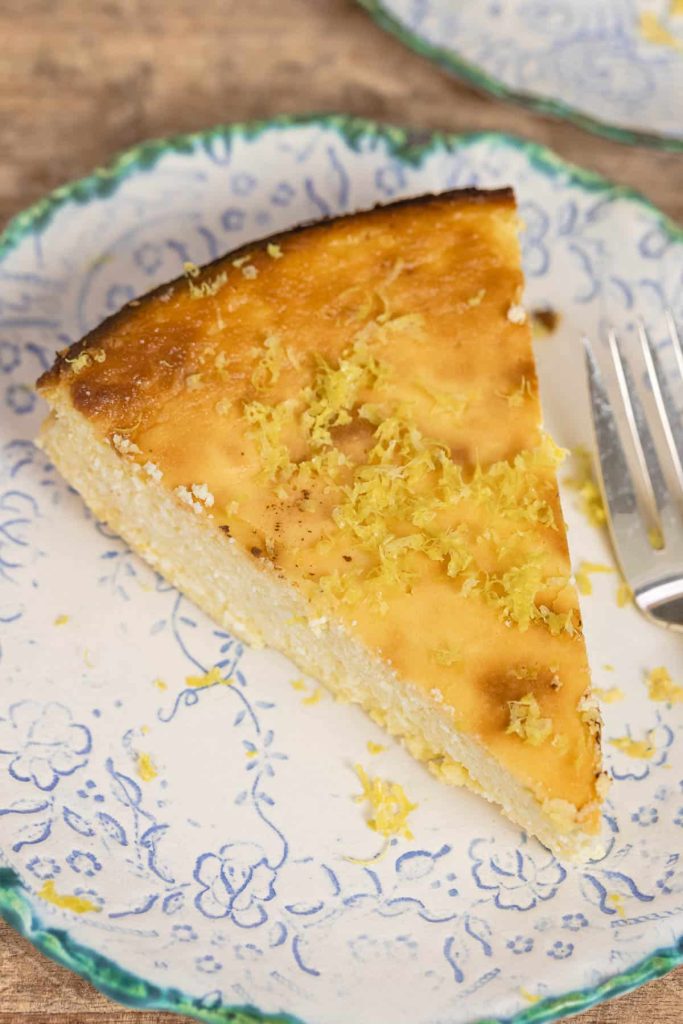
Italian ricotta cheesecake is one of those timeless desserts that proves simple ingredients can create something truly special. Unlike traditional American cheesecake, this version is lighter, less sweet, and has a delicate, creamy texture that lets the rich flavor of whole milk ricotta shine. Fresh lemon zest adds a bright aroma, while vanilla enhances every bite without overpowering the cheesecake.

This authentic recipe uses just five main ingredients and requires very little preparation. With the right technique and a little patience while it cools, you’ll have a beautifully baked cheesecake that’s perfect for holidays, family gatherings, or anytime you’re craving a classic Italian dessert.

1. Best Authentic Italian Ricotta Cheesecake Recipe (Yield: 10 slices)

Ingredients

  • 3 pounds whole milk ricotta cheese
  • 8 large eggs
  • 1¼ cups sugar
  • 1 teaspoon vanilla extract
  • Zest of 3 lemons
  • Olive oil to coat the pan

Instructions

Preheat your oven to 350°F (175°C). Lightly coat the bottom and sides of a 9-inch springform pan with olive oil. If desired, line the bottom with parchment paper for easier removal after baking.

If your ricotta contains a lot of liquid, drain it in a fine-mesh strainer or cheesecloth for at least 1 to 2 hours, or overnight in the refrigerator. Removing excess moisture helps the cheesecake bake evenly and gives it a smooth, creamy texture.

Transfer the drained ricotta to a large mixing bowl. Add the sugar and mix until smooth and creamy. You can use a hand mixer on low speed or a sturdy whisk. Avoid beating too aggressively, as incorporating too much air can cause the cheesecake to rise excessively and crack as it cools.

Add the eggs one at a time, mixing well after each addition until fully incorporated. Scrape down the sides of the bowl occasionally to ensure everything is evenly combined.

Stir in the vanilla extract and the finely grated zest of three lemons. Mix just until everything is blended into a smooth batter.

Pour the batter into the prepared springform pan. Gently tap the pan on the counter several times to release any large air bubbles trapped in the mixture.

Place the cheesecake on the center rack of the preheated oven. Bake for 70 to 80 minutes, or until the edges are lightly golden and set while the center still has a slight jiggle when gently shaken. The internal temperature should be about 150-155°F (65-68°C) for the perfect creamy texture.

Turn off the oven and crack the oven door open about 2 inches. Let the cheesecake remain inside for 30 minutes. This gradual cooling helps reduce the chance of cracks forming on the surface.

Remove the cheesecake from the oven and let it cool completely at room temperature. Once cooled, cover it loosely and refrigerate for at least 6 hours, though overnight chilling produces the best flavor and texture.

Before serving, carefully remove the sides of the springform pan. Slice the cheesecake with a sharp knife dipped in hot water and wiped clean between each cut for neat, professional-looking slices.

Serve chilled on its own or garnish with fresh berries, a light dusting of powdered sugar, or thin strips of fresh lemon zest.

2. Tips for Perfect Italian Ricotta Cheesecake

Drain the ricotta thoroughly. This is the single most important step. Excess moisture can make the cheesecake soft, watery, and slow to set. Drain whole milk ricotta for several hours or overnight for the best consistency.

Use room-temperature eggs. Cold eggs don’t blend as smoothly into the ricotta mixture. Let them sit at room temperature for about 30 minutes before mixing to create a more uniform batter.

Mix gently instead of whipping. Overmixing incorporates too much air, causing the cheesecake to puff up in the oven and sink or crack as it cools. Mix only until the ingredients are fully combined.

Bake until the center is just slightly jiggly. The cheesecake continues to cook from residual heat after it’s removed from the oven. Taking it out at the right time keeps the texture creamy instead of dry.

Cool the cheesecake gradually. Leaving the cheesecake in the turned-off oven with the door slightly open helps prevent sudden temperature changes that often lead to cracks.

Chill overnight before serving. Although it can be served after several hours of refrigeration, an overnight chill allows the cheesecake to firm up completely and gives the flavors time to develop.

Slice with a warm knife. Dip a sharp knife in hot water and wipe it dry between each slice. This creates smooth, clean slices without dragging the creamy filling.

3. Frequently Asked Questions

Can I use part-skim ricotta instead of whole milk ricotta?

You can, but whole milk ricotta is highly recommended. It has a richer flavor and creamier texture, which are essential for an authentic Italian ricotta cheesecake. Part-skim ricotta tends to produce a slightly drier and less luxurious cheesecake.

Why did my cheesecake crack on top?

Small cracks are usually caused by overbaking, overmixing the batter, or cooling the cheesecake too quickly. Even if a few cracks appear, the cheesecake will still taste delicious. Letting it cool gradually in the oven and avoiding excess air in the batter will help keep the surface smooth.

Can I make this cheesecake a day ahead?

Yes! In fact, it’s even better when made in advance. Prepare the cheesecake the day before serving and refrigerate it overnight. This gives it time to fully set and allows the flavors to develop, resulting in a creamier texture.

Can I freeze Italian ricotta cheesecake?

Yes. Allow the cheesecake to cool completely, then wrap it tightly in plastic wrap followed by aluminum foil or place individual slices in airtight containers. Freeze for up to 2 months. Thaw overnight in the refrigerator before serving.

What toppings go well with Italian ricotta cheesecake?

This cheesecake is traditionally served plain because of its delicate flavor, but fresh berries, macerated strawberries, blueberry compote, raspberry sauce, a drizzle of honey, lemon zest, or a light dusting of powdered sugar all make wonderful additions without overpowering the cheesecake.

4. Nutrition Information

Nutrient Amount (Per Slice)
Calories 455
Protein 24 g
Carbohydrates 20 g
Fat 31 g
Saturated Fat 17 g
Cholesterol 220 mg
Sodium 180 mg
Sugar 18 g
Fiber 0 g
Calcium 420 mg

Nutrition values are estimates and may vary depending on the brand of ricotta cheese used.

This authentic Italian ricotta cheesecake is proof that a handful of quality ingredients can create an unforgettable dessert. Its creamy texture, fresh lemon flavor, and light sweetness make it a wonderful alternative to traditional cheesecake, and it’s surprisingly easy to prepare at home.

Once you’ve mastered this simple recipe, you’ll have a classic Italian dessert that’s perfect for holidays, dinner parties, or everyday celebrations. Chill it well before serving, slice it carefully, and enjoy every rich, creamy bite.

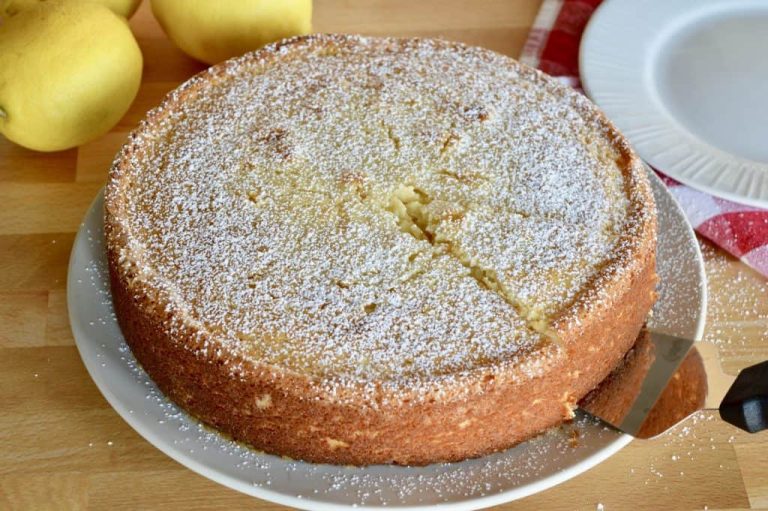
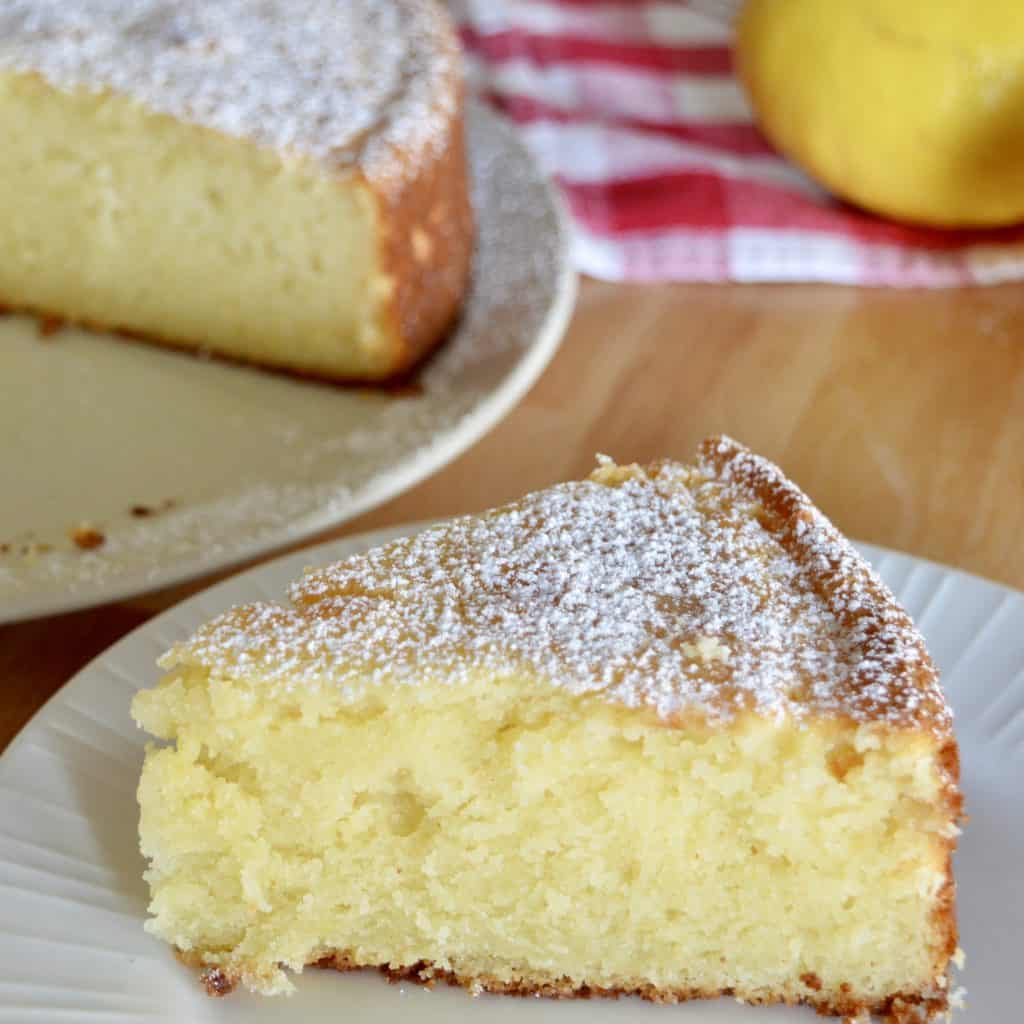
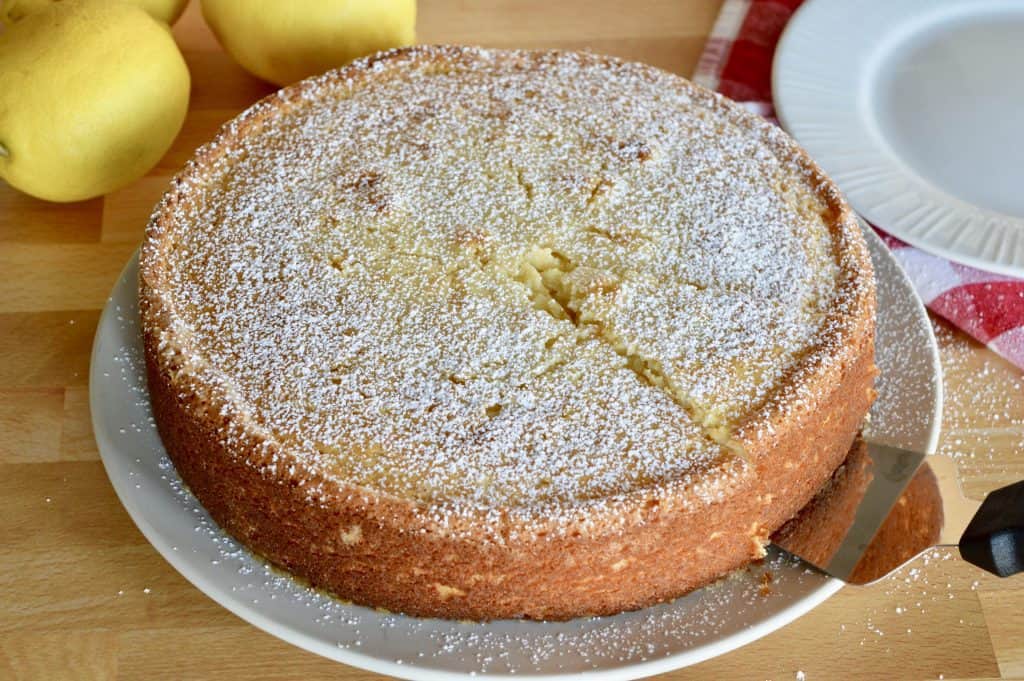
Italian Lemon Ricotta Cake is a simple yet elegant dessert that combines the richness of ricotta cheese with the bright flavor of fresh lemon. This traditional Italian-style cake has a soft, moist texture that makes it perfect for family gatherings, holidays, brunches, or an afternoon treat with coffee.

Unlike heavily frosted cakes, this ricotta cake relies on quality ingredients and a delicate crumb to shine. The ricotta keeps the cake incredibly tender, while the lemon adds a refreshing touch that balances the sweetness beautifully.

1. Italian Lemon Ricotta Cake Recipe (Yield: 12 Servings)

Ingredients

  • ¾ cup butter, softened (1½ sticks)
  • 1½ cups sugar
  • 15 ounces whole milk ricotta cheese, drained well
  • 3 large eggs
  • 1 teaspoon vanilla
  • 1 large lemon, zested and juiced
  • ½ teaspoon baking soda
  • ½ teaspoon salt
  • 1½ cups flour
  • Powdered sugar for dusting top of cake (optional)

Equipment

  • 9-inch springform pan

Instructions

Preheat your oven to 350°F (175°C). Grease a 9-inch springform pan thoroughly with butter or nonstick cooking spray. For extra insurance against sticking, line the bottom of the pan with a round of parchment paper.

If your ricotta contains excess liquid, place it in a fine-mesh sieve and allow it to drain for at least 30 minutes before beginning the recipe. Well-drained ricotta helps create the proper cake texture.

In a large mixing bowl, beat the softened butter and sugar together using an electric mixer for about 3 to 4 minutes. The mixture should become light, fluffy, and noticeably paler in color. This step incorporates air into the batter and contributes to a lighter cake.

Add the drained ricotta cheese and continue mixing until fully combined and smooth.

Add the eggs one at a time, mixing well after each addition. Scrape down the sides of the bowl as needed to ensure everything is evenly incorporated.

Mix in the vanilla extract, lemon zest, and fresh lemon juice. The batter may appear slightly curdled at this stage, which is completely normal.

In a separate bowl, whisk together the flour, baking soda, and salt.

Gradually add the dry ingredients to the ricotta mixture. Mix on low speed just until no streaks of flour remain. Avoid overmixing, as this can result in a denser cake.

Pour the batter into the prepared springform pan and spread it evenly with a spatula. The batter will be fairly thick.

Place the pan on the center rack of the preheated oven and bake for 50 to 60 minutes. The cake is done when the top is golden, the center feels set, and a toothpick inserted near the center comes out with just a few moist crumbs.

If the top begins browning too quickly during baking, loosely tent the cake with aluminum foil for the remaining baking time.

Remove the cake from the oven and place it on a wire rack. Allow it to cool in the pan for about 20 minutes before releasing the springform ring.

Let the cake cool completely before serving. As it cools, the texture becomes even more tender and flavorful.

Just before serving, dust the top lightly with powdered sugar if desired.

Slice and serve at room temperature.

2. Tips for Perfect Italian Lemon Ricotta Cake

Drain the ricotta thoroughly before mixing the batter. Excess moisture is one of the most common reasons ricotta cakes become too dense or fail to bake evenly in the center.

Bring the butter, eggs, and ricotta close to room temperature before starting. Ingredients at similar temperatures combine more smoothly and create a more uniform batter.

Cream the butter and sugar for the full 3 to 4 minutes. This step adds air to the batter and helps create a lighter texture in the finished cake.

Use freshly grated lemon zest rather than bottled lemon flavoring. Most of the lemon aroma comes from the zest, which provides a brighter and more natural flavor.

Mix the flour into the batter only until incorporated. Overmixing after adding flour can develop excess gluten and make the cake less tender.

Check the cake near the end of the baking time by gently shaking the pan. The center should no longer appear liquid or wobble significantly.

Allow the cake to cool completely before slicing. The crumb continues to set as it cools, resulting in cleaner slices and better texture.

3. Frequently Asked Questions

Can I make Italian Lemon Ricotta Cake ahead of time?

Yes. This cake actually tastes even better the next day after the flavors have had time to develop. Store it covered at room temperature or in the refrigerator.

Do I need a springform pan?

A springform pan is recommended because it makes removing the cake much easier, but a deep 9-inch round cake pan can also be used.

Can I use part-skim ricotta cheese?

Whole milk ricotta produces the richest texture, but part-skim ricotta can work if that’s what you have available.

How should I store leftover cake?

Store leftover cake in an airtight container in the refrigerator for up to 5 days. Allow slices to come to room temperature before serving for the best texture.

Can I freeze Italian Lemon Ricotta Cake?

Yes. Wrap the cooled cake tightly in plastic wrap and foil, then freeze for up to 2 months. Thaw overnight in the refrigerator before serving.

4. Nutrition Information

Nutrient Amount Per Serving
Calories 320
Protein 7g
Carbohydrates 34g
Fat 17g
Saturated Fat 10g
Cholesterol 85mg
Sodium 210mg
Fiber 1g
Sugar 22g
Calcium 110mg
Iron 1mg

Nutrition values are estimates and may vary depending on ingredient brands and serving sizes.

This Italian Lemon Ricotta Cake is proof that simple ingredients can create an incredibly memorable dessert. The combination of creamy ricotta, fresh lemon, and a tender cake crumb makes it a wonderful choice for both everyday baking and special occasions.

Once you try this homemade version, you’ll appreciate how easy it is to create a bakery-worthy Italian dessert in your own kitchen. Serve it with coffee, tea, or fresh berries for a beautiful and satisfying treat.

Cannoli are one of the most iconic Italian desserts, featuring crispy pastry shells filled with a sweet and creamy ricotta filling. While they may look like something you’d only find in a bakery, homemade cannoli are surprisingly achievable with a little patience and a few simple ingredients.

This easy cannoli recipe from scratch walks you through making both the crunchy shells and the classic ricotta filling. The result is a delicious homemade dessert that’s perfect for holidays, special occasions, or anytime you’re craving an authentic Italian treat.

1. Homemade Cannoli Recipe (Yield: 18 Servings)

Ingredients

Cannoli

  • 2 cups all-purpose flour
  • 2 tablespoons granulated sugar
  • 3 tablespoons unsalted butter
  • ¼ teaspoon kosher salt
  • ⅓ cup Marsala wine
  • 1 large egg
  • 1 egg yolk, set aside egg white for brushing

Filling

  • 16 ounces ricotta cheese, strained
  • ½ cup powdered sugar
  • 1 teaspoon vanilla extract

Instructions

In a large mixing bowl, combine the flour, granulated sugar, and kosher salt. Add the butter and work it into the flour mixture using your fingertips or a pastry cutter until the mixture resembles coarse crumbs.

Add the Marsala wine, whole egg, and egg yolk. Stir until a dough begins to form. Transfer the dough to a lightly floured surface and knead for about 5 minutes until smooth and elastic. If the dough feels too dry, add a teaspoon of Marsala wine at a time. If it feels sticky, sprinkle in a small amount of flour.

Wrap the dough tightly in plastic wrap and let it rest at room temperature for 1 hour. This resting period relaxes the gluten and makes the dough easier to roll.

While the dough rests, prepare the filling. Place the strained ricotta cheese in a mixing bowl. Add the powdered sugar and vanilla extract. Stir until smooth and creamy. Cover and refrigerate until needed.

After the dough has rested, divide it into two portions. Keep one portion covered while working with the other.

Roll the dough as thinly as possible on a lightly floured surface, about 1/16 inch thick. Using a 4-inch round cutter, cut circles from the dough.

Wrap each dough circle around a cannoli tube. Brush one edge with the reserved egg white and press the overlapping edge firmly to seal.

Fill a deep pot with about 2 inches of oil and heat to 350°F (175°C). Carefully fry a few shells at a time for 1 to 2 minutes, turning occasionally, until golden brown and crisp.

Remove the shells with a slotted spoon and place them on a paper towel-lined plate to drain. Allow them to cool slightly before gently sliding the metal tubes out.

Repeat with the remaining dough.

Allow all the shells to cool completely before filling.

Transfer the ricotta filling to a piping bag or a large zip-top bag with the corner snipped off. Pipe the filling into both ends of each shell until completely filled.

Arrange the cannoli on a serving platter and serve immediately for the crispiest texture.

2. Tips for Perfect Homemade Cannoli

Strain the ricotta cheese for several hours or overnight before making the filling. Excess moisture can create a runny filling that won’t hold its shape inside the shells.

Roll the dough as thinly as possible. Thin dough creates the signature light, crispy texture that authentic cannoli are known for.

Keep the oil temperature close to 350°F throughout frying. Oil that is too cool will make the shells greasy, while oil that is too hot can brown them before they become fully crisp.

Seal the dough securely around the cannoli tubes using the egg white. A weak seal can cause the shells to open while frying.

Allow the shells to cool completely before filling them. Warm shells can soften quickly and affect the texture of the finished dessert.

Fill the cannoli shortly before serving. This helps preserve the crispness of the shells and prevents them from becoming soggy.

If possible, use a piping bag to fill the shells. It distributes the filling evenly and makes the process much easier than using a spoon.

3. Frequently Asked Questions

Can I make cannoli shells ahead of time?

Yes. The shells can be made up to two days in advance and stored in an airtight container at room temperature.

Can I make the filling ahead of time?

Yes. The ricotta filling can be prepared up to 24 hours in advance and kept refrigerated until ready to use.

What can I use instead of Marsala wine?

Dry white wine, sherry, or a combination of grape juice and a splash of vinegar can be used as substitutes.

Why are my cannoli shells not crispy?

Shells may lose crispness if the dough was rolled too thick, the oil temperature was too low, or the filled cannoli sat too long before serving.

Can I freeze cannoli?

The shells can be frozen after frying, but filled cannoli do not freeze well because the filling can become watery after thawing.

4. Nutrition Information

Nutrient Amount Per Serving
Calories 170
Protein 5g
Carbohydrates 16g
Fat 9g
Saturated Fat 4g
Cholesterol 35mg
Sodium 55mg
Fiber 0g
Sugar 5g
Calcium 85mg
Iron 1mg

Nutrition values are estimates and may vary depending on ingredient brands, frying conditions, and serving sizes.

Homemade cannoli are a wonderful way to bring a classic Italian bakery favorite into your own kitchen. With their crispy shells and creamy ricotta filling, they offer a delicious combination of textures that make every bite memorable.

Once you learn how to make cannoli from scratch, you’ll discover that the process is much easier than it seems. Serve them for holidays, celebrations, or a special weekend dessert, and enjoy the satisfaction of making this traditional treat at home.

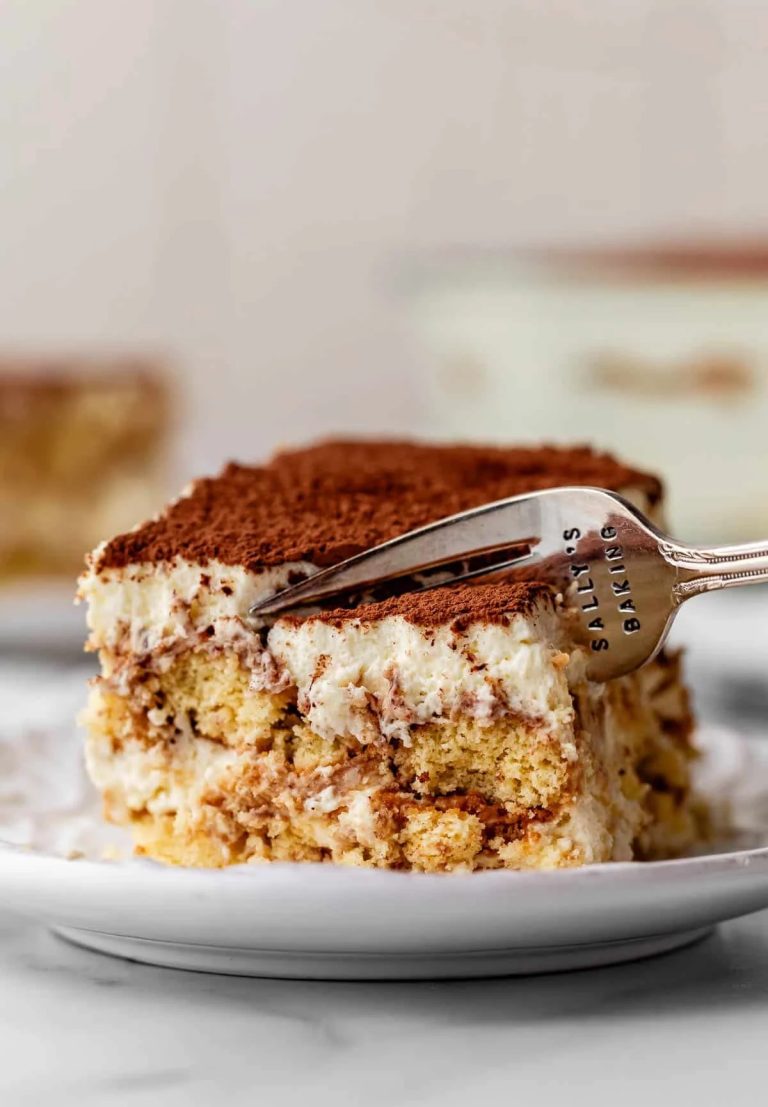
Tiramisu is one of Italy’s most beloved desserts, known for its beautiful layers and elegant presentation. It’s a popular choice for holidays, dinner parties, and special occasions, yet it’s surprisingly easy to make at home.

This homemade tiramisu combines espresso-soaked ladyfingers with a rich mascarpone filling and a dusting of cocoa powder. Made in a 9×13-inch baking dish, it’s the perfect make-ahead dessert that tastes even better after chilling.

1. Homemade Tiramisu Recipe (Yield: 12 Servings)

Ingredients

  • 1 cup (240ml) very strongly prepared espresso, warm or room temperature
  • 5 tablespoons (75ml) Grand Marnier (optional)
  • 40–45 ladyfingers
  • 16 ounces (about 2 cups; 450g) mascarpone, cold
  • 2 tablespoons (30ml) dark rum
  • 4 large pasteurized eggs, separated
  • 1/2 cup (100g) granulated sugar, divided
  • 2 cups (480ml) heavy cream or heavy whipping cream
  • 1/2 teaspoon pure vanilla extract
  • 1/8 teaspoon salt
  • Unsweetened natural or Dutch-process cocoa powder

Instructions

Prepare a 9×13-inch baking dish and set it aside.

In a shallow bowl, combine the espresso and Grand Marnier if using. Stir well and allow the mixture to cool completely if still warm.

Separate the eggs into two large mixing bowls. Place the yolks in one bowl and the whites in another.

Add 1/4 cup of the sugar to the egg yolks. Using an electric mixer, beat for 3 to 4 minutes until the mixture becomes pale, thick, and creamy.

Add the cold mascarpone cheese and dark rum to the yolk mixture. Mix on low speed just until smooth and fully incorporated. Avoid overmixing, which can cause the mascarpone to become grainy.

In a separate large bowl, combine the heavy cream, vanilla extract, and salt. Beat until medium-stiff peaks form.

Gently fold the whipped cream into the mascarpone mixture in several additions until fully combined and smooth.

Add the remaining 1/4 cup sugar to the egg whites. Beat with clean beaters until stiff glossy peaks form.

Carefully fold the beaten egg whites into the mascarpone mixture using a rubber spatula. Work slowly to preserve as much air as possible. The finished filling should be light and fluffy.

Quickly dip each ladyfinger into the espresso mixture for about 1 second per side. Arrange a single layer of soaked ladyfingers across the bottom of the baking dish.

Spread half of the mascarpone filling evenly over the ladyfingers using an offset spatula or the back of a spoon.

Create a second layer of dipped ladyfingers over the filling.

Spread the remaining mascarpone mixture evenly over the second layer and smooth the top.

Cover the dish tightly with plastic wrap and refrigerate for at least 8 hours. For the best flavor and texture, chill overnight.

Just before serving, remove the tiramisu from the refrigerator and generously dust the top with cocoa powder using a fine-mesh sieve.

Slice into portions and serve chilled.


2. Tips for Perfect Homemade Tiramisu

Use cold mascarpone directly from the refrigerator. Warm mascarpone can become loose and grainy when mixed, resulting in a softer filling that doesn’t hold its layers as well.

Dip the ladyfingers very quickly into the espresso mixture. A one-second dip on each side is usually enough. Over-soaked ladyfingers can turn mushy and cause the dessert to become watery after chilling.

Whip the heavy cream only to medium-stiff peaks. Overwhipped cream can create a dense filling and make folding more difficult.

When folding the whipped cream and egg whites into the mascarpone mixture, use slow, gentle motions. Preserving the air in the mixture creates the light texture that makes tiramisu special.

Allow the tiramisu to chill overnight whenever possible. The extra resting time allows the flavors to develop and helps the layers set properly for cleaner slices.

Dust the cocoa powder on top immediately before serving. Adding it too early can cause moisture from the dessert to darken the cocoa and reduce its fresh appearance.

Use a shallow dish when dipping the ladyfingers. This makes it easier to control soaking time and helps ensure every cookie absorbs a similar amount of espresso.

3. Frequently Asked Questions

Can I make tiramisu ahead of time?

Yes. Tiramisu is actually best when prepared in advance. Making it the day before serving allows the layers to fully set and the flavors to blend together.

Can I make tiramisu without alcohol?

Absolutely. Simply omit the Grand Marnier and rum. The dessert will still have plenty of flavor from the espresso and mascarpone.

How long does homemade tiramisu last?

Stored covered in the refrigerator, tiramisu is best enjoyed within 3 to 4 days.

Can I freeze tiramisu?

Yes. Tiramisu can be frozen for up to 2 months. Thaw overnight in the refrigerator before serving.

Why is my tiramisu filling runny?

Runny filling is often caused by overmixing mascarpone, underwhipping the cream, or insufficient chilling time before serving.

4. Nutrition Information

Nutrient Amount Per Serving
Calories 460
Protein 8g
Carbohydrates 32g
Fat 33g
Saturated Fat 19g
Cholesterol 165mg
Sodium 140mg
Fiber 1g
Sugar 16g
Potassium 120mg
Calcium 95mg

Nutrition values are estimates and may vary depending on ingredient brands and serving sizes.

This homemade tiramisu recipe combines simple ingredients to create an elegant dessert that’s perfect for sharing. The layers of espresso-soaked ladyfingers and creamy mascarpone filling come together to create a classic treat that never goes out of style.

With a little preparation and plenty of chilling time, you can create a bakery-quality tiramisu right in your own kitchen. It’s a dessert that’s sure to impress guests while remaining surprisingly approachable for home bakers.