Author

Clifford A. Wright

Browsing

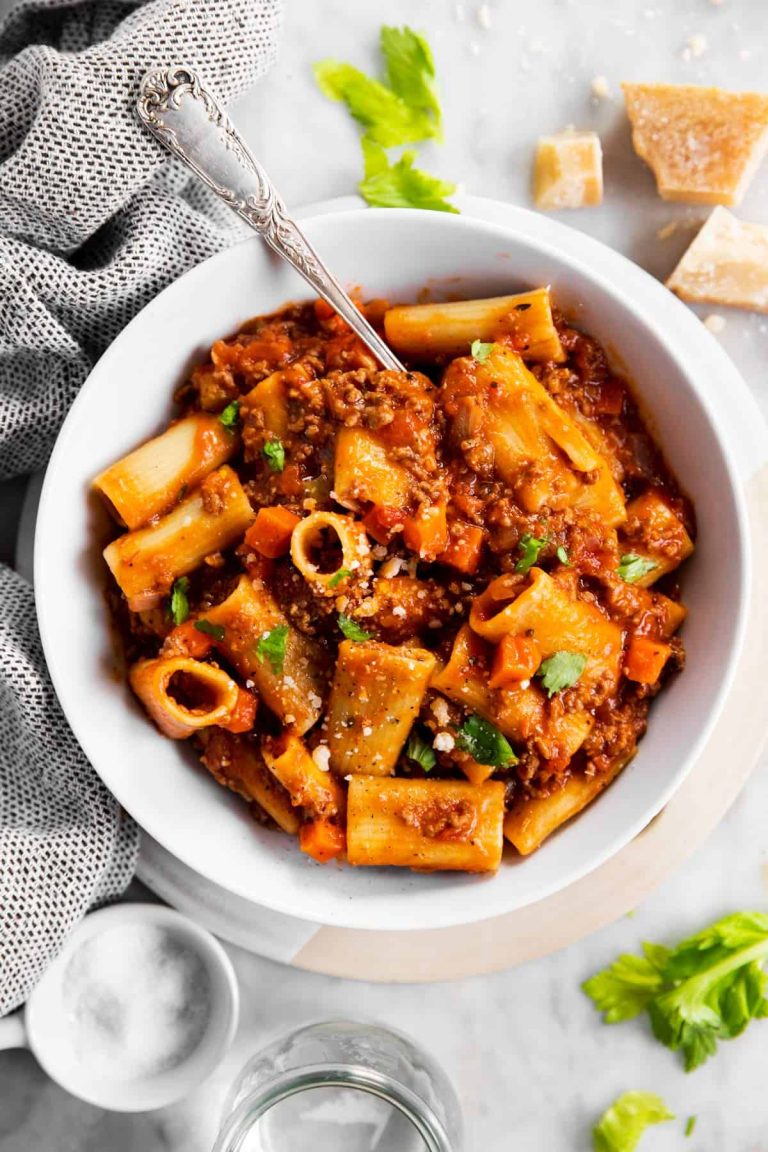
Rigatoni Bolognese is a hearty Italian-inspired pasta dish that combines tender pasta with a rich, slow-cooked meat sauce. It’s a comforting meal that’s perfect for family dinners, weekend gatherings, or anytime you’re craving a satisfying bowl of pasta.

This authentic-style Rigatoni Bolognese recipe features ground beef, vegetables, tomatoes, and broth simmered together to create a flavorful sauce that clings beautifully to the ridges of rigatoni. The result is a delicious pasta dish that’s both simple and impressive.
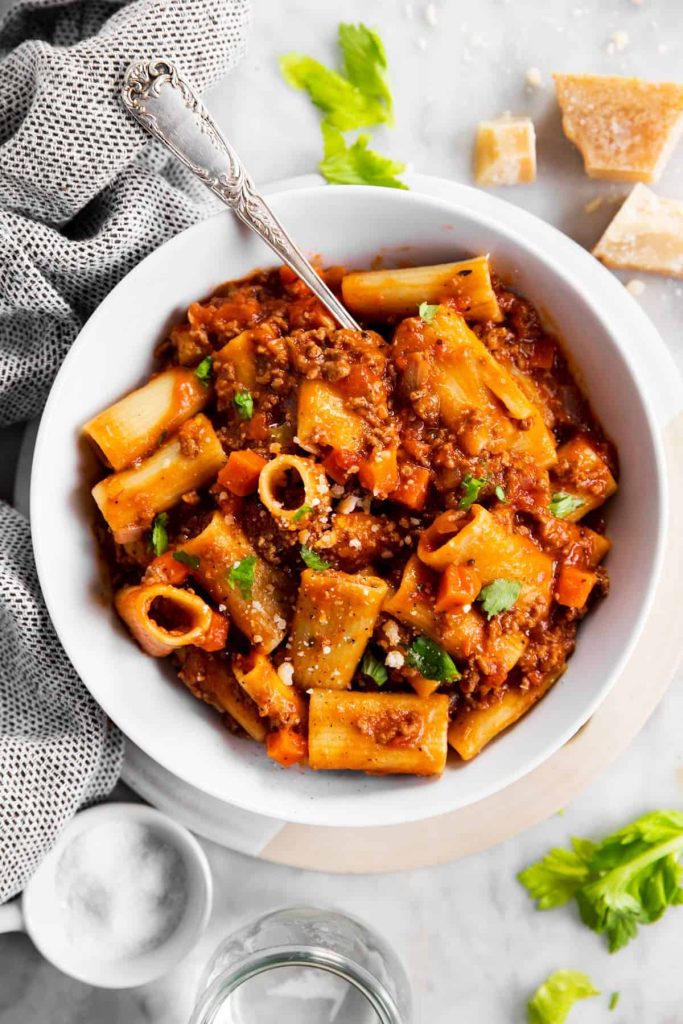
1. Authentic Rigatoni Bolognese Recipe (Yield: 6 Servings)

Ingredients

  • 1 tablespoon olive oil
  • 1 lb ground beef
  • 1 medium onion, finely chopped
  • 1 carrot, finely chopped
  • 1 celery stalk, finely chopped
  • ¼ teaspoon garlic powder
  • 2 teaspoons Italian seasoning
  • Salt and pepper, to taste
  • ¼ cup tomato paste
  • 3 cups beef broth, or more as needed
  • 1 (28-oz) can diced tomatoes
  • 1 (16-oz) box rigatoni pasta, uncooked
  • Grated Parmesan cheese, for serving (optional)

Instructions

Heat the olive oil in a large Dutch oven or deep pot over medium-high heat. Add the ground beef and cook for 5 to 7 minutes, breaking it apart with a spoon until browned.

Add the chopped onion, carrot, and celery to the pot. Continue cooking for another 6 to 8 minutes, stirring occasionally, until the vegetables soften and begin to blend into the beef mixture.

Season with the garlic powder, Italian seasoning, salt, and pepper. Stir well to evenly distribute the seasonings.

Add the tomato paste and cook for 2 minutes while stirring constantly. Cooking the tomato paste before adding liquids helps deepen its flavor and creates a richer sauce.

Pour in the diced tomatoes along with their juices and add the beef broth. Stir thoroughly to combine all the ingredients.

Bring the mixture to a gentle boil, then reduce the heat to low. Let the sauce simmer uncovered for 30 to 40 minutes, stirring occasionally. During this time, the vegetables will soften further and the sauce will develop a richer flavor.

While the sauce simmers, bring a large pot of salted water to a boil. Add the rigatoni and cook until just al dente according to the package directions.

Before draining the pasta, reserve about 1 cup of the pasta cooking water. Drain the rigatoni and set aside.

Taste the Bolognese sauce and adjust the seasoning if needed. If the sauce becomes too thick during simmering, add a splash of additional beef broth.

Add the cooked rigatoni directly to the sauce and stir gently until every piece of pasta is coated.

If the sauce seems too thick after adding the pasta, stir in a small amount of the reserved pasta water until the desired consistency is reached.

Allow the pasta and sauce to cook together for 1 to 2 minutes over low heat. This helps the sauce cling to the rigatoni and enhances the overall flavor.

Remove from the heat and let the dish rest for a few minutes before serving.

Serve warm with grated Parmesan cheese if desired.
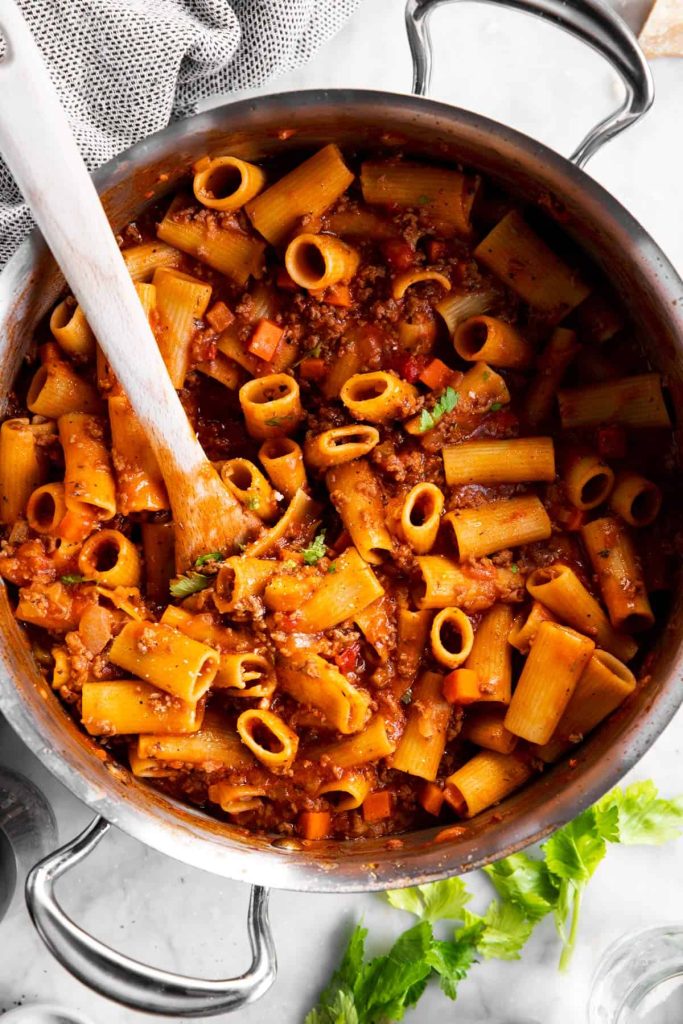
2. Tips for Perfect Homemade Rigatoni Bolognese

Finely chop the onion, carrot, and celery into small, uniform pieces. This allows them to soften completely during simmering and creates a smoother, more cohesive sauce.

Brown the beef thoroughly before adding the vegetables. Allowing the meat to develop some caramelization adds depth and richness to the finished Bolognese.

Cook the tomato paste for a minute or two before adding the liquids. This step removes its raw taste and creates a deeper tomato flavor throughout the sauce.

Maintain a gentle simmer rather than a rapid boil while the sauce cooks. Slow simmering helps the flavors develop without reducing the liquid too quickly.

Cook the rigatoni just until al dente. The pasta will continue absorbing sauce after it’s combined, so slightly firm pasta produces the best final texture.

Reserve some pasta water before draining. The starch in the water helps loosen the sauce if needed and allows it to coat the pasta more evenly.

Mix the pasta directly into the sauce instead of spooning sauce over plain pasta. This ensures every piece of rigatoni is coated and allows the sauce to settle into the pasta’s ridges.

3. Frequently Asked Questions

Why is rigatoni a good choice for Bolognese sauce?

Rigatoni has ridges on the outside and a hollow center that help capture thick meat sauces, making each bite more flavorful.

Can I make the sauce ahead of time?

Yes. The Bolognese sauce can be prepared up to two days in advance and stored in the refrigerator until ready to use.

Can I freeze Rigatoni Bolognese?

Yes. The sauce freezes very well for up to 3 months. For the best texture, cook fresh pasta when ready to serve.

Can I use a different type of pasta?

Absolutely. Penne, ziti, pappardelle, tagliatelle, or fettuccine are all excellent alternatives.

How do I reheat leftovers?

Reheat gently on the stovetop or in the microwave with a splash of broth or water to restore the sauce’s consistency.

4. Nutrition Information

Nutrient Amount Per Serving
Calories 570
Protein 30g
Carbohydrates 58g
Fat 24g
Saturated Fat 8g
Cholesterol 65mg
Sodium 860mg
Fiber 5g
Sugar 8g
Potassium 780mg
Iron 5mg

Nutrition values are estimates and may vary depending on ingredient brands and portion sizes.

This Rigatoni Bolognese recipe delivers everything you want in a comforting pasta dinner: tender pasta, rich meat sauce, and plenty of savory flavor. The combination of beef, vegetables, tomatoes, and herbs creates a hearty meal that’s satisfying without being complicated.

Perfect for weeknight dinners or relaxed weekend meals, this dish brings classic Italian-inspired comfort to your table. Once you try homemade Rigatoni Bolognese, it’s likely to become a favorite recipe you’ll make again and again.
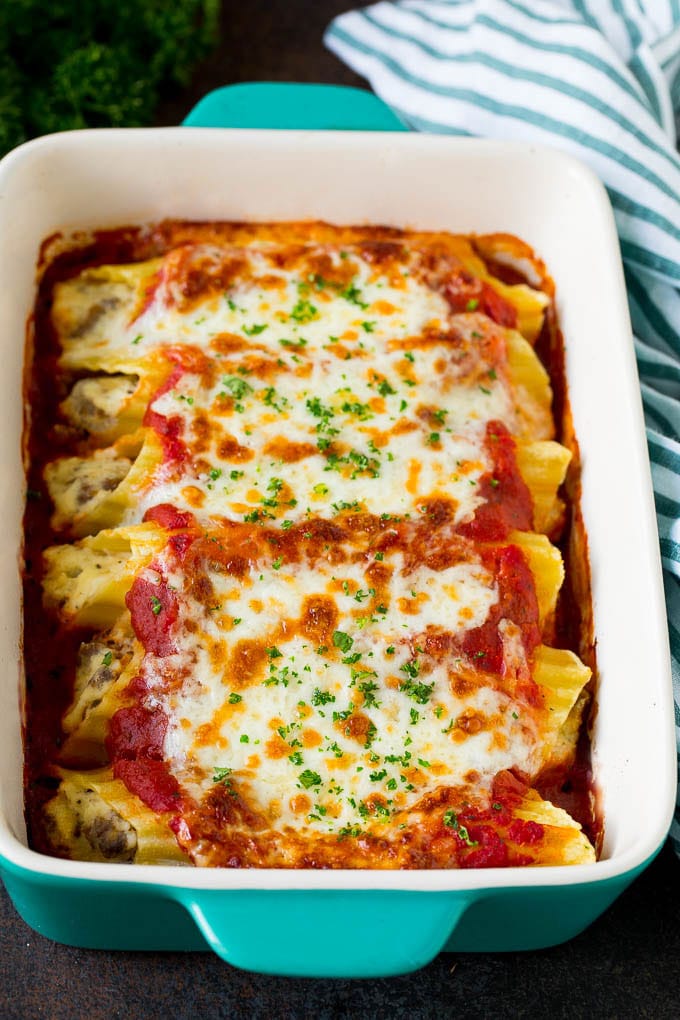
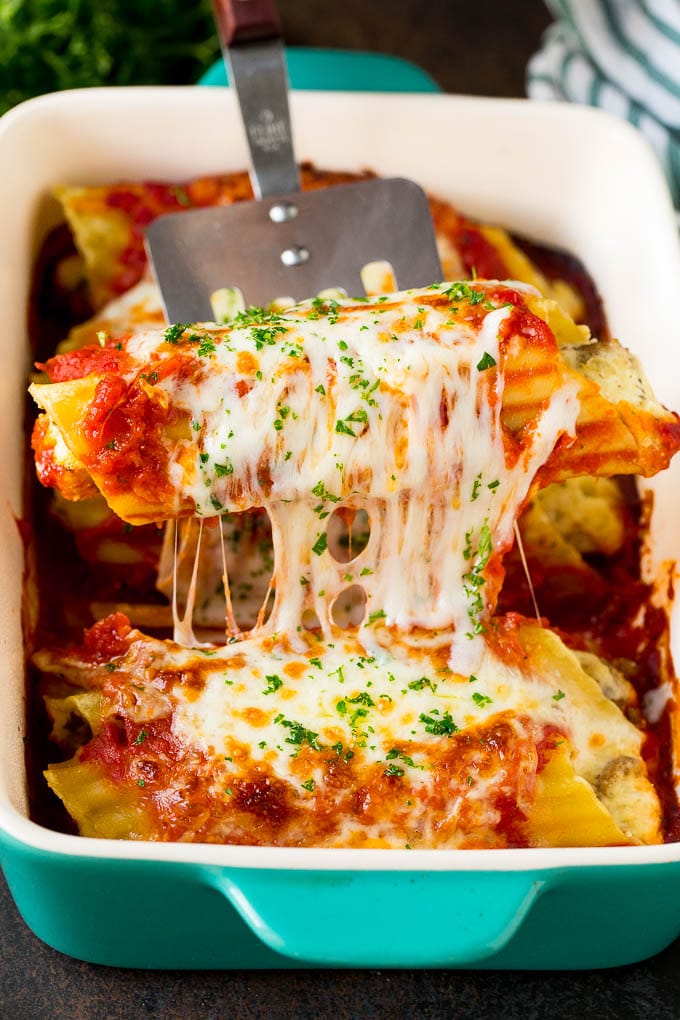
Manicotti is a classic Italian-American comfort food that combines pasta, a rich cheese filling, and flavorful sauce in one satisfying dish. It’s a popular choice for family dinners, holidays, and gatherings because it looks impressive while being surprisingly easy to prepare.

This authentic manicotti recipe features tender pasta shells stuffed with a creamy ricotta and sausage filling, then baked in marinara sauce and topped with melted mozzarella cheese. The result is a hearty meal that delivers plenty of flavor in every bite.

1. Authentic Manicotti Recipe (Yield: 6 Servings)

Ingredients

For the Filling

  • 2 teaspoons olive oil
  • 1 pound Italian sausage, hot or mild, casings removed
  • 1/2 cup onion, finely chopped
  • 2 teaspoons minced garlic
  • 15 ounces ricotta cheese
  • 1 egg
  • 1 cup mozzarella cheese, shredded
  • 1/2 cup Parmesan cheese, finely grated
  • 3/4 teaspoon dried Italian seasoning
  • Salt and pepper, to taste

For Assembly

  • 2 1/2 cups marinara sauce
  • 12 manicotti shells
  • 1 1/2 cups mozzarella cheese
  • 2 tablespoons chopped parsley
  • Cooking spray

Instructions

Preheat your oven to 375°F (190°C). Lightly coat a 9×13-inch baking dish with cooking spray.

Bring a large pot of salted water to a boil. Cook the manicotti shells for 2 to 3 minutes less than the package directions indicate. The pasta should be slightly firm because it will continue cooking in the oven. Carefully drain the shells and rinse them briefly with cool water to stop the cooking process. Place them in a single layer on a lightly oiled baking sheet to prevent sticking.

While the pasta cooks, heat the olive oil in a large skillet over medium heat. Add the Italian sausage and cook for 5 to 7 minutes, breaking it into small crumbles as it browns.

Add the chopped onion and cook for another 4 to 5 minutes until softened. Stir in the minced garlic and cook for 30 seconds until fragrant.

Remove the sausage mixture from the heat and allow it to cool for about 10 minutes. This helps prevent the egg from cooking when mixed into the filling.

In a large bowl, combine the ricotta cheese, egg, 1 cup mozzarella cheese, Parmesan cheese, Italian seasoning, salt, and pepper. Add the cooled sausage mixture and stir until evenly combined.

Transfer the filling to a large piping bag or a zip-top bag with one corner snipped off. This makes filling the manicotti much easier and helps prevent the shells from breaking.

Spread 1 cup of marinara sauce evenly across the bottom of the prepared baking dish.

Carefully pipe the filling into each manicotti shell from both ends until completely filled. Arrange the filled shells in a single layer over the sauce.

Pour the remaining marinara sauce evenly over the manicotti, making sure most of the pasta is covered. Covering the shells helps keep them tender during baking.

Sprinkle the remaining 1 1/2 cups mozzarella cheese over the top.

Cover the baking dish tightly with aluminum foil and bake for 30 minutes.

Remove the foil and continue baking for an additional 10 to 15 minutes, or until the cheese is melted and lightly golden and the sauce is bubbling around the edges.

Remove the manicotti from the oven and let it rest for 10 minutes before serving. This allows the filling to set slightly and makes serving easier.

Garnish with chopped parsley and serve warm.

2. Tips for Perfect Homemade Manicotti

Cook the manicotti shells slightly under al dente. Fully cooked shells become fragile and can tear while being filled. Slightly firm pasta is easier to handle and finishes cooking perfectly in the oven.

Allow the sausage mixture to cool before combining it with the ricotta mixture. Adding hot sausage directly to the filling can affect the texture and partially cook the egg.

Use a piping bag or zip-top bag instead of a spoon to fill the shells. This method fills the pasta more evenly and significantly reduces the chance of breaking the manicotti.

Spread sauce on the bottom of the baking dish before adding the shells. This prevents the pasta from sticking and helps keep the bottoms moist during baking.

Make sure most of the shells are covered with sauce before baking. Exposed pasta can dry out and become chewy in the oven.

Cover the dish tightly with foil for the first part of baking. The trapped steam helps cook the pasta completely and keeps the filling creamy.

Let the manicotti rest for about 10 minutes after baking. This gives the filling time to firm up slightly, making the shells easier to serve without falling apart.

3. Frequently Asked Questions

Can I make manicotti ahead of time?

Yes. You can assemble the entire dish up to 24 hours in advance, cover it tightly, and refrigerate until ready to bake.

Can I freeze manicotti?

Yes. Assemble the manicotti in a freezer-safe dish, cover tightly, and freeze for up to 3 months. Thaw overnight in the refrigerator before baking.

Do I have to use Italian sausage?

No. Ground beef, ground turkey, or even a vegetarian filling can be substituted depending on your preferences.

Can I use store-bought marinara sauce?

Absolutely. A good-quality jarred marinara sauce works very well and helps save preparation time.

What side dishes go well with manicotti?

Garlic bread, Caesar salad, roasted vegetables, sautéed green beans, or a simple garden salad all pair nicely with manicotti.

4. Nutrition Information

Nutrient Amount Per Serving
Calories 690
Protein 38g
Carbohydrates 39g
Fat 41g
Saturated Fat 18g
Cholesterol 125mg
Sodium 1,150mg
Fiber 4g
Sugar 8g
Potassium 620mg
Calcium 550mg

Nutrition values are estimates and may vary based on ingredient brands and serving sizes.

This homemade manicotti recipe combines tender pasta, a rich sausage and cheese filling, and plenty of marinara sauce for a comforting meal that’s perfect for sharing. The baked cheese topping and flavorful filling make every bite satisfying and delicious.

With a few simple techniques and quality ingredients, you can create restaurant-style manicotti right in your own kitchen. It’s a classic Italian-inspired dish that’s sure to become a favorite for family dinners and special occasions.

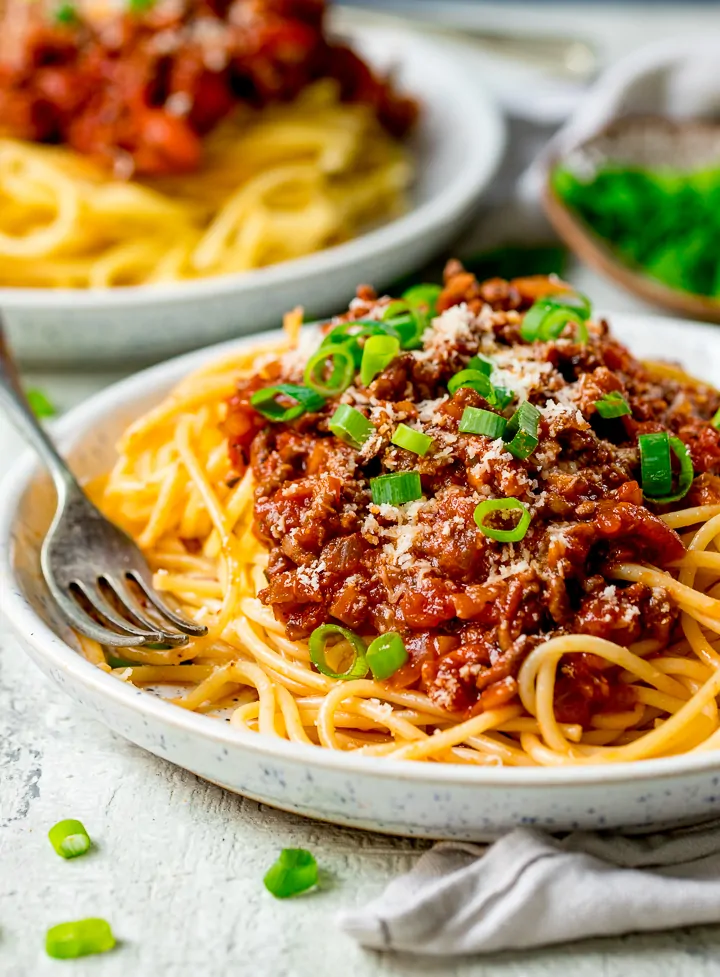
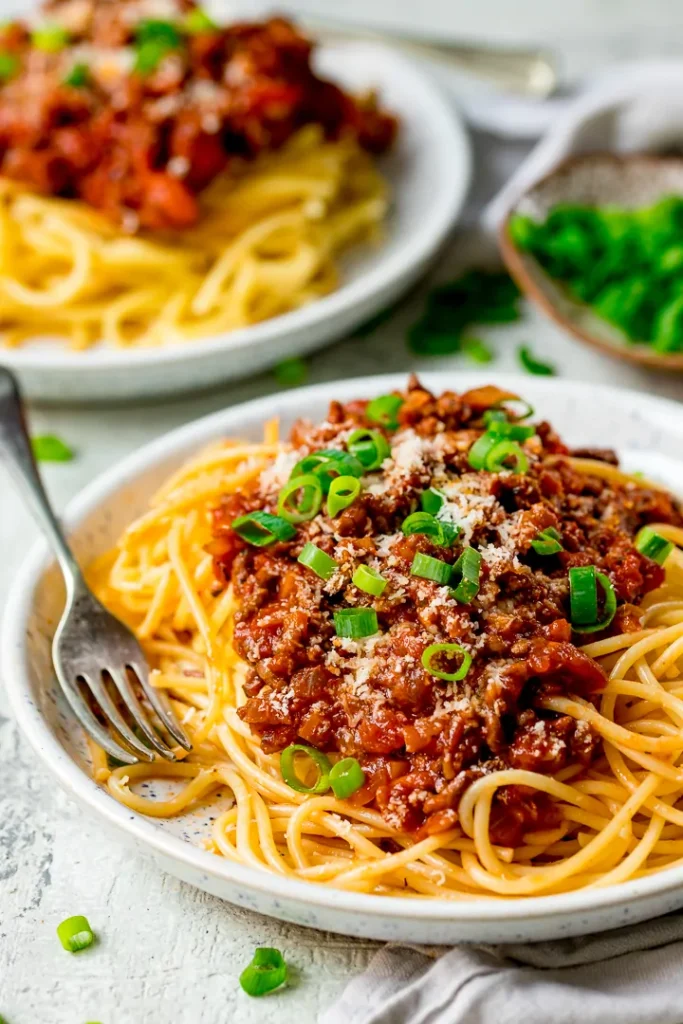
Spaghetti Bolognese is a classic comfort food that has earned a place on dinner tables around the world. With its hearty meat sauce and tender pasta, it’s a satisfying meal that’s perfect for family dinners, weekend cooking, or special occasions.

This authentic Spaghetti Bolognese recipe combines ground beef, vegetables, tomatoes, and herbs to create a rich and flavorful sauce. Served over perfectly cooked spaghetti and finished with Parmesan cheese, it’s a timeless dish that’s always a crowd-pleaser.

1. Authentic Spaghetti Bolognese Recipe (Yield: 4 Servings)

Ingredients

  • 1 tbsp olive oil
  • 1 onion, peeled and finely diced
  • 2 cloves garlic, peeled and minced
  • 1 carrot, peeled and finely diced
  • 3 chestnut mushrooms, finely diced
  • 450 g (1 lb) minced beef (ground beef)
  • 120 ml (1/2 cup) red wine
  • 3 tbsp tomato puree
  • 1 tsp dried oregano
  • ½ tsp dried thyme
  • 1 tbsp Worcestershire sauce
  • 1 beef stock cube, crumbled
  • 2 x 400 g (2 x 14 oz) tins finely chopped tomatoes
  • ½ tbsp light brown sugar
  • ½ tsp salt
  • ½ tsp black pepper
  • 300 g (10.5 oz) dried spaghetti or fresh pasta
  • Small bunch spring onions (scallions), chopped
  • Grated Parmesan cheese

Instructions

Heat the olive oil in a large skillet, sauté pan, or Dutch oven over medium heat. Add the diced onion, carrot, and mushrooms. Cook for 6 to 8 minutes, stirring occasionally, until the vegetables soften and begin to develop flavor.

Add the minced garlic and cook for about 30 seconds, stirring frequently to prevent burning.

Add the minced beef to the pan and cook for 6 to 8 minutes, breaking it apart with a wooden spoon as it browns. Continue cooking until no pink remains.

Pour in the red wine and stir well, scraping up any browned bits from the bottom of the pan. Allow the wine to simmer for 2 to 3 minutes so some of the liquid can reduce.

Stir in the tomato puree, oregano, thyme, Worcestershire sauce, and crumbled beef stock cube. Mix thoroughly until the beef is evenly coated with the seasonings.

Add the chopped tomatoes, brown sugar, salt, and black pepper. Stir everything together until well combined.

Bring the sauce to a gentle simmer, then reduce the heat to low. Allow the Bolognese sauce to cook uncovered for 35 to 45 minutes, stirring occasionally. During this time, the flavors will deepen and the sauce will thicken.

About 15 minutes before the sauce is finished, bring a large pot of salted water to a boil. Add the spaghetti and cook according to the package directions until al dente.

Drain the spaghetti, reserving a small amount of pasta water if desired.

Taste the Bolognese sauce and adjust the seasoning if needed. If the sauce seems too thick, stir in a small splash of reserved pasta water.

Divide the spaghetti among serving bowls or plates. Spoon the Bolognese sauce generously over the pasta.

Finish with chopped spring onions and a sprinkle of grated Parmesan cheese. Serve immediately while hot.

2. Tips for Perfect Homemade Spaghetti Bolognese

Finely dice the onion, carrot, and mushrooms so they soften completely during cooking. Smaller pieces blend into the sauce better and create a richer texture.

Take the time to brown the beef properly before adding the liquids. Let the meat develop some caramelized bits in the pan, as this adds deeper flavor to the finished sauce.

After adding the red wine, allow it to simmer for a few minutes until most of the alcohol evaporates. This concentrates the flavor and prevents the sauce from tasting overly acidic.

Keep the sauce at a gentle simmer rather than a rapid boil. Slow cooking allows the tomatoes, beef, and seasonings to meld together while thickening the sauce naturally.

Stir the sauce occasionally during the simmering process to prevent sticking and ensure even cooking, especially as the sauce begins to reduce.

Cook the spaghetti just until al dente. The pasta should still have a slight bite, which helps it hold up better when combined with the rich Bolognese sauce.

Reserve about ½ cup of pasta water before draining the spaghetti. If the sauce becomes too thick, a small amount of pasta water can help create a silky consistency and help the sauce cling to the pasta.

Taste the sauce before serving and adjust the seasoning if needed. The exact amount of salt can vary depending on the tomatoes, stock cube, and Parmesan cheese used.

3. Frequently Asked Questions

Can I make Spaghetti Bolognese ahead of time?

Yes. The sauce can be prepared up to two days in advance and stored in the refrigerator. Reheat gently before serving.

Can I freeze Bolognese sauce?

Absolutely. Allow the sauce to cool completely, then store it in freezer-safe containers for up to 3 months.

What is the best pasta for Bolognese sauce?

Spaghetti is a popular choice, but tagliatelle, fettuccine, pappardelle, and rigatoni also pair well with meat sauce.

Can I omit the red wine?

Yes. You can replace the wine with additional beef broth or stock if preferred.

What side dishes go well with Spaghetti Bolognese?

Garlic bread, Caesar salad, mixed green salad, roasted vegetables, or a simple side of steamed vegetables all complement the dish nicely.

4. Nutrition Information

Nutrient Amount Per Serving
Calories 710
Protein 41g
Carbohydrates 67g
Fat 29g
Saturated Fat 11g
Cholesterol 95mg
Sodium 980mg
Fiber 7g
Sugar 12g
Potassium 1,050mg
Iron 6mg

Nutrition values are estimates and may vary depending on ingredient brands, preparation methods, and serving sizes.

This authentic spaghetti bolognese recipe is a comforting meal that combines tender pasta with a rich, slow-simmered meat sauce. The combination of beef, vegetables, herbs, and tomatoes creates a classic dish that’s both satisfying and easy to make at home.

Perfect for weeknight dinners or relaxed family meals, this homemade Bolognese delivers hearty flavor in every bite. Once you’ve mastered this recipe, it may become one of your favorite pasta dishes to make again and again.
One pot meals are a great way to make a satisfying dinner without spending hours in the kitchen. They combine simple ingredients, easy preparation, and minimal cleanup, making them perfect for busy weeknights.

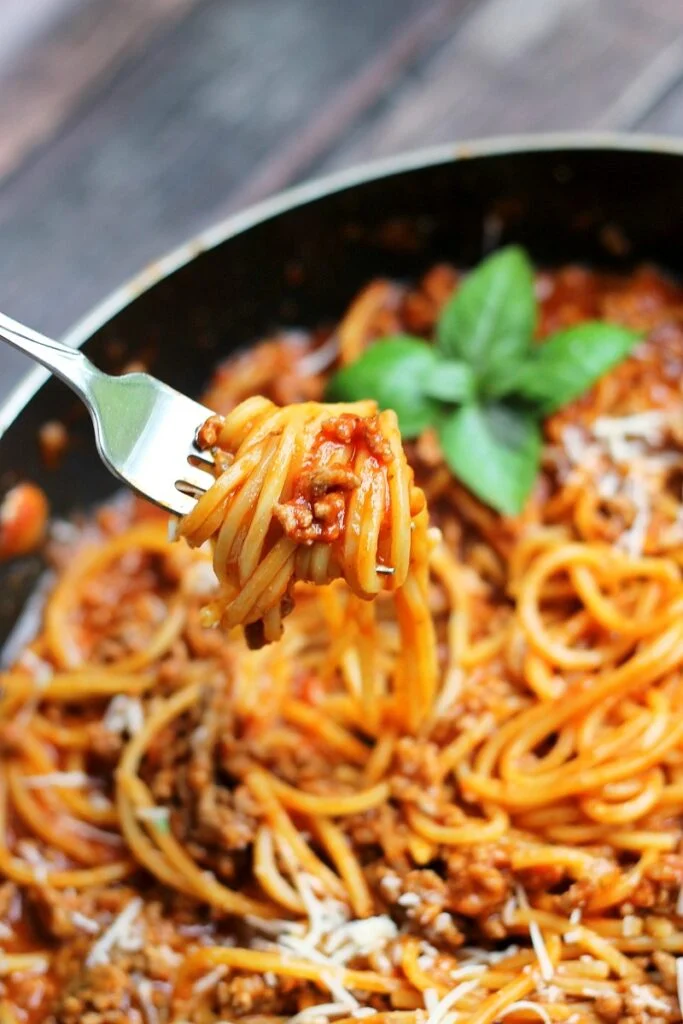
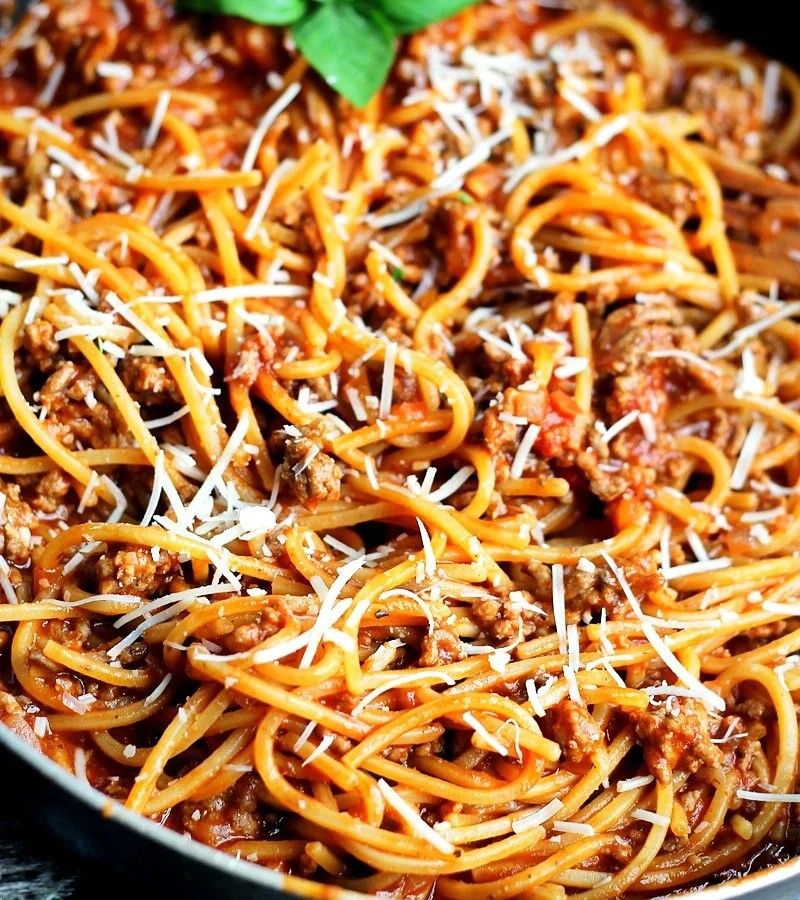
This One Pot Spaghetti with Meat Sauce recipe brings together tender pasta, seasoned ground beef, and a rich tomato-based sauce in a single pot. It’s a comforting family meal that’s both convenient and delicious.

1. One Pot Spaghetti with Meat Sauce (Yield: 6 Servings)

Ingredients

  • 1 pound ground beef
  • 1 medium onion, chopped finely
  • 2 garlic cloves, minced
  • 14 ounces chicken or vegetable broth
  • 2 cups water
  • 6 ounces tomato paste
  • 1 teaspoon oregano
  • ½ teaspoon dried basil
  • ¼ teaspoon black pepper
  • 12 ounces spaghetti
  • ¼ cup Parmesan cheese

Instructions

Heat a large Dutch oven or deep skillet over medium-high heat. Add the ground beef and cook for 5 to 7 minutes, breaking it apart with a wooden spoon as it browns.

Add the finely chopped onion to the beef and continue cooking for another 4 to 5 minutes until the onion becomes soft and translucent. Stir in the minced garlic and cook for about 30 seconds until fragrant.

Pour in the chicken or vegetable broth and water. Add the tomato paste, oregano, basil, and black pepper. Stir thoroughly until the tomato paste is completely dissolved and the mixture is smooth.

Bring the sauce mixture to a gentle boil over medium-high heat.

Break the spaghetti in half if needed so it fits comfortably into the pot. Add the spaghetti to the boiling liquid, pressing it down gently as it softens.

Reduce the heat to medium and allow the spaghetti to cook uncovered. Stir frequently, especially during the first few minutes, to prevent the pasta from sticking together.

Continue cooking for 12 to 15 minutes, stirring occasionally. As the pasta cooks, it will absorb the liquid and help create a thick, flavorful sauce.

If the sauce becomes too thick before the pasta is fully cooked, add a small splash of water or broth and continue cooking until the spaghetti reaches your desired tenderness.

Once the spaghetti is cooked and most of the liquid has been absorbed, remove the pot from the heat.

Stir in the Parmesan cheese until melted and evenly incorporated into the sauce.

Allow the spaghetti to rest for 3 to 5 minutes before serving. During this time, the sauce will continue to thicken slightly.

Serve warm with additional Parmesan cheese if desired.

2. Tips for Perfect One Pot Spaghetti with Meat Sauce

Use a large pot with plenty of room for stirring. This helps the spaghetti cook evenly and prevents sticking.

Stir the pasta frequently during cooking, especially in the beginning when the noodles are softening.

Choose a good-quality broth for extra flavor since the pasta absorbs the cooking liquid as it cooks.

Keep the heat at a gentle simmer rather than a rapid boil. This allows the pasta to cook evenly while helping the sauce develop the right consistency.

If you prefer a richer flavor, use beef broth instead of chicken or vegetable broth.

Freshly grated Parmesan cheese melts more smoothly and adds better flavor than pre-shredded varieties.

Let the finished dish rest for a few minutes before serving so the sauce can thicken naturally.

3. Frequently Asked Questions

Can I use a different type of pasta?

Yes. Short pasta shapes such as penne, rotini, or rigatoni work well, though the cooking time and liquid amount may need slight adjustments.

Can I make this recipe ahead of time?

Yes. It can be prepared several hours in advance and reheated before serving. You may need to add a splash of broth or water when reheating.

Can I freeze leftovers?

Yes. Store cooled spaghetti in airtight containers and freeze for up to 3 months. Thaw overnight in the refrigerator before reheating.

What vegetables can I add to this recipe?

Diced bell peppers, mushrooms, spinach, zucchini, or carrots can be added for extra nutrition and flavor.

How do I prevent the spaghetti from becoming mushy?

Avoid overcooking the pasta and remove the pot from the heat as soon as the spaghetti reaches an al dente texture. The pasta will continue to soften slightly as it rests.

4. Nutrition Information

Nutrient Amount Per Serving
Calories 420
Protein 25g
Carbohydrates 40g
Fat 18g
Saturated Fat 7g
Cholesterol 60mg
Sodium 620mg
Fiber 3g
Sugar 4g
Potassium 540mg
Iron 3.5mg

Nutrition values are estimates and may vary depending on ingredient brands and preparation methods.

One Pot Spaghetti with Meat Sauce is an easy, comforting meal that delivers plenty of flavor with minimal cleanup. Everything cooks together in a single pot, allowing the pasta to absorb the rich flavors of the sauce as it cooks.

This recipe is perfect for busy evenings when you want a hearty homemade dinner without a lot of extra work. Once you try this simple one-pot method, it may become one of your favorite ways to make spaghetti.

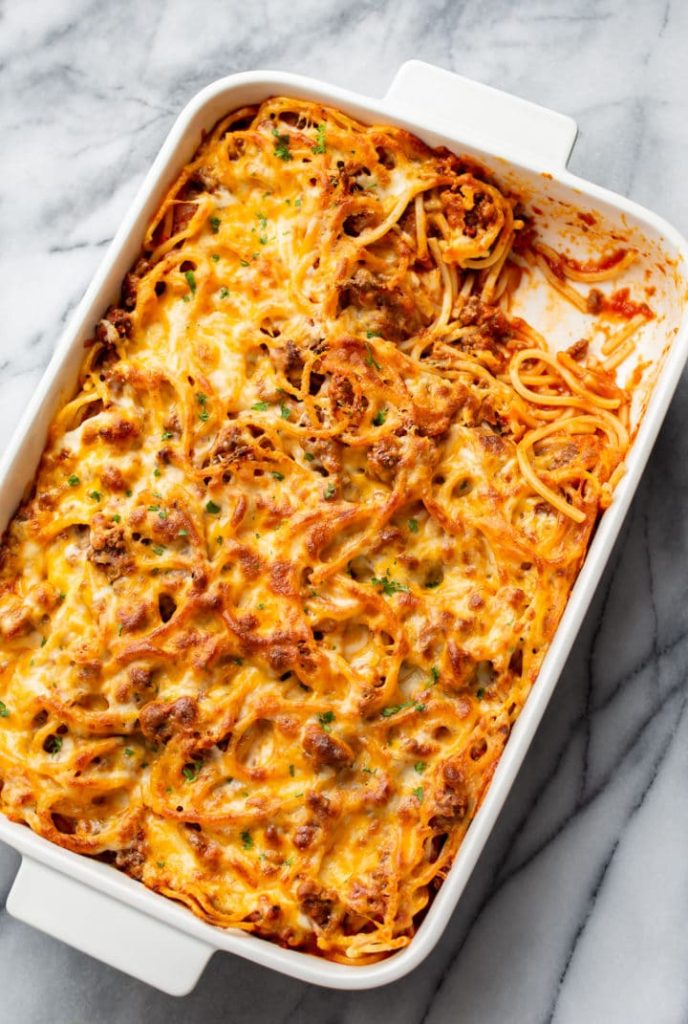
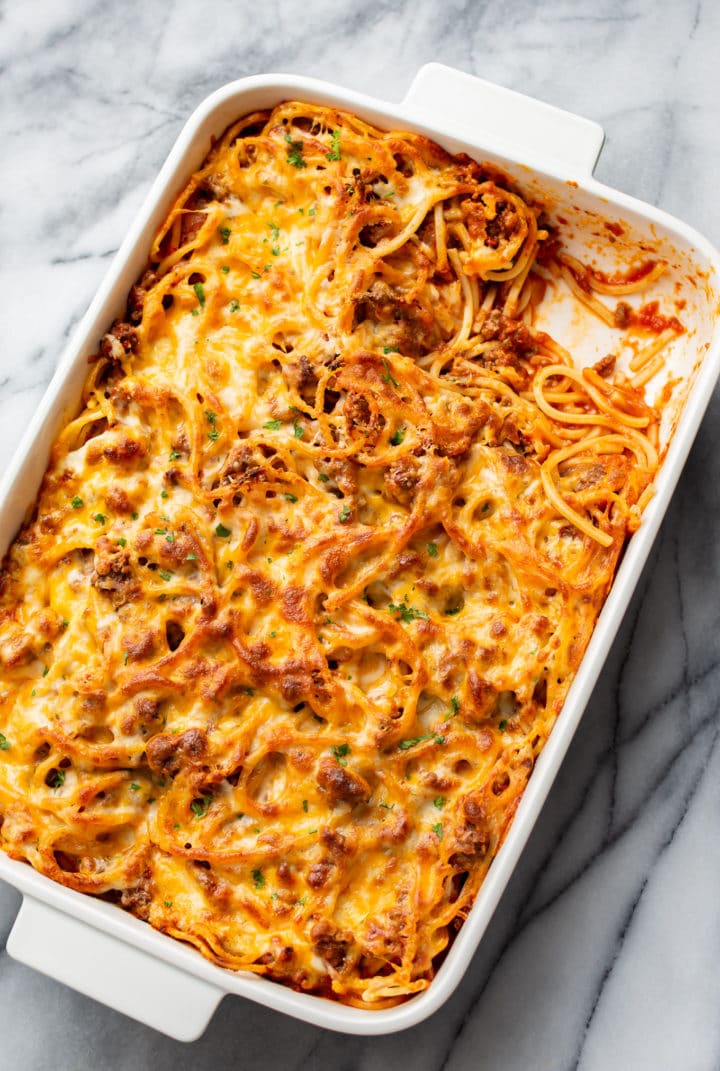
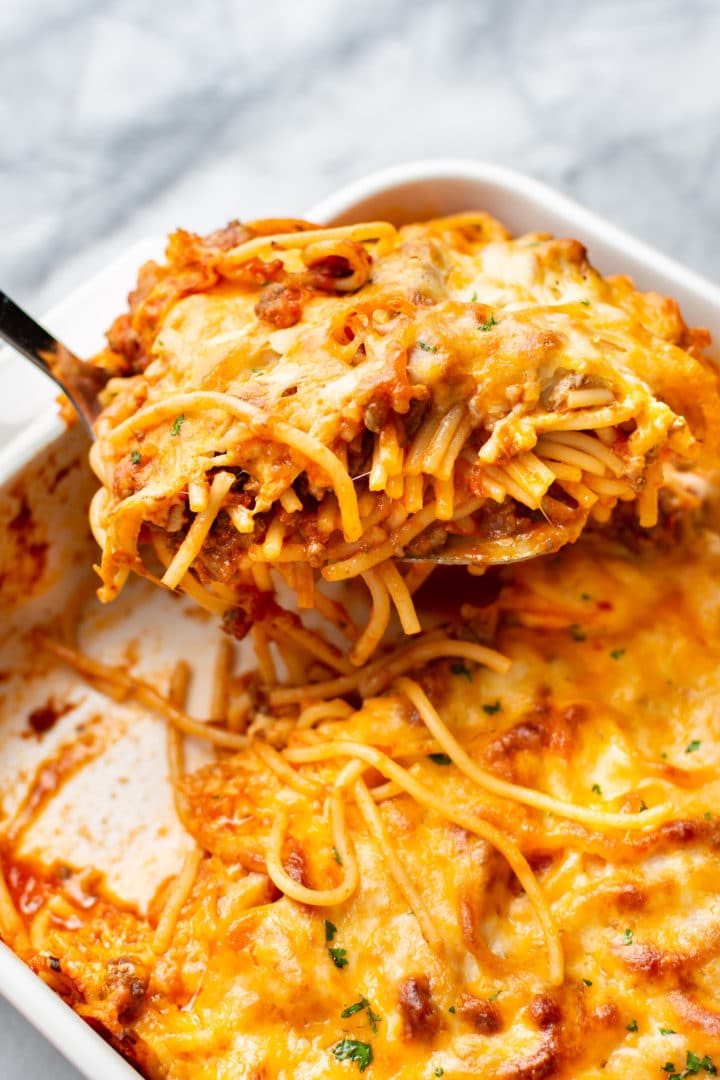
Baked spaghetti is a comforting family favorite that combines tender pasta, hearty meat sauce, and plenty of melted cheese in one satisfying dish. It’s easy to prepare, feeds a crowd, and makes a wonderful meal for busy weeknights, potlucks, or casual gatherings.

This baked spaghetti recipe takes classic spaghetti to the next level by layering it with a rich beef sauce and three kinds of cheese. The result is a warm, cheesy casserole that’s sure to become a regular part of your dinner rotation.

1. Baked Spaghetti Recipe (Yield: 8 Servings)

Ingredients

  • 1 pound uncooked spaghetti
  • 1 pound lean ground beef
  • 1/2 medium onion, chopped
  • 1/2 teaspoon dried oregano or Italian seasoning
  • 1/2 teaspoon crushed red pepper flakes (optional)
  • 4 cloves garlic, minced
  • 4 cups marinara sauce
  • Salt and pepper, to taste
  • 1 cup shredded mozzarella cheese
  • 1 cup shredded cheddar cheese
  • 1 cup freshly grated Parmesan cheese
  • Chopped fresh parsley (optional, for garnish)

Instructions

Preheat your oven to 375°F (190°C). Lightly grease a 9×13-inch baking dish and set it aside.

Bring a large pot of salted water to a boil. Add the spaghetti and cook according to the package directions until just al dente. Since the pasta will continue cooking in the oven, avoid overcooking it at this stage.

Drain the spaghetti and set it aside while preparing the sauce.

Heat a large skillet or Dutch oven over medium heat. Add the ground beef and cook for 6 to 8 minutes, breaking it into small pieces as it browns.

Add the chopped onion to the skillet and continue cooking for another 4 to 5 minutes until the onion becomes soft and translucent.

Stir in the oregano, crushed red pepper flakes if using, and minced garlic. Cook for about 30 seconds, stirring frequently until fragrant.

Pour the marinara sauce into the skillet and stir well to combine. Season with salt and pepper to taste.

Reduce the heat to low and let the sauce simmer for about 10 minutes. This allows the flavors to blend together while slightly thickening the sauce.

Add the cooked spaghetti to the sauce and toss until the pasta is evenly coated.

Spread about half of the spaghetti mixture into the prepared baking dish. Sprinkle half of the mozzarella, half of the cheddar, and about one-third of the Parmesan cheese over the pasta.

Add the remaining spaghetti mixture on top and spread it into an even layer.

Top with the remaining mozzarella cheese, remaining cheddar cheese, and the rest of the Parmesan cheese.

Cover the baking dish loosely with aluminum foil and place it in the preheated oven. Bake for 20 minutes.

Remove the foil and continue baking for an additional 10 to 15 minutes, or until the cheese is fully melted and lightly golden around the edges.

Remove the baked spaghetti from the oven and allow it to rest for 5 to 10 minutes before serving. This helps the casserole hold its shape when sliced.

Garnish with chopped fresh parsley if desired and serve warm.

2. Tips for Perfect Homemade Baked Spaghetti With Ground Beef

Cook the spaghetti just until al dente so it maintains the proper texture after baking.

Choose a high-quality marinara sauce for the best overall flavor.

Freshly grated Parmesan cheese melts more smoothly and provides better flavor than pre-grated varieties.

Allow the baked spaghetti to rest briefly after baking. This helps the layers settle and makes serving easier.

If you prefer a richer casserole, reserve a small amount of extra cheese to sprinkle over the top during the final few minutes of baking.

A deeper baking dish can help prevent bubbling sauce from spilling over during cooking.

Leftovers often taste even better the next day as the flavors continue to develop.

3. Frequently Asked Questions

Can I make baked spaghetti ahead of time?

Yes. Assemble the casserole up to one day in advance, cover tightly, and refrigerate. When ready to bake, allow it to sit at room temperature for about 20 minutes before placing it in the oven.

Can I freeze baked spaghetti?

Yes. Baked spaghetti freezes very well. Allow it to cool completely, wrap tightly, and freeze for up to 3 months.

What can I serve with baked spaghetti?

Garlic bread, Caesar salad, roasted vegetables, steamed broccoli, and dinner rolls are all excellent side dishes.

Can I substitute ground turkey for ground beef?

Absolutely. Ground turkey, ground chicken, or Italian sausage can all be used as alternatives depending on your preference.

How do I reheat leftovers?

Individual portions can be reheated in the microwave, while larger portions can be covered and warmed in a 350°F (175°C) oven until heated through.

4. Nutrition Information

Nutrient Amount Per Serving
Calories 560
Protein 34g
Carbohydrates 46g
Fat 27g
Saturated Fat 12g
Cholesterol 85mg
Sodium 820mg
Fiber 4g
Sugar 8g
Potassium 650mg
Iron 4mg

Nutrition values are estimates and may vary depending on ingredient brands and portion sizes.

This baked spaghetti recipe transforms simple pantry ingredients into a hearty, comforting meal that the whole family can enjoy. The combination of pasta, savory beef sauce, and melted cheese creates a satisfying dish that’s perfect for both weeknight dinners and special gatherings.

Easy to prepare and packed with classic Italian-inspired flavors, this casserole is a reliable recipe you’ll want to make again and again. Once you try this homemade baked spaghetti, it’s sure to earn a place among your favorite comfort food recipes.
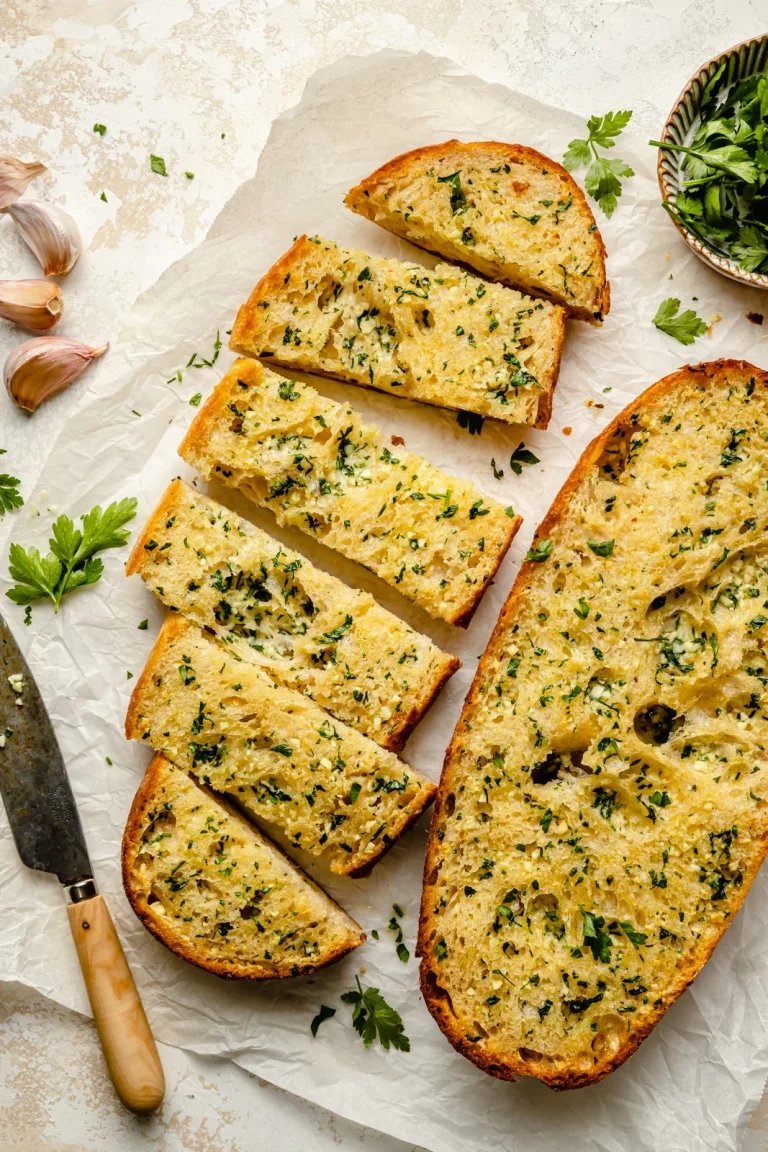
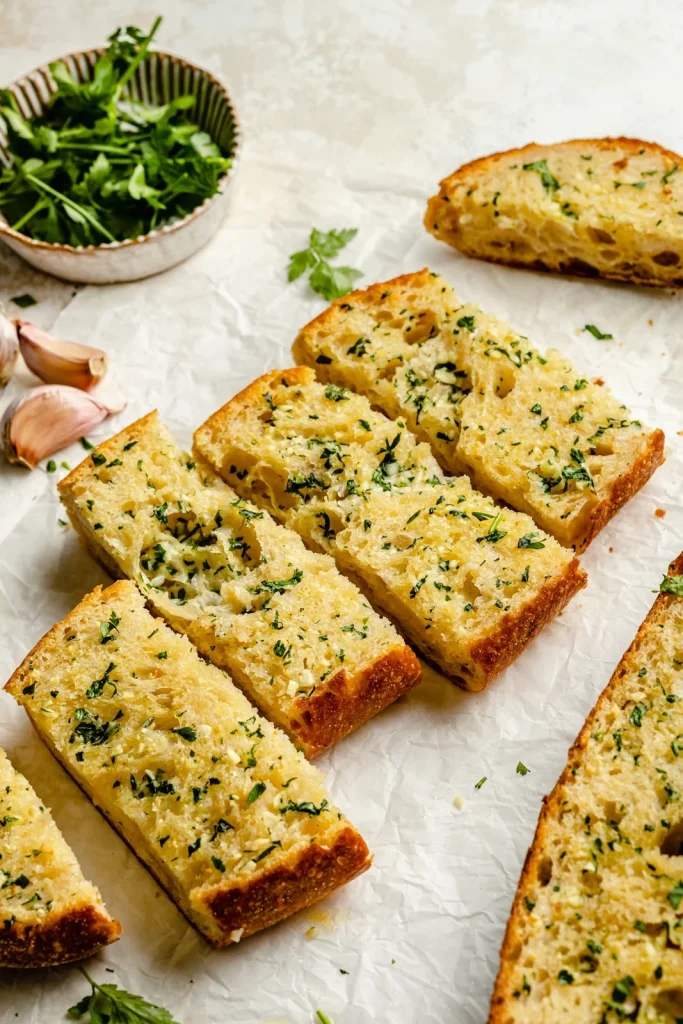
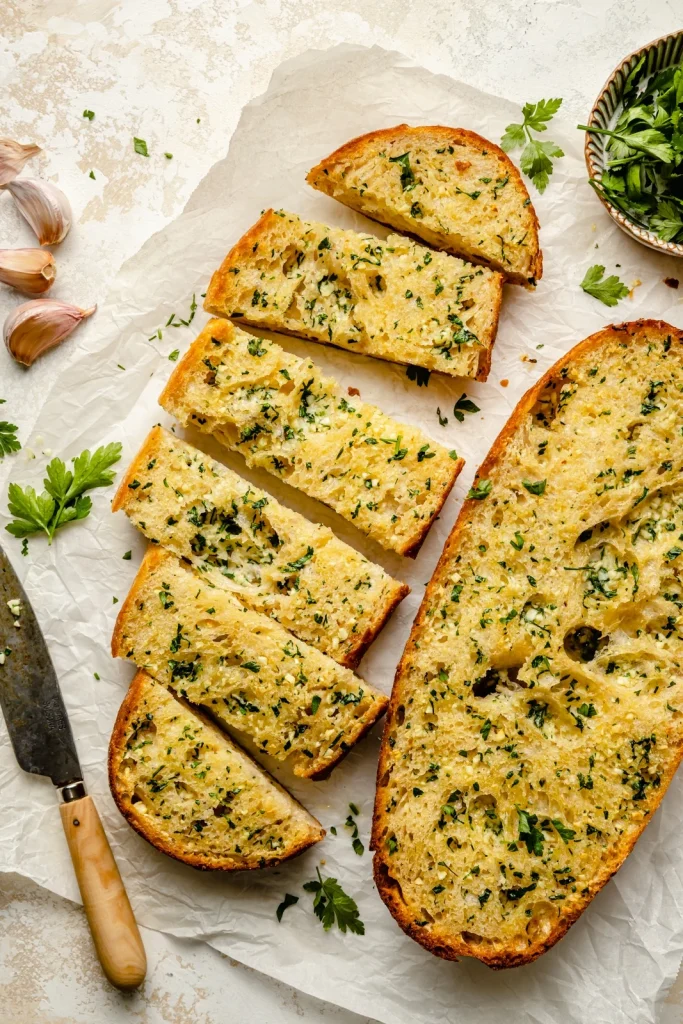
Garlic bread is one of those simple side dishes that can easily steal the spotlight at the dinner table. With its crispy edges, buttery center, savory garlic flavor, and cheesy topping, homemade garlic bread is hard to resist.

This recipe creates a bakery-style loaf that is loaded with flavor and delivers the perfect balance of crunch and softness in every bite. Once you try this homemade version, you may find yourself making it far more often than ordering it from your favorite pizza restaurant.

1. Garlic Bread Recipe (Yield: 8 Servings)

Ingredients

  • 1 pound Italian loaf or French loaf
  • 1/2 cup softened unsalted butter (can also use salted)
  • 4 cloves garlic, finely minced
  • 1 tablespoon finely chopped fresh parsley
  • ⅛ teaspoon sea salt
  • ¼ cup freshly grated Parmesan cheese
  • Extra parsley and chives for garnish

Instructions

Preheat your oven to 400°F (200°C). Line a large baking sheet with parchment paper or aluminum foil for easy cleanup.

Place the softened butter in a medium mixing bowl. Add the minced garlic, chopped parsley, sea salt, and freshly grated Parmesan cheese. Stir everything together until well combined and the garlic is evenly distributed throughout the butter mixture.

Using a serrated bread knife, slice the Italian or French loaf lengthwise into two equal halves. Place both halves cut-side up on the prepared baking sheet.

Spread the garlic butter mixture generously over the cut surfaces of the bread. Make sure to cover the bread evenly from edge to edge so every bite is packed with flavor.

Transfer the baking sheet to the preheated oven and bake for 10 to 12 minutes, or until the butter has melted completely and the bread is heated through.

For a crispier top, switch the oven to broil during the last 1 to 2 minutes of cooking. Watch the bread closely during this step, as it can brown quickly. Remove the bread once the edges are golden and the top is lightly toasted.

Allow the garlic bread to cool for 2 to 3 minutes before slicing. This brief resting time helps the butter settle into the bread and makes it easier to cut.

Slice into individual servings and garnish with additional parsley and chives. Serve warm and enjoy.

2. Tips for Perfect Homemade Garlic Bread

Use fresh garlic instead of garlic powder for the most robust flavor and aroma.

Allow the butter to soften fully before mixing. Soft butter spreads more easily and helps create an even layer across the bread.

Choose a sturdy loaf such as Italian or French bread. These breads hold up well to the butter mixture while maintaining a crisp exterior and soft interior.

Grate Parmesan cheese fresh from a block whenever possible. Freshly grated cheese melts better and delivers superior flavor.

Spread the butter mixture all the way to the edges of the bread to ensure every bite has the perfect amount of seasoning.

Keep a close eye on the bread during the broiling step. Even an extra minute can cause the garlic bread to become overly dark.

Serve the bread immediately after baking for the best texture and flavor.

If preparing for a crowd, double the recipe and bake multiple loaves at the same time.

3. Frequently Asked Questions

Can I make garlic bread ahead of time?

Yes. You can prepare the garlic butter mixture and spread it on the bread several hours in advance. Store the prepared bread covered in the refrigerator until you are ready to bake.

Can I freeze homemade garlic bread?

Absolutely. Assemble the bread with the garlic butter mixture, wrap it tightly in plastic wrap and foil, and freeze for up to three months. Bake directly from frozen, adding a few extra minutes to the cooking time.

What type of bread works best for garlic bread?

Italian and French loaves are popular choices because they provide a crisp crust and soft interior. Ciabatta and baguettes can also produce excellent results.

Can I add other cheeses to this recipe?

Yes. Mozzarella, Romano, Asiago, and provolone are all delicious additions that can create different flavor profiles while maintaining the classic garlic bread taste.

How do I store leftover garlic bread?

Store leftover garlic bread in an airtight container or wrapped tightly in foil in the refrigerator for up to three days. Reheat in the oven to restore its crispy texture.

4. Nutrition Information

The following nutrition information is approximate and based on one serving.

Nutrient Amount Per Serving
Calories 230
Protein 6g
Carbohydrates 26g
Fat 11g
Saturated Fat 6g
Cholesterol 25mg
Sodium 260mg
Fiber 1g
Sugar 1g
Calcium 70mg
Iron 2mg

This homemade Garlic Bread Recipe proves that a few simple ingredients can create an incredibly flavorful side dish. The combination of buttery garlic spread, Parmesan cheese, and fresh herbs transforms an ordinary loaf of bread into something truly memorable.

Perfect alongside pasta, soup, salad, or your favorite Italian-inspired meals, this recipe is easy enough for weeknight dinners and delicious enough for special occasions. Once you make it from scratch, you’ll appreciate just how fresh and satisfying homemade garlic bread can be.

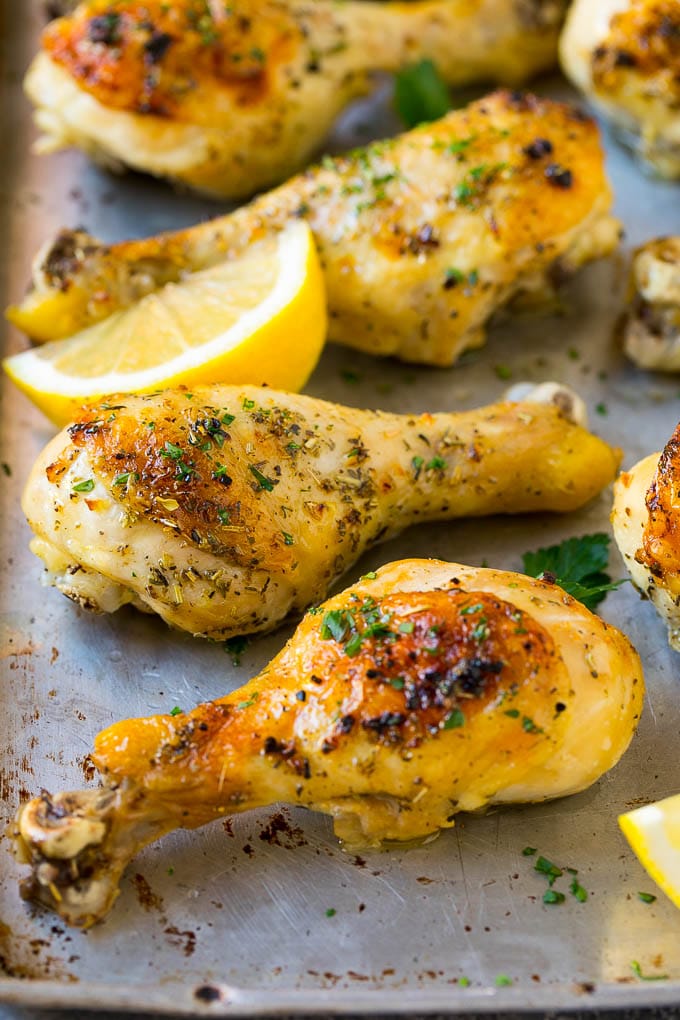
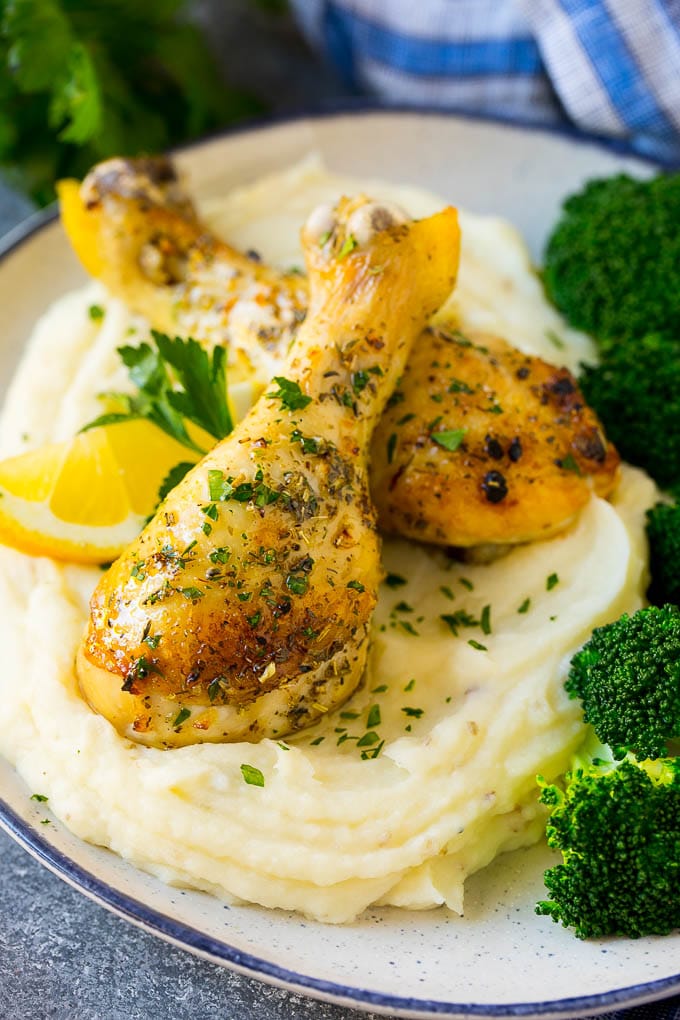
Baked Chicken Drumsticks with Garlic and Herbs is a simple and satisfying dinner recipe that’s perfect for busy weeknights, family meals, and casual gatherings.

With minimal preparation and everyday ingredients, this dish delivers a hearty meal that pairs well with a variety of side dishes, making it a dependable addition to your dinner rotation.

1. Baked Chicken Drumsticks with Garlic and Herbs (Yield: 6 Servings)

Ingredients

  • 3 pounds chicken drumsticks
  • 1/2 cup olive oil
  • 1/4 cup lemon juice
  • 2 teaspoons minced garlic
  • 1 teaspoon salt
  • 1/2 teaspoon pepper
  • 2 teaspoons Italian seasoning
  • 2 tablespoons fresh parsley, chopped
  • Cooking spray

Instructions

Preheat the oven to 400°F (200°C). Coat a large baking dish or rimmed baking sheet with cooking spray and set aside.

Pat the chicken drumsticks dry with paper towels. Removing excess moisture helps the skin crisp up better during baking.

In a large mixing bowl, whisk together the olive oil, lemon juice, minced garlic, salt, pepper, Italian seasoning, and chopped parsley until well combined.

Add the chicken drumsticks to the bowl and toss thoroughly to coat each piece in the marinade. Make sure the seasoning mixture covers all sides of the chicken.

For the best flavor, cover the bowl and refrigerate the chicken for at least 30 minutes. If time allows, marinate for 2 to 4 hours.

Arrange the drumsticks in a single layer on the prepared baking dish. Leave a small amount of space between each piece to allow proper air circulation and even cooking.

Pour any remaining marinade from the bowl over the chicken.

Place the baking dish in the preheated oven and bake for 35 minutes.

Carefully remove the pan from the oven and turn the drumsticks over using tongs. This helps them cook evenly and develop a golden exterior on all sides.

Return the chicken to the oven and continue baking for an additional 15 to 20 minutes, or until the internal temperature reaches 165°F (74°C) when measured with a meat thermometer.

For extra browning, switch the oven to broil during the last 2 to 3 minutes of cooking. Watch carefully to prevent burning.

Remove the chicken from the oven and let it rest for 5 minutes before serving. This allows the juices to redistribute throughout the meat.

Transfer the drumsticks to a serving platter and garnish with additional chopped parsley if desired. Serve warm with your favorite side dishes.

2. Tips for Perfect Baked Chicken Drumsticks with Garlic and Herbs

Choose drumsticks that are similar in size so they cook evenly and finish at the same time.

For deeper flavor, prepare the marinade ahead of time and allow the chicken to sit in it for several hours before baking. This helps the seasonings distribute more evenly throughout the meat.

Place the drumsticks skin-side up on the baking sheet to encourage better browning and a more appealing appearance.

Avoid covering the chicken while it bakes. Leaving it uncovered helps the skin develop a golden, slightly crisp texture.

If excess liquid accumulates in the pan during cooking, carefully drain some of it away to help the chicken roast instead of steam.

Bake the chicken on the center oven rack for the most consistent heat distribution and even cooking.

Let the drumsticks rest for a few minutes after baking. This helps the juices settle and keeps the meat moist when served.

For extra color and flavor, sprinkle freshly chopped parsley and a light squeeze of lemon juice over the chicken just before serving.

3. Frequently Asked Questions

Can I use chicken thighs instead of drumsticks?

Yes. Chicken thighs work very well with the same marinade. Cooking times may vary slightly depending on their size and whether they are bone-in or boneless.

Can I prepare this recipe ahead of time?

Yes. You can marinate the chicken up to 24 hours in advance and keep it refrigerated until ready to bake.

What side dishes pair well with baked chicken drumsticks?

These drumsticks pair well with roasted vegetables, mashed potatoes, rice, pasta, salad, steamed vegetables, or dinner rolls.

Can I make this recipe in an air fryer?

Yes. Arrange the drumsticks in a single layer and cook according to your air fryer’s recommendations until they reach a safe internal temperature.

How do I store leftovers?

Store leftover chicken in an airtight container in the refrigerator for up to 4 days. Reheat in the oven or microwave until heated through.

4. Nutrition Information

Nutrient Amount Per Serving
Calories 410
Protein 34g
Carbohydrates 2g
Fat 29g
Saturated Fat 6g
Cholesterol 155mg
Sodium 510mg
Fiber 0g
Sugar 1g
Calcium 30mg
Iron 2mg

Baked Chicken Drumsticks with Garlic and Herbs is an easy recipe that delivers a satisfying meal with very little effort. The simple preparation and versatile serving options make it a great choice for weeknight dinners, meal prep, and family gatherings throughout the year.

Keep this recipe handy whenever you need a dependable chicken dinner that’s easy to prepare and serve. Once you add it to your meal rotation, it’s likely to become a go-to favorite for busy evenings and casual family meals.

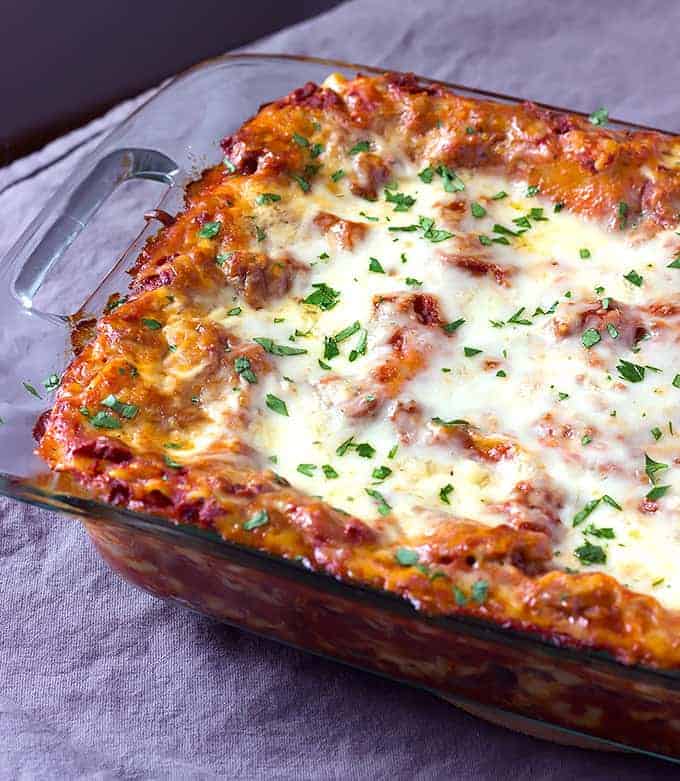
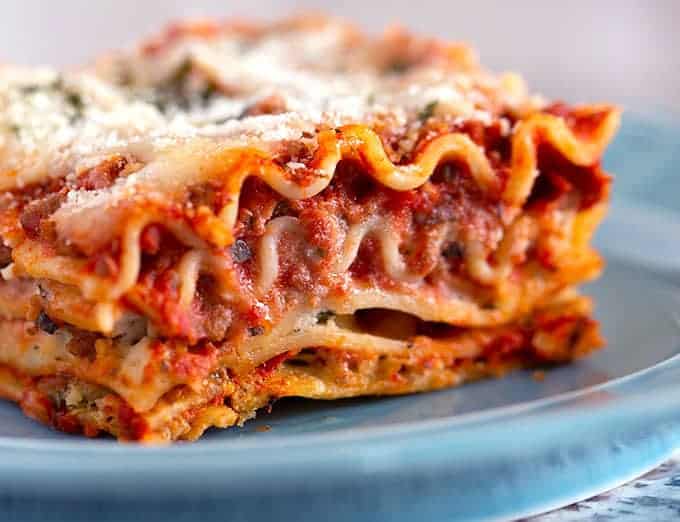
Classic lasagna is one of the most beloved comfort food dishes, bringing together layers of pasta, rich meat sauce, creamy cheese filling, and melted cheese in every slice. It’s a timeless recipe that’s perfect for family dinners, holiday gatherings, potlucks, and special occasions when you want to serve something hearty and satisfying.

This homemade version delivers everything people love about traditional lasagna while using simple ingredients and easy-to-follow steps. Make it ahead of time for busy days or serve it fresh from the oven for a meal that always feels special and welcoming around the table.

1. Classic Lasagna Recipe (Yield: 12 Servings)

Ingredients

  • 1 lb. ground beef
  • 1/2 lb. sweet Italian sausage
  • 1 medium onion, chopped
  • 2 garlic cloves, minced
  • 1 (15 oz.) can tomato sauce
  • 1 (15 oz.) can crushed tomatoes
  • 2 (6 oz.) cans tomato paste
  • 1/2 cup water
  • 2 tablespoons sugar
  • 3 teaspoons salt, divided
  • 3 teaspoons Italian seasoning, divided
  • 1 1/2 teaspoons dried basil leaves, divided
  • 1/4 teaspoon ground black pepper
  • 1/4 cup minced fresh flat-leaf parsley, divided
  • 2 cups shredded mozzarella cheese, divided
  • 15 oz. (1 ¾ cups) whole milk ricotta cheese
  • 1/2 cup grated parmesan cheese, divided
  • 1 large egg
  • 12 lasagna noodles

Instructions

Preheat the oven to 375°F (190°C). Lightly grease a 9×13-inch baking dish and set it aside.

In a large Dutch oven or heavy-bottomed pot, cook the ground beef, Italian sausage, and chopped onion over medium heat until the meat is browned and fully cooked. Break the meat into small pieces as it cooks. Drain excess grease if necessary.

Add the minced garlic and cook for about one minute until fragrant. Stir in the tomato sauce, crushed tomatoes, tomato paste, and water. Add the sugar, 2 teaspoons of salt, 2 teaspoons of Italian seasoning, 1 teaspoon of dried basil, black pepper, and 2 tablespoons of fresh parsley.

Mix everything thoroughly and bring the sauce to a gentle simmer. Reduce the heat to low and allow the sauce to cook uncovered for 30 to 40 minutes, stirring occasionally. The sauce should thicken and develop a rich flavor.

While the sauce simmers, bring a large pot of salted water to a boil. Cook the lasagna noodles according to package directions until al dente. Drain and rinse with cool water to prevent sticking. Lay the noodles flat on a baking sheet or parchment paper while preparing the cheese mixture.

In a medium mixing bowl, combine the ricotta cheese, egg, remaining 1 teaspoon salt, remaining 1 teaspoon Italian seasoning, remaining 1/2 teaspoon basil, remaining parsley, 1/4 cup parmesan cheese, and 1 cup mozzarella cheese. Stir until well blended.

Spread about 1 cup of meat sauce across the bottom of the prepared baking dish. Arrange 4 lasagna noodles over the sauce, slightly overlapping if needed.

Spread one-third of the ricotta mixture evenly over the noodles. Spoon about one-third of the remaining meat sauce over the cheese layer.

Repeat the layers two more times, creating a total of three layers of noodles, ricotta mixture, and meat sauce.

For the final layer, top with the remaining meat sauce. Sprinkle the remaining 1 cup mozzarella cheese and remaining 1/4 cup parmesan cheese evenly over the top.

Cover the baking dish loosely with aluminum foil, making sure the foil does not touch the cheese.

Bake for 25 minutes covered. Remove the foil and continue baking for an additional 25 minutes, or until the cheese is melted, bubbly, and lightly golden.

Remove the lasagna from the oven and allow it to rest for at least 15 to 20 minutes before slicing. This helps the layers set and makes serving easier.

Slice into 12 portions and serve warm.

2. Tips for Perfect Classic Lasagna

Use freshly shredded mozzarella cheese whenever possible. It melts more smoothly than pre-shredded cheese and helps create a better texture throughout the lasagna.

Allow the sauce to cool slightly before assembling the layers. This makes the lasagna easier to build and helps prevent the cheese mixture from becoming too loose.

Spread each layer evenly from edge to edge. Consistent layers help the lasagna bake evenly and ensure every slice contains a balanced amount of sauce, cheese, and pasta.

Avoid overfilling the baking dish. Leaving a little space at the top helps prevent bubbling sauce and cheese from spilling over during baking.

Place the baking dish on a rimmed baking sheet before putting it in the oven. This makes cleanup easier if any sauce bubbles over the sides.

For cleaner slices, use a sharp knife and wipe it clean between cuts. This simple step helps maintain the distinct layers when serving.

If the top begins browning too quickly, loosely tent the dish with foil for the remaining baking time.

Leftover lasagna often tastes even better the next day, making it an excellent recipe for meal prep and make-ahead meals.

3. Frequently Asked Questions

Can I freeze classic lasagna?

Yes. Lasagna freezes very well both before and after baking. Wrap it tightly and freeze for up to three months. Thaw overnight in the refrigerator before reheating or baking.

Can I use oven-ready lasagna noodles?

Yes. Oven-ready noodles can be substituted for traditional noodles. Make sure the sauce contains enough moisture to soften the noodles during baking.

What side dishes go well with lasagna?

Classic lasagna pairs beautifully with garlic bread, Caesar salad, roasted vegetables, green salad, or steamed vegetables.

How do I reheat leftover lasagna?

Cover individual portions with foil and reheat in a 350°F oven until warmed through. You can also microwave smaller portions for convenience.

Can I substitute cottage cheese for ricotta cheese?

Yes. Cottage cheese is a common substitute and provides a similar texture. Drain excess liquid before using it in the recipe.

4. Nutrition Information

Nutrient Amount Per Serving
Calories 460
Protein 29g
Carbohydrates 29g
Fat 25g
Saturated Fat 11g
Cholesterol 95mg
Sodium 980mg
Fiber 3g
Sugar 7g
Calcium 320mg
Iron 3mg

Classic Lasagna is a timeless recipe that brings comfort and tradition to the dinner table. With its hearty layers and make-ahead convenience, it’s a dependable choice for family meals, celebrations, and gatherings of all sizes.

Keep this recipe handy whenever you need a dish that’s both impressive and easy to share. Once you make this homemade classic, it’s likely to become a regular part of your recipe collection for years to come.

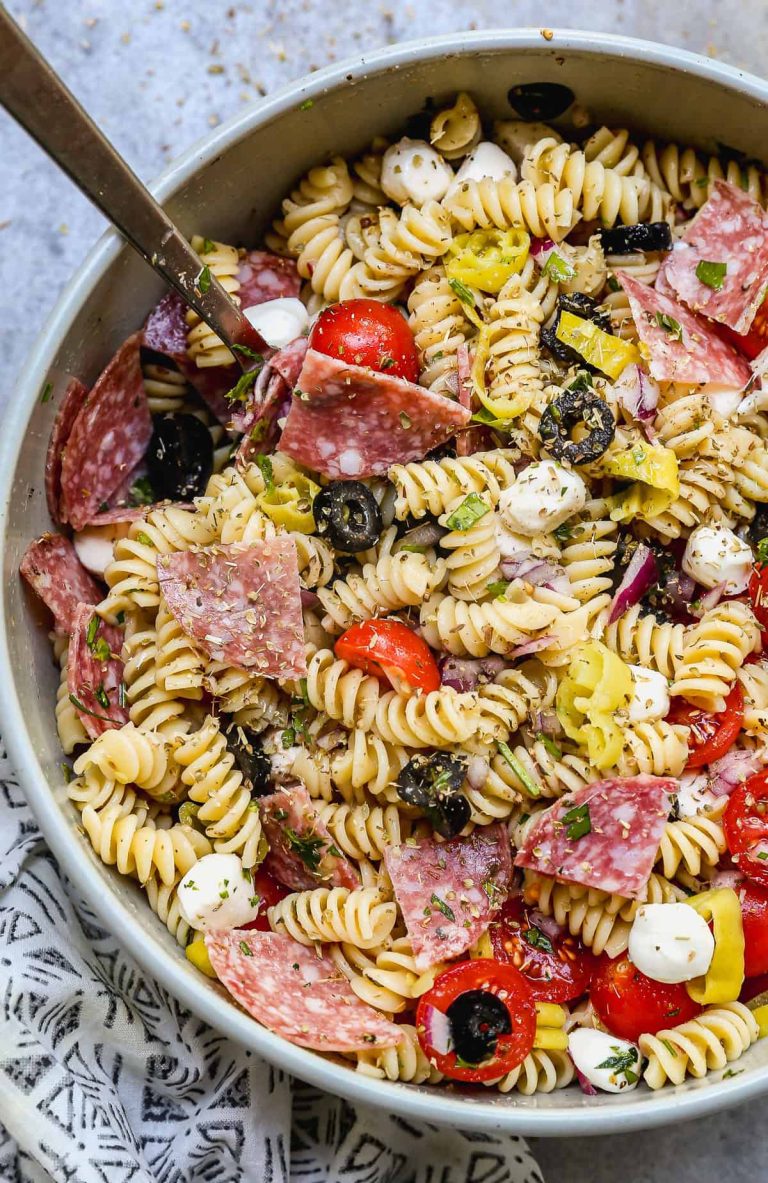
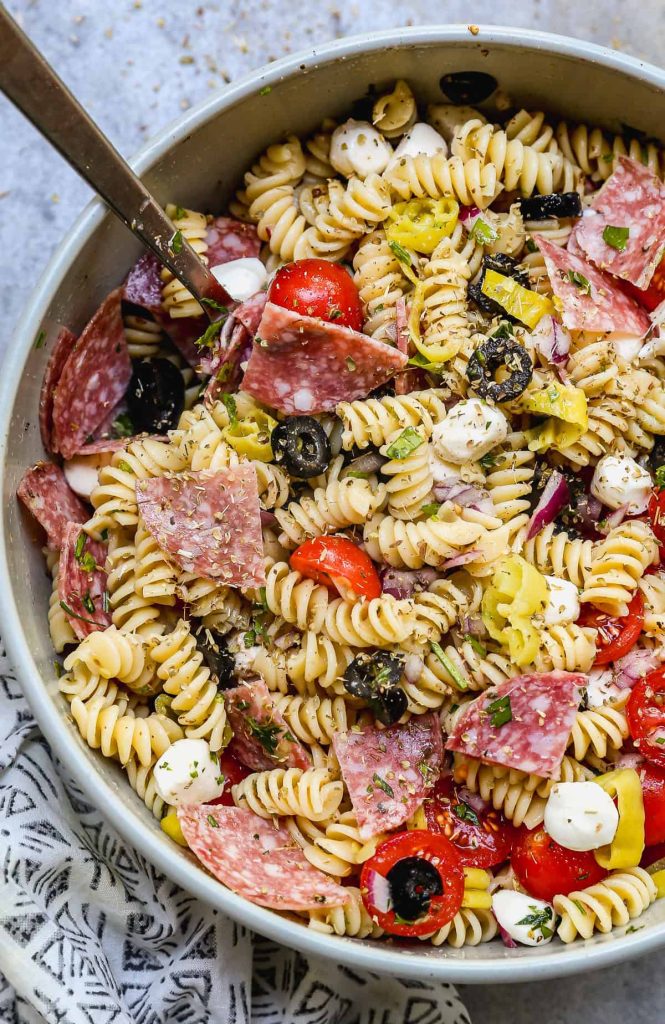
Italian Pasta Salad is a classic side dish that fits almost any occasion, from backyard barbecues and family dinners to potlucks and holiday gatherings. It’s easy to prepare, simple to customize, and can be made ahead of time, making it a favorite recipe for both busy weeknights and special events.

This recipe combines everyday ingredients into a colorful and satisfying dish that’s perfect for sharing. With a homemade Italian dressing and plenty of texture in every bite, this Italian Pasta Salad is a dependable recipe you’ll want to keep on hand for gatherings, meal prep, and simple family meals throughout the year.

1. Italian Pasta Salad Recipe ( Yield: 8 Servings )

Ingredients

For the Pasta Salad

  • 1 pound rotini pasta, uncooked
  • 8 ounces fresh mozzarella cheese pearls (or chopped into pieces if you can’t find pearls)
  • 8 ounces salami, pepperoni, or beef summer sausage
  • 6 ounces black olives, pitted and sliced
  • 1/2 red onion, diced
  • 1 1/2 cups cherry tomatoes (224g), halved
  • 2 tablespoons fresh parsley, chopped
  • 1/2 cup freshly grated parmesan cheese (50g)
  • Pepperoncinis, sliced (optional)

For the Italian Salad Dressing

  • 3/4 cup olive oil (150g)
  • 1/4 cup red wine vinegar (58g)
  • 2 teaspoons dried parsley flakes
  • 2 teaspoons dried minced onion
  • 2 teaspoons fresh lemon juice
  • 1 teaspoon dried basil
  • 1 teaspoon dried oregano
  • 1 teaspoon garlic salt
  • 1 teaspoon granulated sugar
  • 1/4 teaspoon freshly ground black pepper

Instructions

Bring a large pot of generously salted water to a rolling boil. Add the rotini pasta and cook according to the package directions until al dente. The pasta should be tender but still have a slight bite, as overcooked pasta can become mushy when mixed with the dressing.

Drain the pasta in a colander and immediately rinse it under cold running water. This stops the cooking process and cools the pasta quickly. Allow the pasta to drain thoroughly before transferring it to a large mixing bowl.

While the pasta cools, prepare the dressing. In a medium bowl or a jar with a tight-fitting lid, combine the olive oil, red wine vinegar, dried parsley flakes, dried minced onion, lemon juice, dried basil, oregano, garlic salt, sugar, and black pepper. Whisk thoroughly or shake the jar vigorously until the dressing is well combined and slightly emulsified.

Prepare the remaining ingredients. Slice the salami, pepperoni, or beef summer sausage into bite-sized pieces. Halve the cherry tomatoes, dice the red onion, slice the black olives, and chop the fresh parsley. If using larger mozzarella balls, cut them into bite-sized pieces.

Add the cooled pasta to a large serving bowl. Stir in the mozzarella pearls, sliced meat, black olives, red onion, cherry tomatoes, parsley, parmesan cheese, and pepperoncinis if desired.

Pour about three-quarters of the dressing over the salad and gently toss until all ingredients are evenly coated. Reserve the remaining dressing for later if needed.

Cover the bowl tightly with plastic wrap or a lid and refrigerate for at least one hour. Chilling allows the flavors to blend together and improves the overall taste of the salad.

Before serving, toss the salad again and add the remaining dressing if the pasta has absorbed too much moisture during chilling. Taste and adjust seasoning if necessary.

Serve chilled and garnish with additional parmesan cheese and fresh parsley if desired.

2. Tips for Perfect Italian Pasta Salad

Always cook the pasta just until al dente. Slightly firm pasta holds its shape better and absorbs the dressing without becoming soft.

Rinse the cooked pasta with cold water immediately after draining. This cools the pasta quickly and prevents it from continuing to cook.

Allow the pasta to drain completely before combining it with the other ingredients. Excess water can dilute the dressing and reduce flavor.

Make the salad several hours in advance when possible. The extra chilling time allows the dressing to penetrate the pasta and enhances the overall flavor.

Reserve a small portion of the dressing to add just before serving. Pasta naturally absorbs dressing while chilling, and a little extra dressing helps refresh the salad.

Cut all ingredients into similar bite-sized pieces to ensure every forkful contains a balanced combination of flavors and textures.

Use freshly grated parmesan cheese for the best flavor and texture. Pre-packaged grated cheese may not provide the same rich taste.

Store the salad in an airtight container to maintain freshness and prevent the ingredients from drying out.

3. Frequently Asked Questions

Can I make Italian pasta salad a day ahead?

Yes. In fact, many people prefer making it a day in advance because the flavors have more time to blend together. Store it covered in the refrigerator and stir before serving.

What other pasta shapes work well in this recipe?

Fusilli, penne, farfalle, cavatappi, and bowtie pasta are all excellent alternatives. Choose shapes that can hold onto the dressing and ingredients.

How long does Italian pasta salad last in the refrigerator?

When stored in an airtight container, it typically stays fresh for 3 to 4 days. Stir before serving and add a splash of dressing if needed.

Can I make this pasta salad vegetarian?

Absolutely. Simply omit the salami, pepperoni, or sausage and add extra vegetables such as cucumbers, bell peppers, artichoke hearts, or chickpeas.

What can I serve with Italian pasta salad?

This salad pairs wonderfully with grilled chicken, burgers, sandwiches, steak, seafood, or roasted vegetables. It also works well as a complete meal on its own.

4. Nutrition Information

Nutrient Amount Per Serving
Calories 610
Protein 22g
Carbohydrates 42g
Fat 39g
Saturated Fat 11g
Cholesterol 52mg
Sodium 1080mg
Fiber 3g
Sugar 4g
Calcium 260mg
Iron 2.5mg

Italian Pasta Salad is an easy make-ahead dish that’s perfect for everything from family dinners to large gatherings. With simple preparation and plenty of flexibility, it’s a recipe that fits seamlessly into any meal plan and works well for both special occasions and everyday meals.

Keep this recipe on hand whenever you need a reliable side dish that’s easy to prepare and serve. Once you try it, Italian Pasta Salad is likely to become a regular favorite for potlucks, picnics, barbecues, and family get-togethers throughout the year.

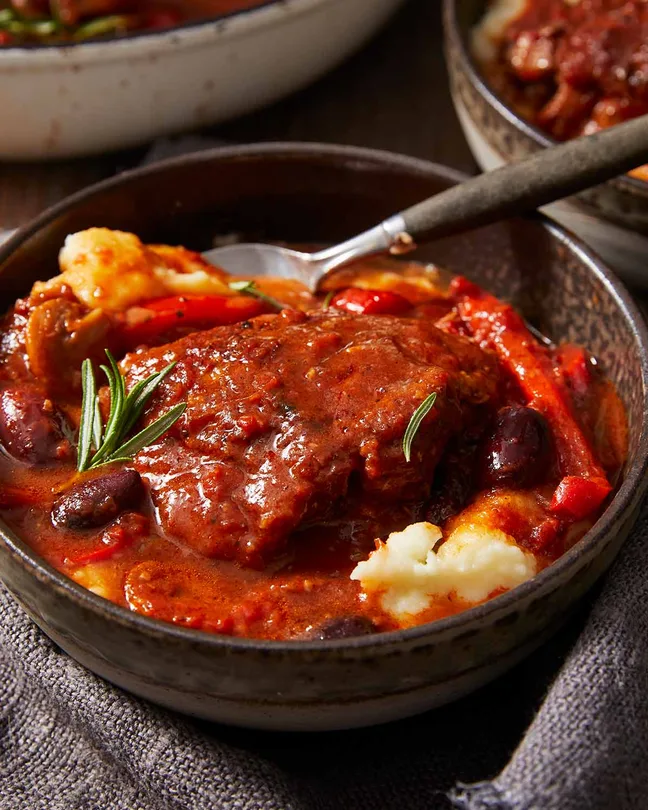
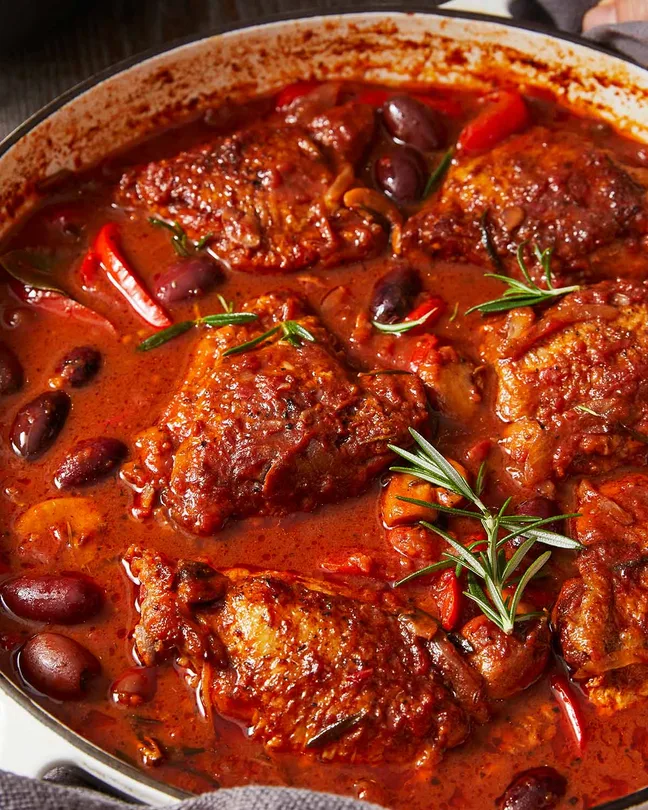
Easy Chicken Cacciatore is a classic Italian comfort food that transforms simple ingredients into a rich and satisfying meal. Tender chicken is slowly simmered in a flavorful tomato-based sauce filled with vegetables, herbs, and savory seasonings. The result is a hearty dish that feels cozy, comforting, and perfect for sharing around the dinner table.

One of the reasons Chicken Cacciatore has remained popular for generations is its ability to feed a crowd with minimal effort. Everything cooks together in one pot, allowing the flavors to develop beautifully while keeping preparation simple.

1. Chicken Cacciatore Recipe (Yield: 8 Servings)

Ingredients

Chicken

  • 4 large bone-in chicken thighs (about 1 kg / 2 lb)
  • 4 chicken drumsticks
  • 1/2 teaspoon cooking salt or kosher salt
  • 1/4 teaspoon black pepper
  • 1 tablespoon olive oil

Cacciatore

  • 1 onion, halved and finely sliced
  • 2 rosemary sprigs (about 15 cm / 6 inches long), or 1 teaspoon dried rosemary
  • 2 bay leaves
  • 3 garlic cloves, finely minced
  • 3 anchovy fillets, or 1 teaspoon anchovy paste
  • 250g (8 oz) mushrooms, sliced
  • 2 red capsicums, sliced about 8 mm thick
  • 1/3 cup tomato paste
  • 3/4 cup pinot noir or other dry red wine
  • 2 cups low-sodium chicken stock or broth
  • 400g (14 oz) canned crushed tomatoes
  • 16 whole Kalamata olives, pitted and drained
  • 1/4 teaspoon cooking salt or kosher salt
  • 1/4 teaspoon black pepper
  • 1 teaspoon dried oregano

Instructions

Pat the chicken thighs and drumsticks dry with paper towels. Season all sides with the salt and black pepper.

Heat the olive oil in a large Dutch oven or heavy-bottomed pot over medium-high heat. Add the chicken pieces skin-side down and cook for about 4 to 5 minutes until golden brown. Turn the chicken and cook for another 3 minutes. The chicken does not need to be fully cooked at this stage. Transfer it to a plate and set aside.

Reduce the heat to medium. Add the sliced onion to the same pot and cook for 4 to 5 minutes, stirring occasionally, until softened. Add the rosemary, bay leaves, garlic, and anchovy fillets. Stir for about 1 minute, allowing the anchovies to dissolve into the mixture and create a rich savory base.

Add the mushrooms and cook for 5 minutes until they begin to soften and release their moisture. Stir in the sliced red capsicums and continue cooking for another 3 to 4 minutes.

Add the tomato paste and stir continuously for 2 minutes. Cooking the tomato paste helps deepen its flavor and creates a richer sauce.

Pour in the red wine and scrape the bottom of the pot to loosen any browned bits. Allow the wine to simmer for 2 to 3 minutes until slightly reduced.

Stir in the chicken stock, crushed tomatoes, Kalamata olives, salt, black pepper, and dried oregano. Mix well until everything is fully combined.

Return the browned chicken pieces to the pot, nestling them into the sauce. Spoon some sauce over the chicken.

Bring the mixture to a gentle simmer. Reduce the heat to low, partially cover the pot, and cook for 45 to 50 minutes. During this time, the chicken will become tender and the sauce will thicken while developing rich flavor.

Remove the lid during the last 10 minutes of cooking if you prefer a thicker sauce.

Discard the rosemary stems and bay leaves before serving.

Serve the Chicken Cacciatore hot with pasta, mashed potatoes, polenta, rice, or crusty bread. Garnish with fresh parsley or grated parmesan cheese if desired.

2. Tips for Perfect Chicken Cacciatore

Brown the chicken before simmering to develop deeper flavor and create a richer sauce.

Use bone-in chicken pieces whenever possible. The bones add extra flavor and help keep the meat tender during cooking.

Allow the sauce to simmer gently rather than boil rapidly. Slow cooking helps the chicken stay juicy and allows the flavors to blend together.

Choose a dry red wine instead of a sweet variety for the most balanced flavor.

Slice the vegetables evenly so they cook at the same rate and create a consistent texture throughout the dish.

If the sauce becomes too thick, add a splash of chicken broth. If it’s too thin, simmer uncovered for a few extra minutes.

Taste the sauce before serving and adjust the seasoning if needed.

3. Frequently Asked Questions

What does Chicken Cacciatore mean?

“Cacciatore” translates to “hunter-style” in Italian. It refers to a rustic cooking method that combines meat with vegetables, herbs, and a flavorful sauce.

Can I make Chicken Cacciatore ahead of time?

Yes. In fact, many people find that the flavors become even better after resting overnight in the refrigerator. Simply reheat gently before serving.

Can I use boneless chicken instead?

Yes. Boneless chicken thighs work especially well. Keep in mind that boneless chicken may cook more quickly than bone-in pieces.

What side dishes go well with Chicken Cacciatore?

Popular options include pasta, polenta, mashed potatoes, rice, roasted vegetables, and crusty Italian bread.

Can I freeze leftovers?

Absolutely. Allow the dish to cool completely before storing it in freezer-safe containers. It can be frozen for up to 3 months.

4. Nutrition Information

Nutrition values are estimates and may vary depending on the ingredients used.

Nutrient Amount Per Serving
Calories 425
Protein 34g
Carbohydrates 15g
Fat 24g
Saturated Fat 6g
Cholesterol 145mg
Sodium 760mg
Fiber 4g
Sugar 7g

Easy Chicken Cacciatore is a delicious one-pot meal that combines tender chicken with a rich, savory tomato sauce and classic Italian-inspired flavors. It’s simple enough for a weeknight dinner yet impressive enough for guests and special gatherings. With its hearty texture, comforting flavor, and easy preparation, this recipe is one you’ll want to make again and again.